Workflow#
This part of the class explains what workflow applications are, why they are useful, and how you can build them using Plone without needing to write any code.
What Is Workflow?#
Workflow helps you track and control the state of a piece of Plone content, e.g., whether it is private or published.
For example, when you first create a Plone page, it starts off in the “Private” state: only you and someone with Manager role can view it. Once you have finished editing the page, you submit it for review: your page is now in the “Pending Review” state. Only someone with Reviewer role can approve the page for publication. If they do approve the page for publication, it is in the “Published” state: it is visible to everyone, including those visiting the site who aren’t logged in.
In Plone, a workflow definition includes the following:
its states, e.g. “Private”, “Pending review”, “Published”
the security settings for each state, e.g. which roles or groups can view or edit a content item in that particular state
the transitions between states, e.g. “submit” (from “Private” to “Pending review” state), “publish” (from “Pending review” to “Published” state)
the security settings for each transition, e.g. which roles or groups are allowed to initiate that particular transition
The DCWorkflow tool, which ships with Plone, is what makes this possible. The fact that DCWorkflow is a core component of Plone is one of the things that differentiates Plone from other content management systems, in which workflow is either not available or is an afterthought.
Workflow protects Plone site content from unauthorized viewing and editing, and lets you share those rights with others, via the Sharing tab.
Plone Comes With Several Workflows#
Each Plone site includes several workflows out of the box:
Simple Publication Workflow
Single State Workflow
Comment Review Workflow
Community Workflow for Folders
Intranet Workflow for Folders
Intranet/Extranet Workflow
Single State Workflow
Community Workflow
Plone lets you assign a different workflow to each content type.
(Plone also lets you assign no workflow to a content type; in Plone 5, for example, File and Image content types are not assigned a workflow, so File and Image items take their state from their containing folder.)
Plone lets you create workflow policies that define which workflow should be assigned to a given folder and its contents.
You Can Add and Customize Workflows#
Plone lets you edit workflows and add new ones to a site:
by installing an add-on that includes one or more new workflows
through the included Plone Management Interface
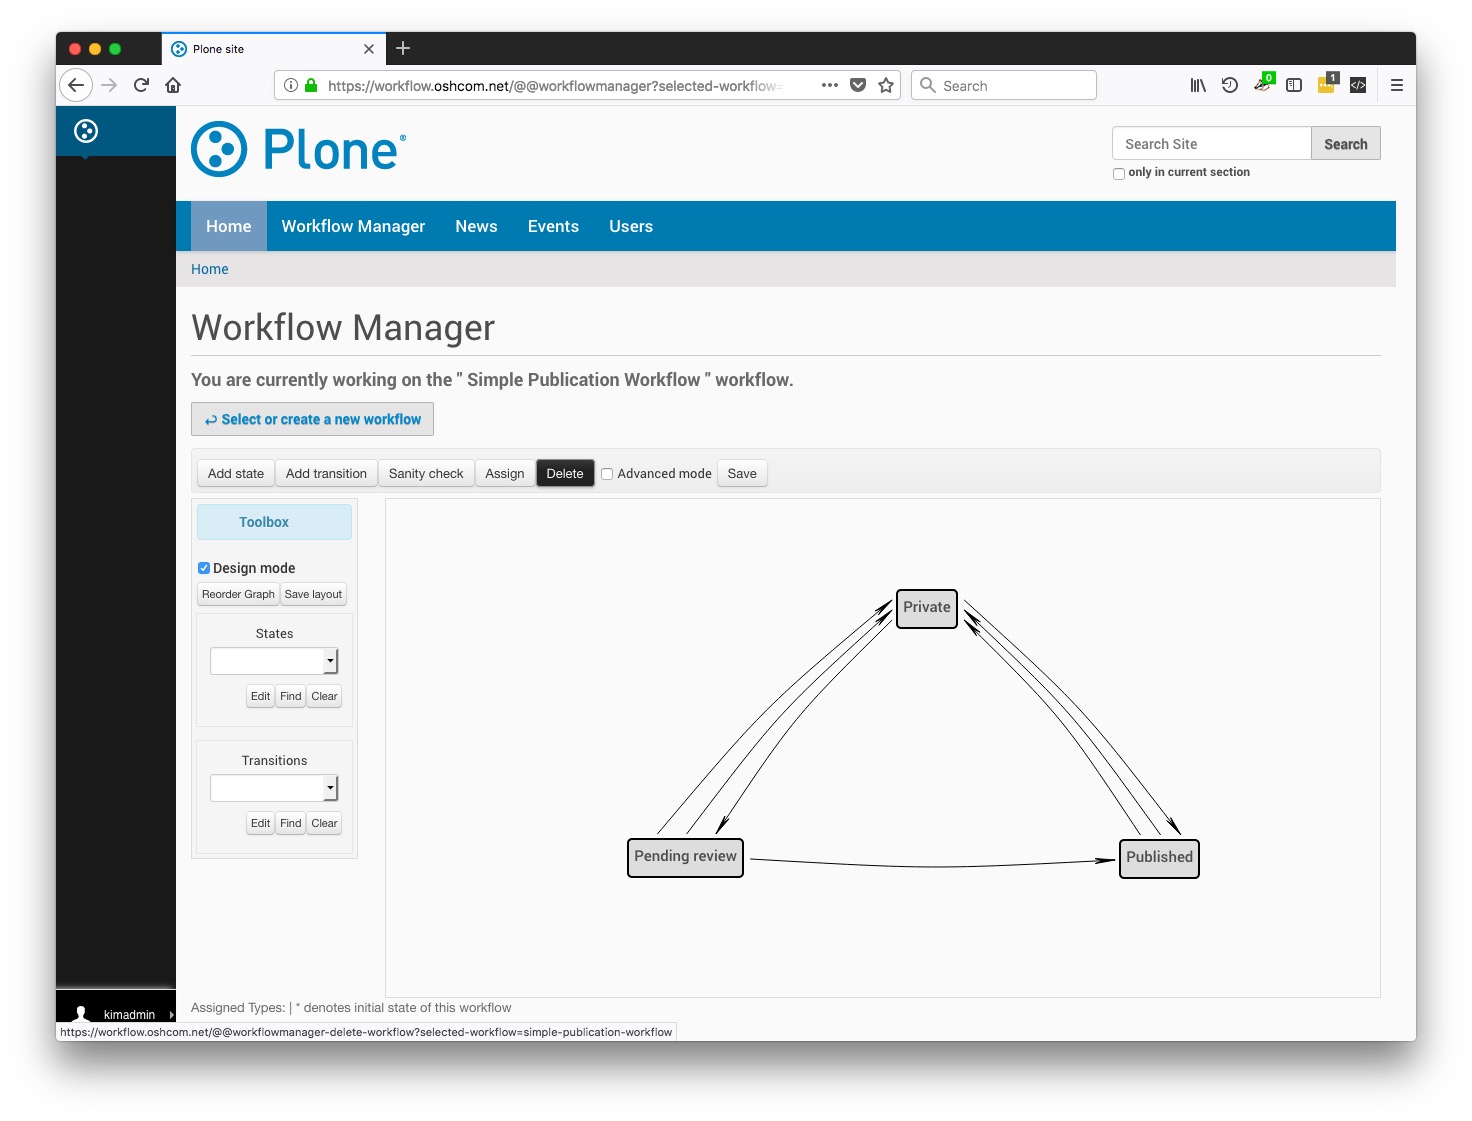
through the Workflow Manager (plone.app.workflowmanager) add-on
The Workflow Manager is a much better tool than the Management Interface for creating or editing complex workflows because it has a diagram-centric, visual user interface.
For this class, however, we will be creating a simple workflow and so we will use the Management Interface. We also believe it is important for a Plone power user or site administrator to know how to use Plone’s built-in tools, in case you need to debug a security/permission issue and you can’t install the Workflow Manager add-on.
Workflow Applies to Included and New Content Types#
As soon as you begin working with content in a Plone site, you are using its workflow capabilities.
Every content type in a Plone site is assigned a specific workflow or is assigned the site’s default workflow (the Simple Publication Workflow is the default default workflow for a Plone site):
Pages
Folders
News Items
Events
Collections
Files
Images
Links
But you can also have workflow apply to any new content types you add to your Plone site.
This means you can use Plone workflow to track anything that you can store in a Plone site, including the online equivalent of paper forms.
Especially in large organizations, the conversion of paper forms to Plone forms and content items can represent a tremendous increase in efficiency (time, accuracy, and retrievability).
Example Business Process: Home Renovation Permits#
Imagine a scenario in which a city government wants homeowners to obtain a permit before renovating their home, so that inspectors can verify later whether a permit was obtained for that work.
The Paper-Based Business Process#
Typically, the process would go like this:
The homeowner goes to city hall to get the paper permit
The homeowner fills out the permit
The homeowner returns the permit to city hall, with payment
Within city hall, once the permit has been received by the city, there is an internal process to be followed:
The permit must be verified (no missing required fields, everything filled out seems sensible
Payment must have been received
The permit is sent to one or more internal city departments for approval
If the permit is approved, the homeowner is sent a copy of the approval, usually by (physical) mail
For enforcement purposes, the homeowner must display a copy of the approved permit. A city inspector may ask to see the approved permit, to ensure that the renovations being done were the ones included in the approved permit.
The Online Business Process#
If all of the above steps could be performed electronically,
a homeowner could instantaneously obtain and quickly fill out an online renovation permit;
submitting the filled out permit could be done through a website without requiring any travel;
electronic payment could be confirmed and associated electronically with the submitted permit;
forwarding the permit for approvals within city hall could be done instantaneously;
no more permit approvals would get lost or unnecessarily delayed in transit;
phone calls from homeowners asking about the status of their permit would be eliminated;
inspectors needing to look up a permit could do so instantaneously.
What is a Workflow Application?#
A workflow application is what we call all the elements required to make an online business process:
a form, to be filled out by the user
content items, created by the form
workflow, applied to each content item
Additionally, these elements are nice to have:
a dashboard showing the state of all the content items (ie. have they been handled, are they done, what state is each one in?)
a way of searching for individual content items, via any of their form field values
a welcoming front page that directs users to the form, displays instructions, and provides useful links to the workflow application administrators and internal users (if any)
Why Use a Workflow Application?#
The authors of this training class have helped organizations convert paper-based forms and their handling into online workflow applications.
In one case, a single (albeit complex) workflow application has allowed a university department to save at least half a staff person’s time, not so much to reduce staffing but to allow an already overburdened staff to be reassigned to work that cannot be automated. Over a ten-year period, the cost savings represent hundreds of thousands of dollars and counting, not including intangible benefits such as:
clients have immediate access to forms at any time of day or night
clients are notified by email when their submitted form is being processed
clients can view their submitted forms and check their status at any time
no submitted forms are lost
no submitted forms are overlooked
submitted forms can be searched for electronically
staff working with submitted forms have always-updated status information and work lists
staff have immediate access to submitted data, anywhere, anytime
For the remainder of this class, we will show how you can create each of these elements with Plone and how you put them together to make a workflow application.
A Simple Workflow Application: Submitting Questions#
We will start by showing how to create a very simple workflow application: a form that a website visitor can fill out to ask a question.
Whenever the form is filled out, a “question” content item is created and is placed in the “unanswered” state.
The website administrator must answer the question (via email), then transition the question content item into the “answered” state.
At any time, there should be a way to see which questions have not yet been answered, and there should be a way to look up questions (by the submitter’s name, email address, and the text of their question).
Tools for Building Workflow Applications#
These are tools we can use to create each element of a workflow application:
the form to be filled out:
Dexterity (included with Plone), or
PloneFormGen, or
creating content items:
Dexterity (included with Plone), or
uwosh.pfg.d2c, or
creating the workflow:
the Management Interface, a low-level, legacy way of configuring Plone’s innards, or
Workflow Manager, a Plone add-on that provides a more intuitive, graphical way of creating, editing, and applying workflows
For this training class we will use Dexterity and the Management Interface.
Dexterity is the content type framework that replaces Archetypes. (By “content type framework” we mean the infrastructure that supports the creation and customization of content types, and the mechanism that lets Plone sites read those content types so users can create content items). Dexterity is not a genuine form builder tool, but it includes one.
PloneFormGen is the venerable form builder for Plone, but since it is built using the old, deprecated Archetypes framework, we have begun to shy away from recommending it for new sites. It works well with Plone 5, but its long term future is in doubt.
EasyForm is intended to be the new PloneFormGen. It has been around for a few years now, and, with the release of Plone 5 in 2015, began gaining momentum and wider support within the community. It does not yet have all the functionality of PloneFormGen, which is why many of us still use and (with caveats) recommend PloneFormGen, even on new sites.
The Workflow Manager is a Plone add-on that provides an intuitive graphical way of creating, editing, and applying a workflow. It is a must-have when dealing with workflows that have many states and transitions, but is not needed for working with simple workflows like the ones included with Plone. (Compare this to, for example, one custom workflow the author of this training class has been working on that contains 36 states and 56 transitions).
Use Dexterity to Build a Content Type and Form#
Your Plone site already includes Dexterity, and it is already activated.
You should be logged into your Plone site as an account with Manager role, e.g. “admin”.
Go to Site Setup
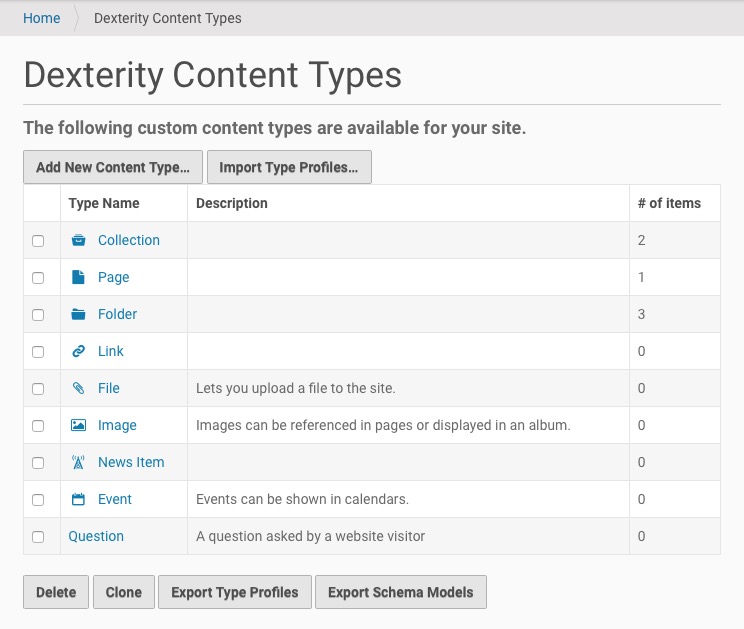
Go to the Dexterity Content Types control panel
Click the “Add New Content Type…” button
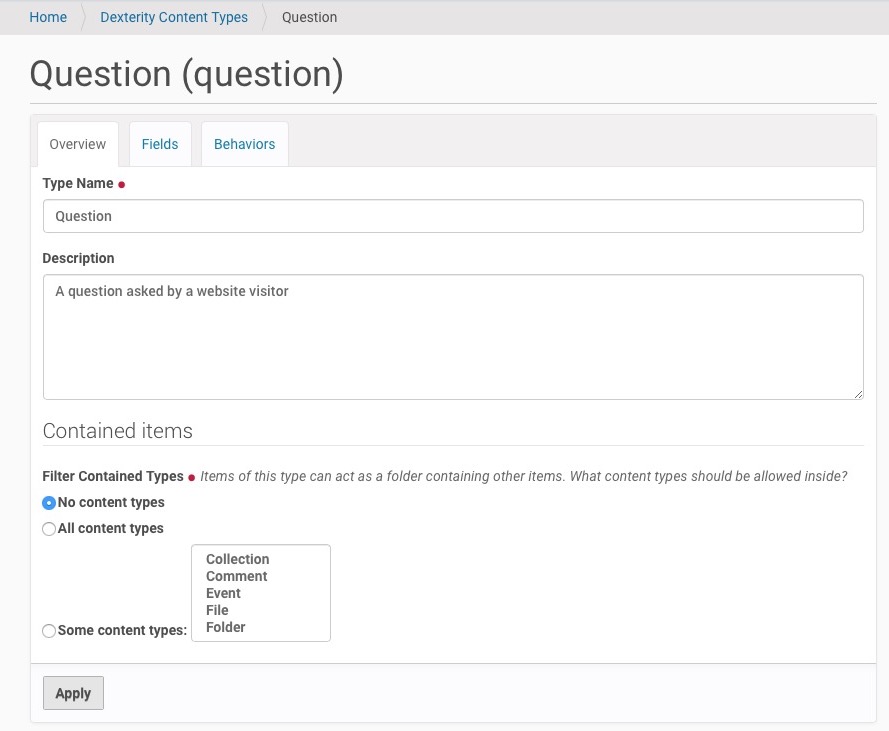
For “Type Name”, enter “Question”. Press Tab to move to the next field, “Short Name”. Allow the “Short Name” value to be set to “question”. Press Tab again to move to the “Description” field, and enter “A question asked by a website visitor”. Press the “Add” button.

You will be taken back to the Dexterity Content Types control panel. The new Question content type will have been added to the bottom of the list of content types. Click on it (on the blue “Question” link in the “Type Name” column).
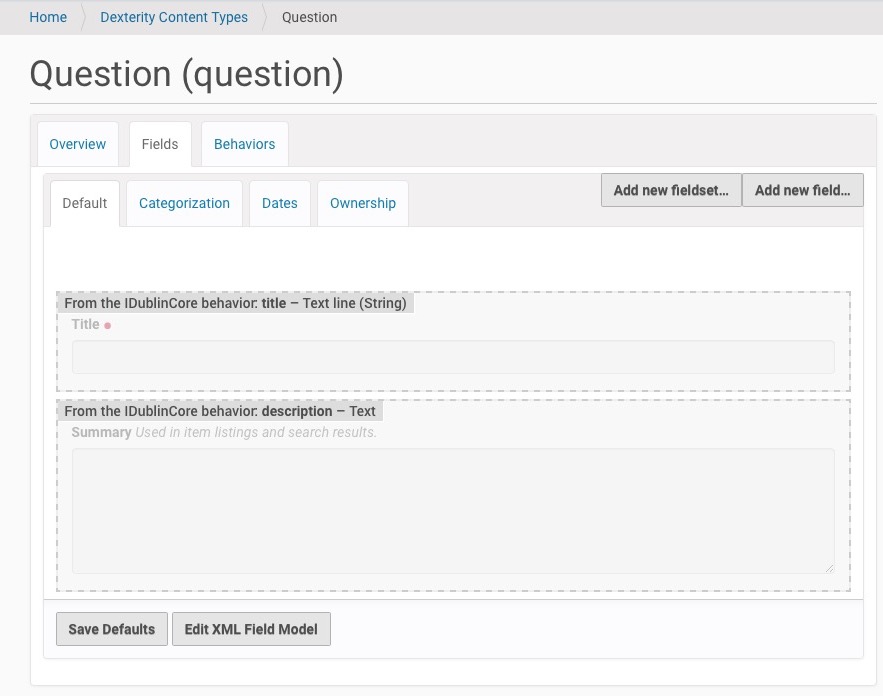
Click on the Fields tab to see the fields that this new content type contains. By default, new Dexterity content types have Title and Description fields.
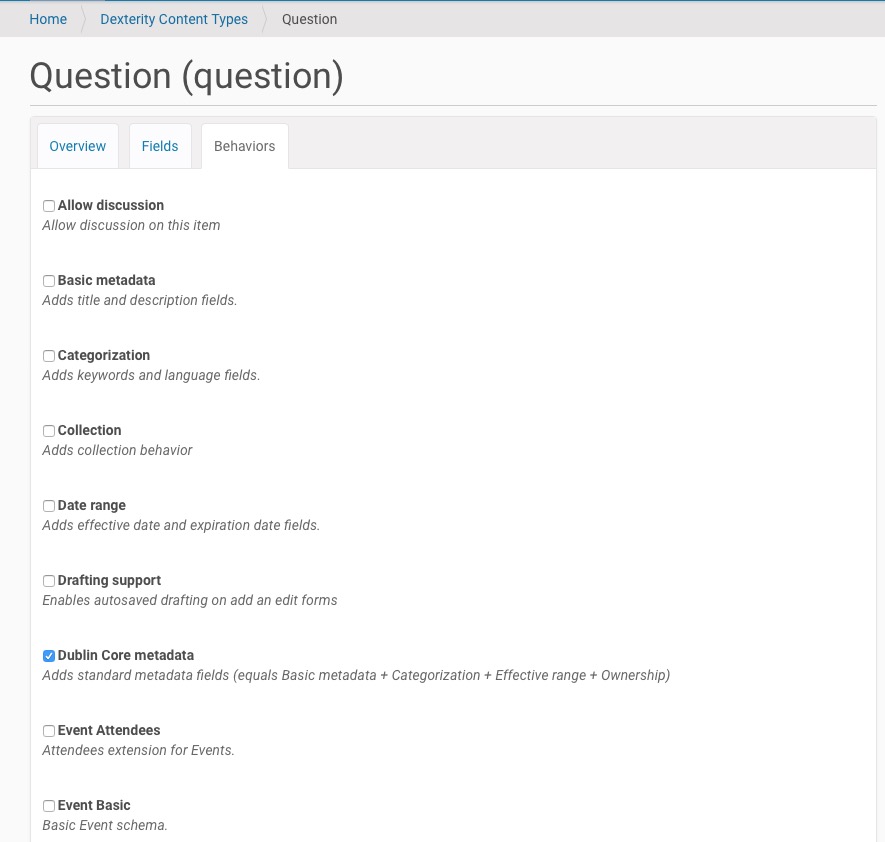
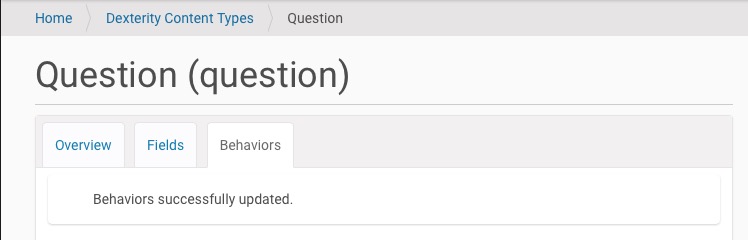
For this example, we don’t need them, so we will disable them by clicking on the Behaviors tab. Behaviors are essentially packaged sets of fields that work together. In this example we want to disable the “Dublin Core metadata” behavior, so that this content type no longer includes title and description fields. Uncheck the box next to “Dublin Core metadata” and click the “Save” button at the bottom of the page. You should see the message “Behaviors successfully updated”.
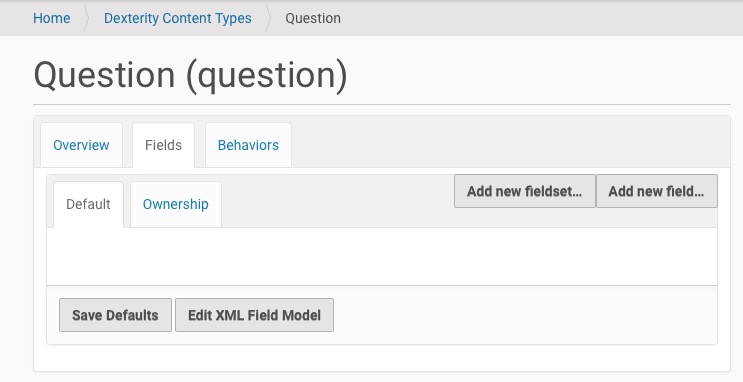
Click again on the Fields tab. There should be no fields shown for the content type
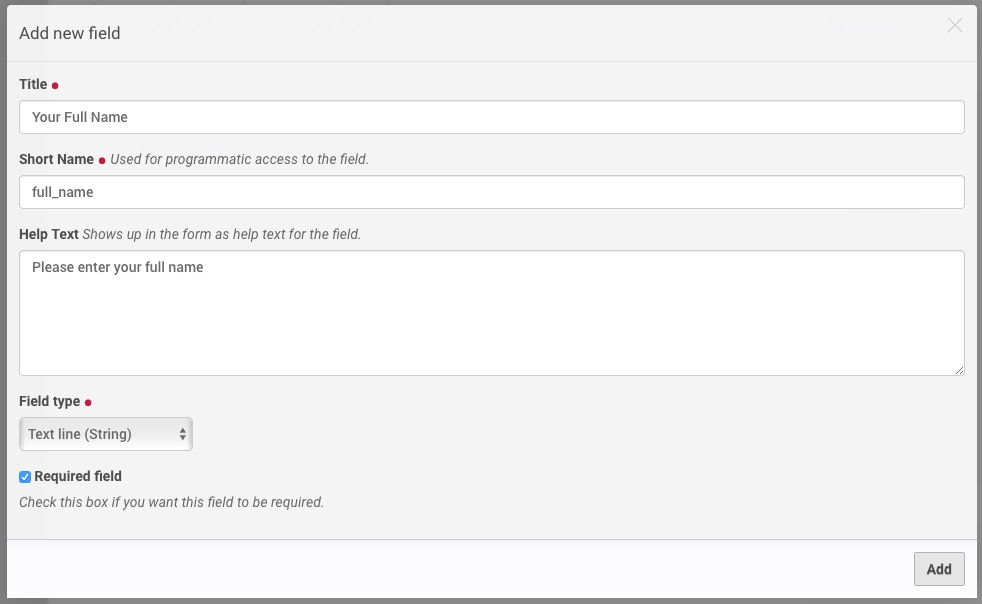
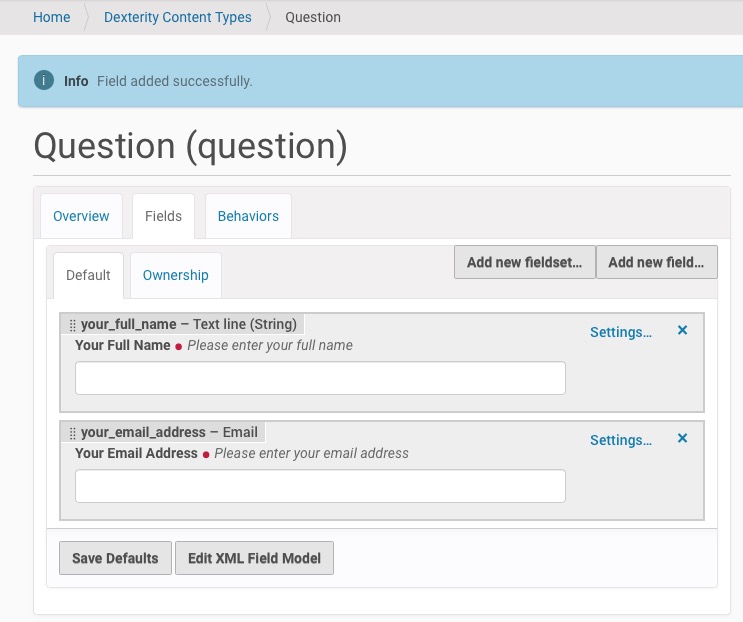
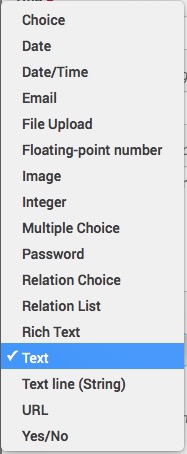
Click “Add new field...”, and in the dialog box fill in “Title” with “Your Full Name”, press the Tab key, leave the default “Short Name” value “your_full_name”, press the Tab key, enter for “Help Text” the value “Please enter your full name”. Leave the “Field type” default value of “Text line (String)”, check the box for “Required field”, press the “Add” button.
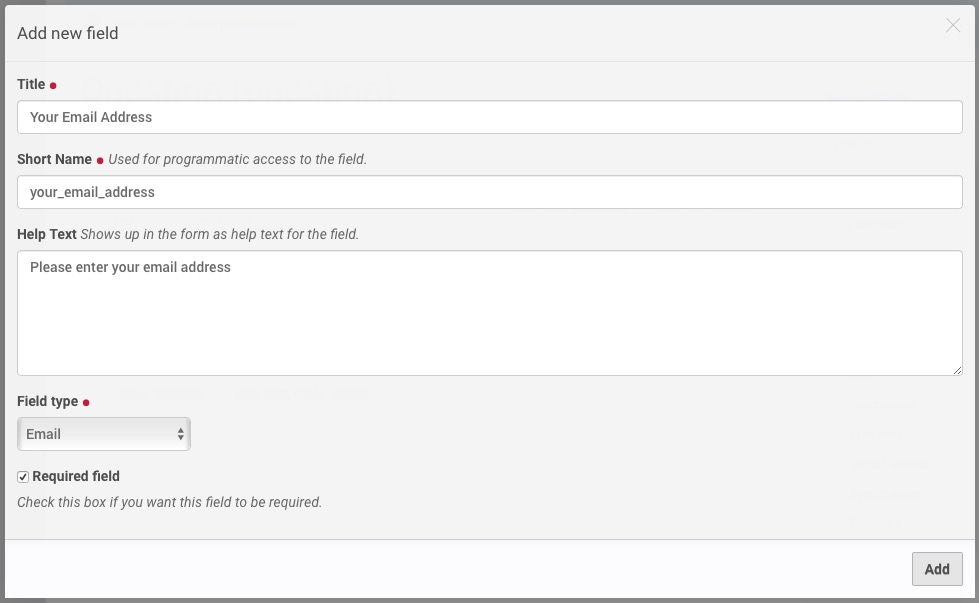
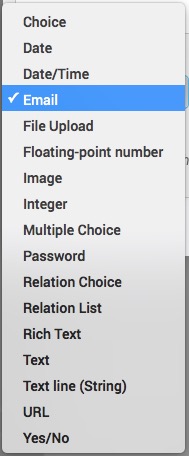
Click “Add new field...”, and in the dialog box give the new field the title “Your Email Address”, short name “your_email_address”, help text “Please enter your email address”, select “Email” for the field type, and make the field required. Press the “Add” button.
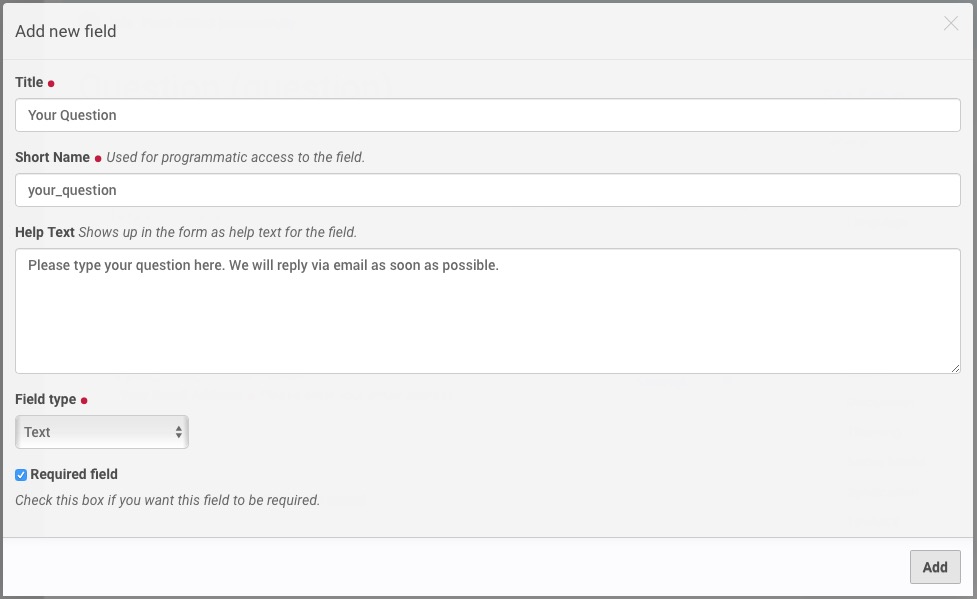
Click “Add new field...”, and in the dialog box give the new field the title “Your Question”, short name “your_question”, help text “Please type your question here. We will reply via email as soon as possible.”, field type “Text”, and make the field required. Press the “Add” button.
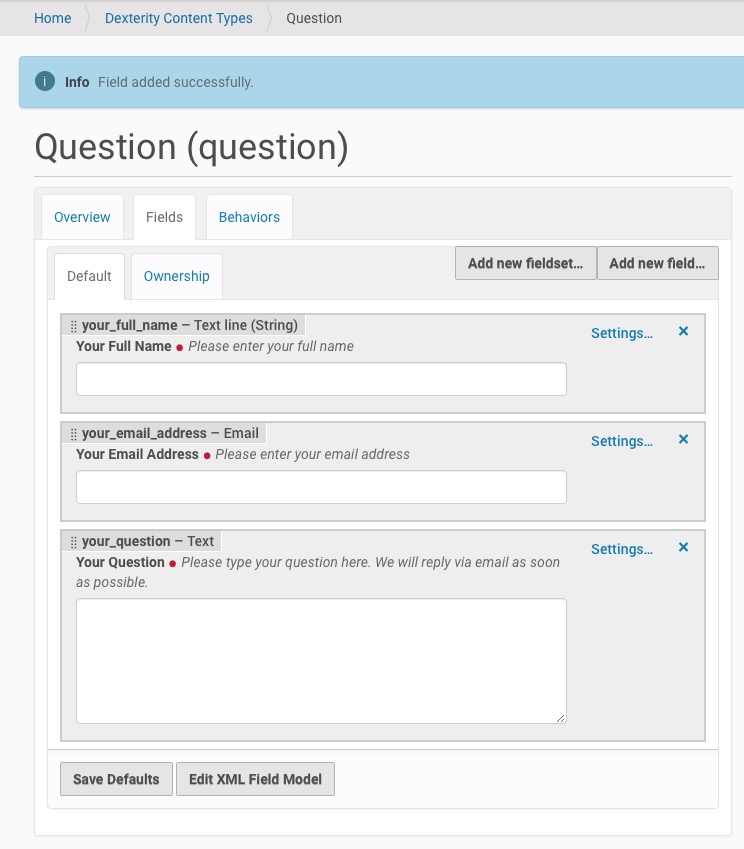
Congratulations, you have created the Question content type!
About the Dexterity XML Field Model#
If you click on the “Edit XML Field Model” button, you can see how Dexterity stores the definition of the Question content type in XML format:
<model xmlns:form="http://namespaces.plone.org/supermodel/form" xmlns:i18n="http://xml.zope.org/namespaces/i18n" xmlns:lingua="http://namespaces.plone.org/supermodel/lingua" xmlns:marshal="http://namespaces.plone.org/supermodel/marshal" xmlns:security="http://namespaces.plone.org/supermodel/security" xmlns:users="http://namespaces.plone.org/supermodel/users" xmlns="http://namespaces.plone.org/supermodel/schema">
  <schema>
    <field name="your_full_name" type="zope.schema.TextLine">
    <description>Please enter your full name</description>
    <title>Your Full Name</title>
    </field>
    <field name="your_email_address" type="plone.schema.email.Email">
    <description>Please enter your email address</description>
    <title>Your Email Address</title>
    </field>
    <field name="your_question" type="zope.schema.Text">
    <description>Please type your question here. We will reply via email as soon as possible.</description>
    <title>Your Question</title>
    </field>
  </schema>
</model>
Power user tip: it can be easier and faster to edit the XML model directly if you need to add fields for which you already have the XML snippet or if you want to reorder fields or otherwise edit any aspect of the field definitions. If you want to copy a content type from one site to another, copying the XML model is much faster than trying to rebuild the content type via the clickable user interface.
Viewing the Dexterity Form#
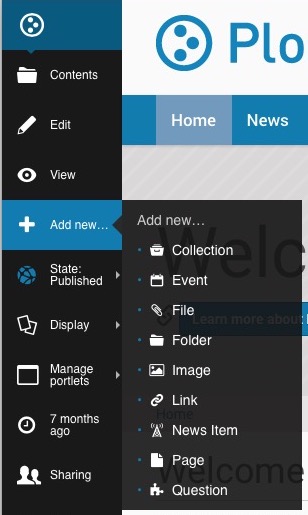
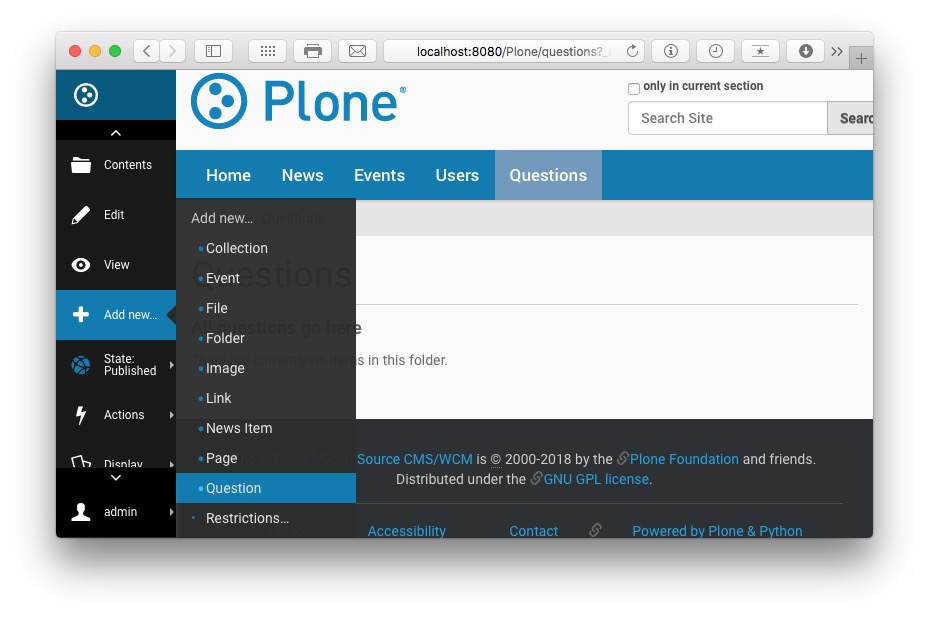
Now that you have created the Question content type, you view its “add form” (the form that lets you add a Question to your site) by navigating to any part of your site and clicking the “Add new…” menu item in the left toolbar.
Click on Home in the portal tabs

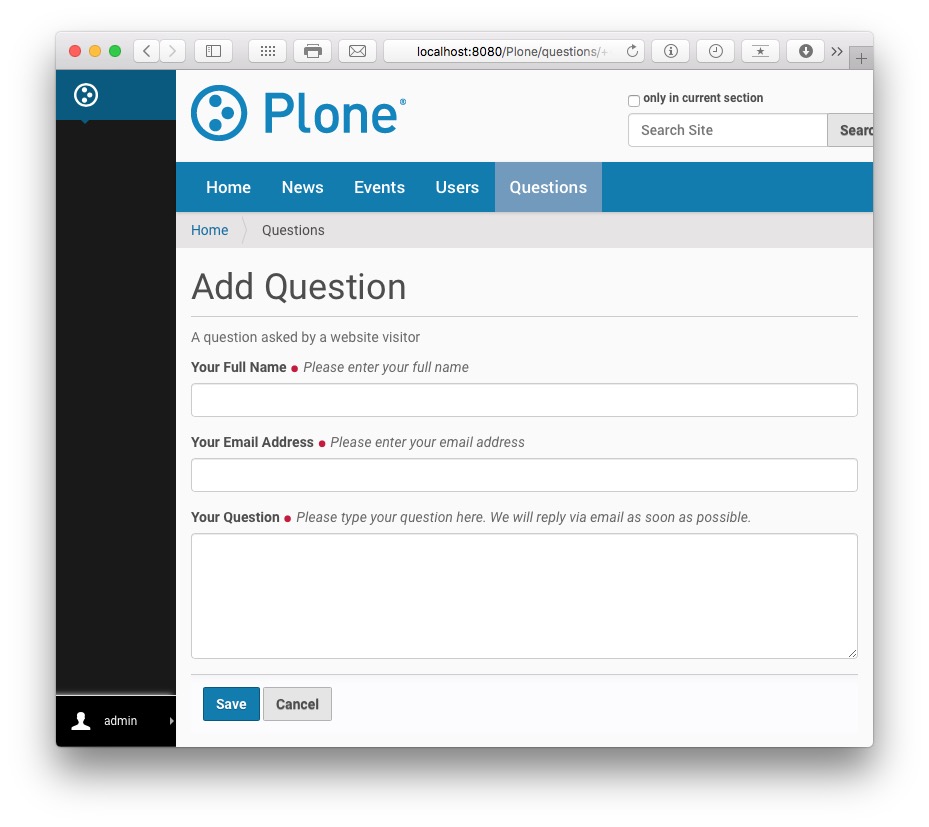
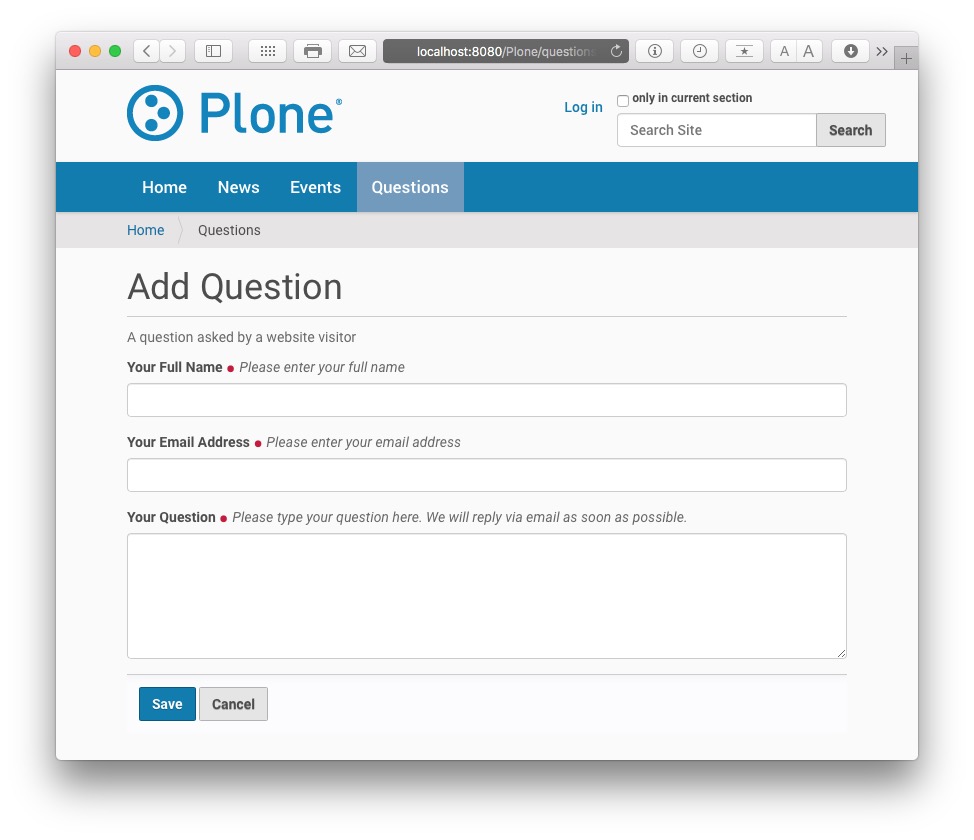
Click on “Add new…” in the toolbar. You will see the new “Question” content type at the bottom of the submenu. Click on it, and you will be shown the “Add Question” form:
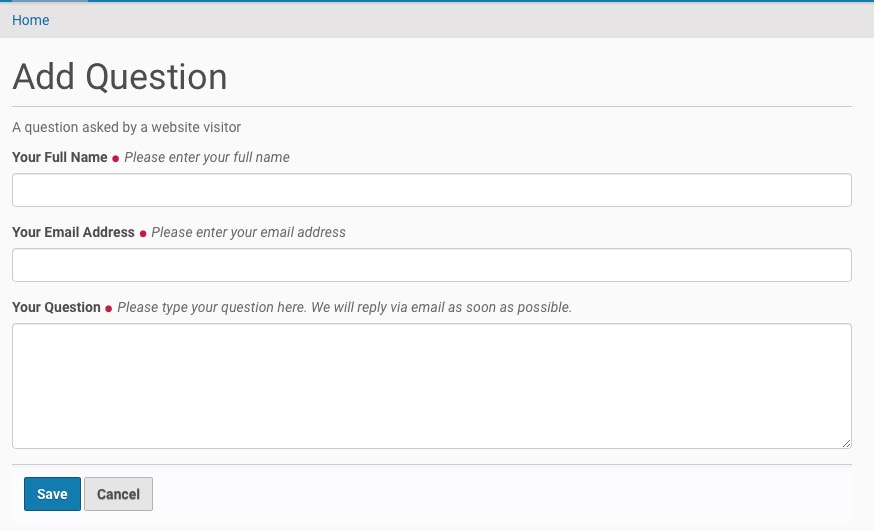
This “Add Question” form is what your website visitors will use. It is equivalent to the PloneFormGen and EasyForm forms described above in Section XXX.
Click the “Cancel” button to return to the front page of your site.
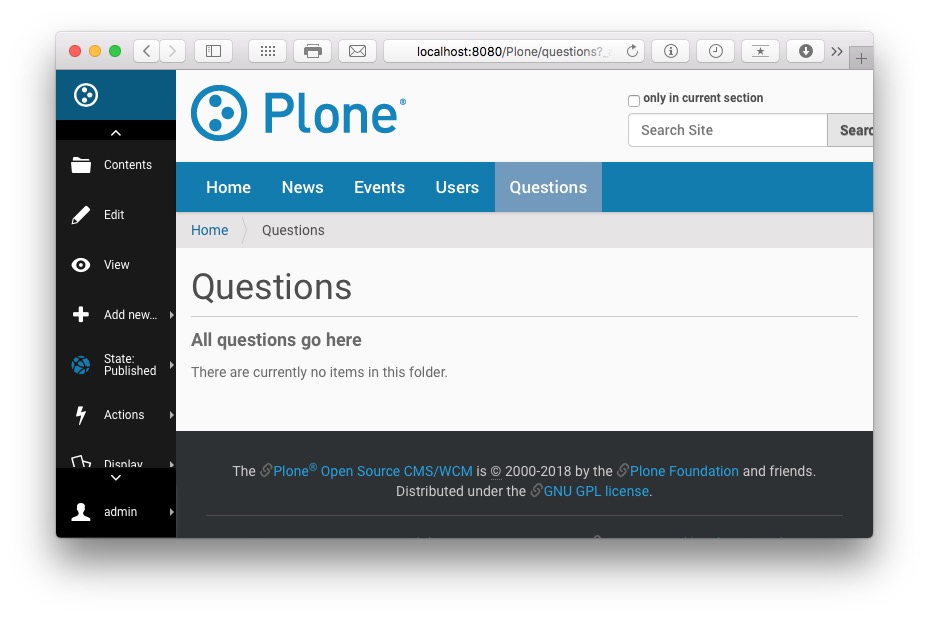
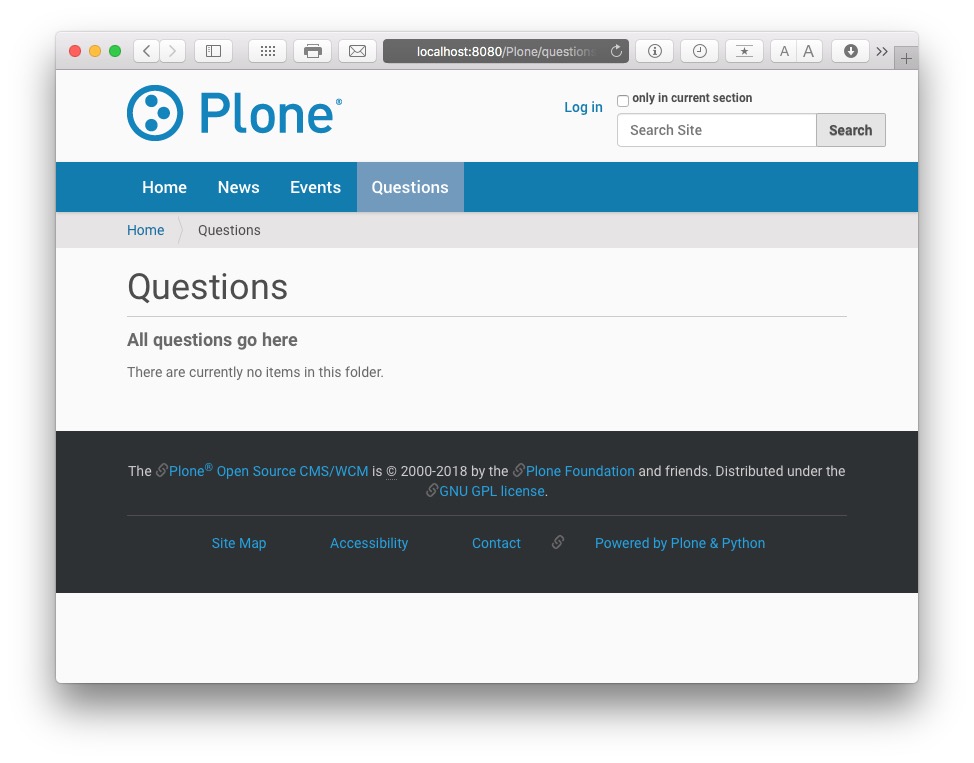
Create a Folder to Hold Filled Out Forms#
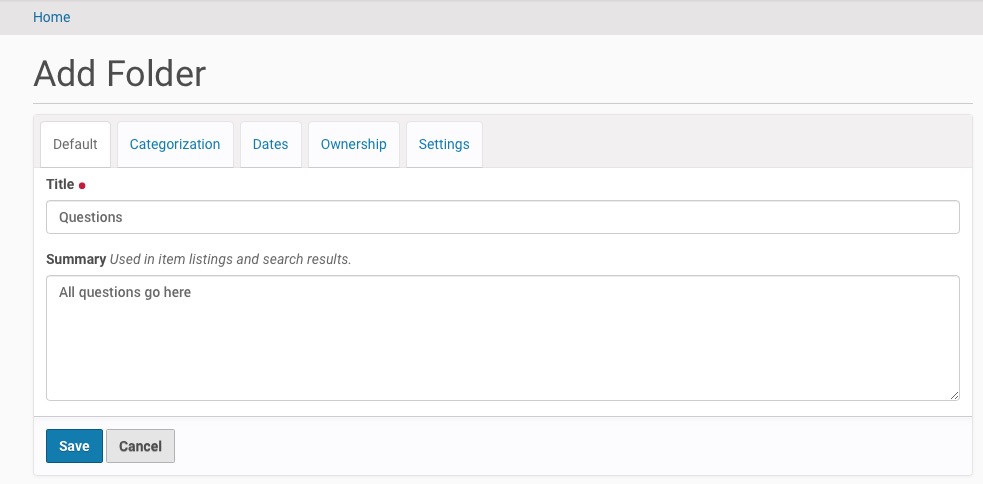
You will not want to clutter up the root (top) folder of your website. Instead, create a folder called “Questions” in which website visitors’ Question items will be created:
Click “Add new…” in the left toolbar
Choose “Folder”
For the title, enter “Questions”; for the summary, enter “All questions go here”. Press the “Save” button; your browser will be directed to the new Questions folder.
Grant Access to the Folder#
We need to give anonymous (not logged in) website visitors permission to add new Question items to this folder.
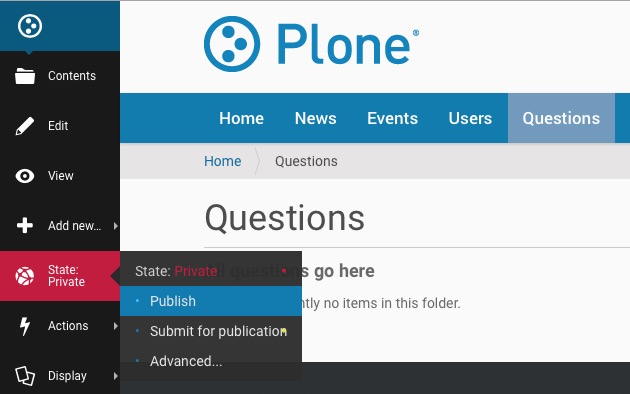
Publish the Questions folder by clicking the “State” toolbar button and choosing “Publish”.
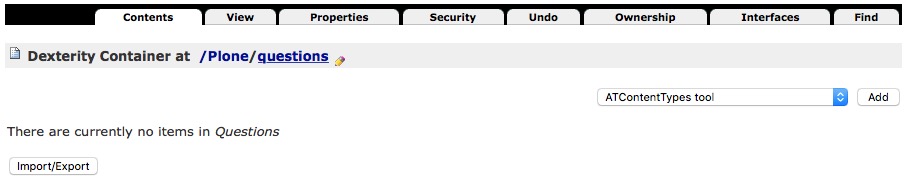
While viewing the newly published Questions folder, click on your browser’s URL (web address) bar and append “/manage_main” to the URL of the folder, e.g. “http://localhost:8080/Plone/questions/manage_main” then press the Return key to go to that URL. You will see the Management Interface view of the Questions folder.
Click on the “Security” tab.
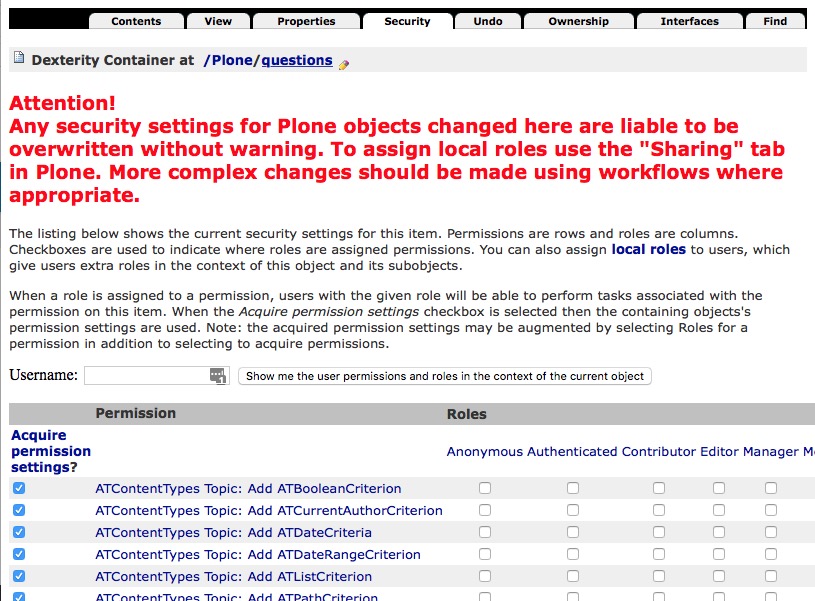
Use your browser’s “find on this page” feature (Control-F or Command-F key or Edit->Find menu item) to search for “Add portal content”. It will be almost halfway down this tall page.

Check the box in that row under the “Anonymous” column, then scroll to the bottom of the page and press the “Save Changes” button.

Test the Form to Create Content Items#
We have a Question content type, a folder in which to create Question content items, and a working “add” form that we can use to create Question content items.
We should test that form now, as a user with Manager role and as an anonymous (not logged in) website visitor.
Test the Form as a Manager#
To test the form as a Manager, use the same browser window you have been using in which you are logged in as “admin”.
Go to the Questions folder at http://localhost:8080/Plone/questions
Click the “Add new…” button in the toolbar and choose “Question”
Fill in all the fields with your name, your email address, and a question
Press the “Save” button
If all works correctly, you will be redirected to view your new Question item at the URL http://localhost:8080/Plone/questions/question
Test the Form as an Anonymous Website Visitor#
To test the form as an anonymous (not logged in) website visitor, open a new “incognito” (or “private browsing”) browser window: for Safari and Firefox, use File -> New Private Window; for Chrome, use File -> New Incognito Window.
Go to the Questions folder at http://localhost:8080/Plone/questions
There is no toolbar shown because you’re not logged in with this browser window. To use the equivalent of the “Add new…” toolbar button in the toolbar and its “Question” choice, you must visit this URL: http://localhost:8080/Plone/questions/++add++question
Fill in all the fields with your name, your email address, and a question
Press the “Save” button.
Did everything work as you expected? Why would you be taken to the login form?
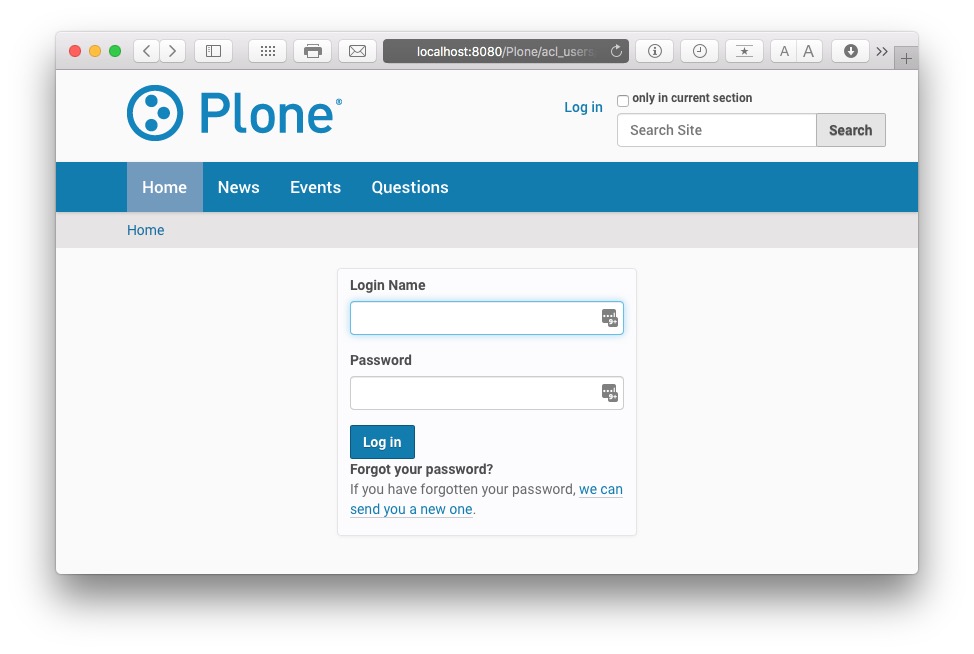
If you look at the URL bar of your browser, you should see this: http://localhost:8080/Plone/acl_users/credentials_cookie_auth/require_login?came_from=http%3A//localhost%3A8080/Plone/questions/question
The “came_from” variable value is the original URL you tried to view when Plone decided you did not have the necessary permissions and sent you to the login form. In this case, that original URL is http://localhost:8080/Plone/questions/question, which indicates that the Question item was created. But, because you are not logged in, you do not have permission to view that new Question item, which is in the “private” state (the initial state of the Simple Publication Workflow, the default workflow for a Plone site). That is why you were redirected to the login form.
Create a Thank You Page#
Being shown the login form is not ideal nor expected behaviour for anonymous website visitors who have successfully filled out a question form.
Instead, when they have filled out their question form and have pressed “Save”, you want them to get a nice thank you message.
Anonymous users are redirected to the login page when they try to view the Question item they just created. This is done by the default view for any Plone content item: Plone will not display a content item that is in the private state to an anonymous (not logged-in) user, so it gives the user a chance to log in. If the user has an account on the site and logs in successfully, Plone then checks to see if the user has the necessary permissions or roles needed to view the content item.
To change this behaviour, we need to create a new view for the Question content type that does the following:
checks in the user is anonymous; if so, redirects to the site homepage and displays a thank you message
if the user is not anonymous (ie. is logged in) and has edit permissions on the Question item, displays the values of the Question fields
Create a New View for the Question Content Type#
For Plone’s simplest views, you need to define only a page template. (More complex views require Python code and ZCML registration).
Here is how to create a new page template:
Navigate to the Management Interface at http://localhost:8080/Plone/manage_main
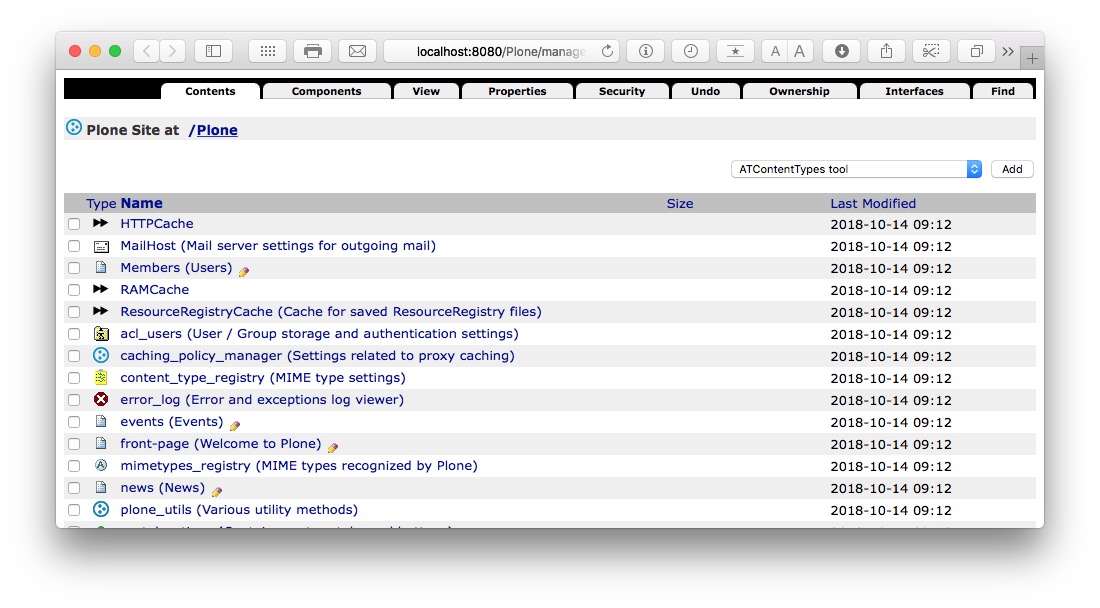
Click on “portal_skins”
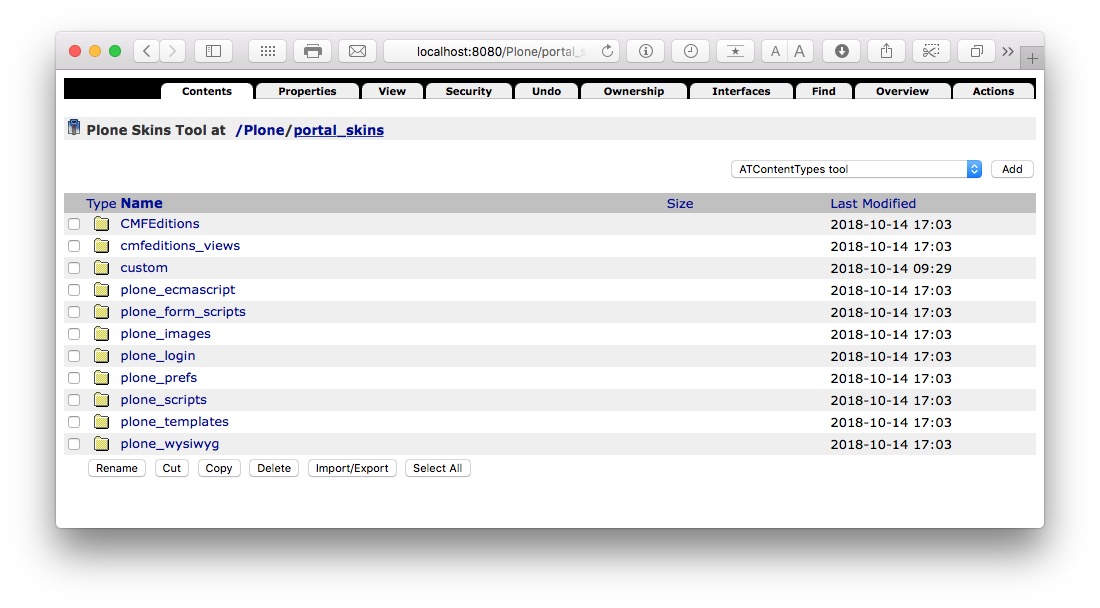
Click on “custom”
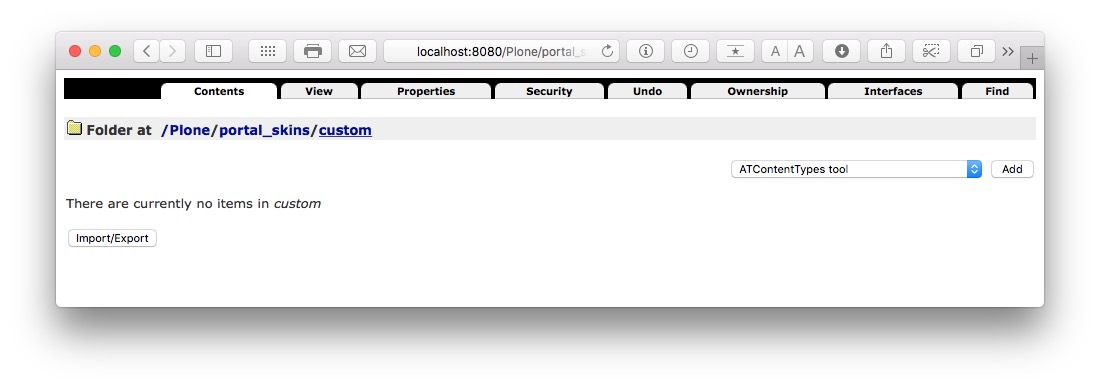
Use the drop down menu on the right side of the page, next to the “Add” button, to select “Page template”.
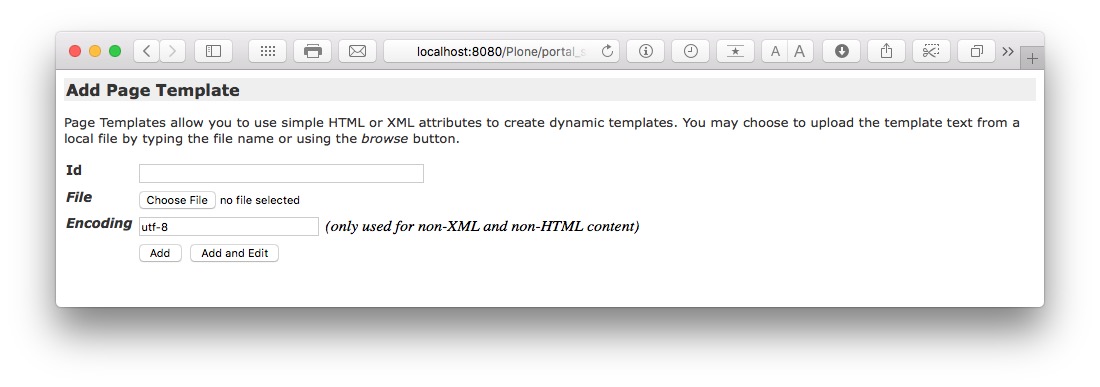
In the “Id” field, enter “question_view”, then press the “Add and Edit” button.
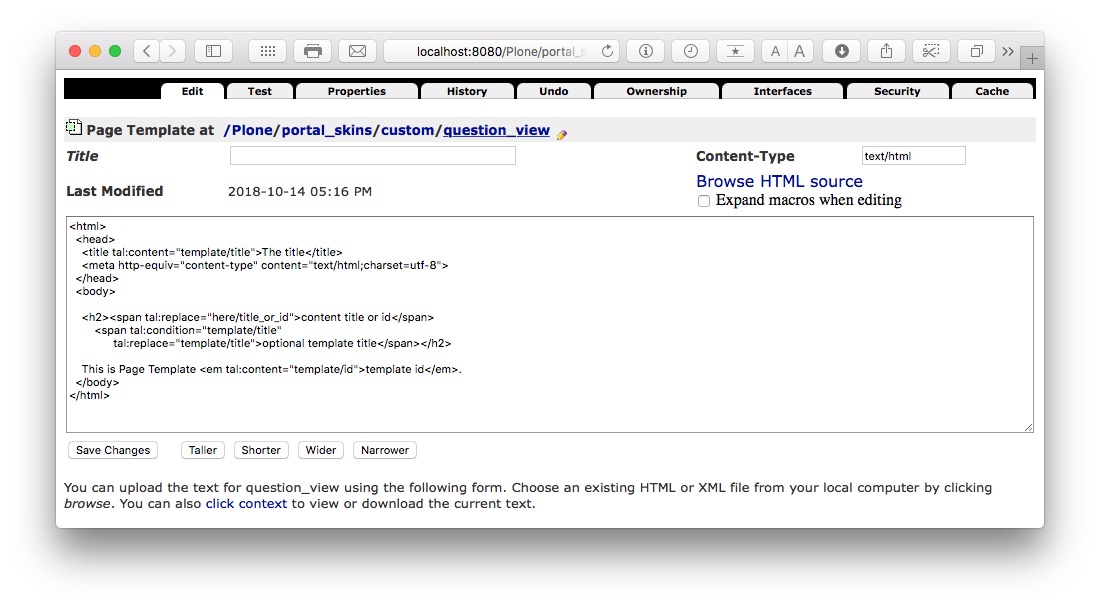
This is the default HTML for new page templates:
<html>
  <head>
    <title tal:content="template/title">The title</title>
    <meta http-equiv="content-type" content="text/html;charset=utf-8">
  </head>
  <body>

    <h2><span tal:replace="here/title_or_id">content title or id</span>
        <span tal:condition="template/title"
            tal:replace="template/title">optional template title</span></h2>

    This is Page Template <em tal:content="template/id">template id</em>.
  </body>
</html>
We want the page template to display a thank you message to anonymous website visitors who are directed to their newly-created Question. Replace the page template HTML with the following, then press the “Save Changes” button.
<html>
  <body tal:define="checkPermission nocall: context/portal_membership/checkPermission; canedit python:checkPermission('Modify portal content',context)" >

  <tal:anon condition="not: canedit">
    <h2>Thank you</h2>
    We will respond to your question as soon as possible!
  </tal:anon>

  </body>
</html>
This page template calls Plone’s “portal_membership” tool’s “checkPermission” method to determine if the user has edit permission on the Question item. If the user does not, a thank you message is displayed.
Before we handle the other case (when the user does have edit permission on the Question item), let’s set this new page template to be the default one for Question items.
Set the Default View for the Question Content Type#
Here is how to make the new view the default one for Question items:
Navigate to the Management Interface at http://localhost:8080/Plone/manage_main
Click on “portal_types”
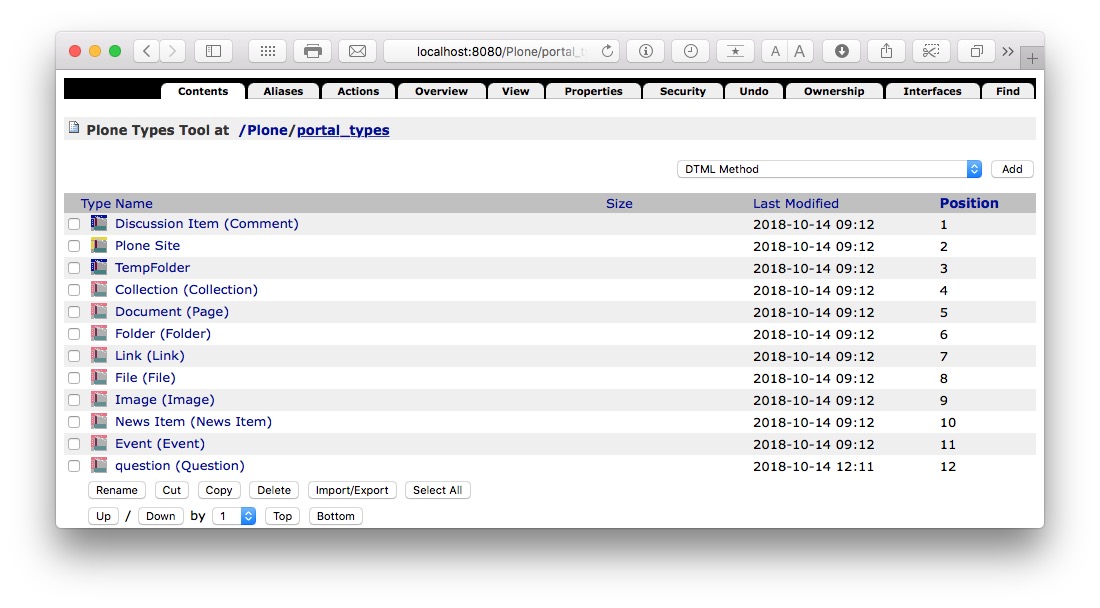
Click on the “question” portal type (should be at the bottom of the page) to view the Question content type’s factory type information (“FTI”):
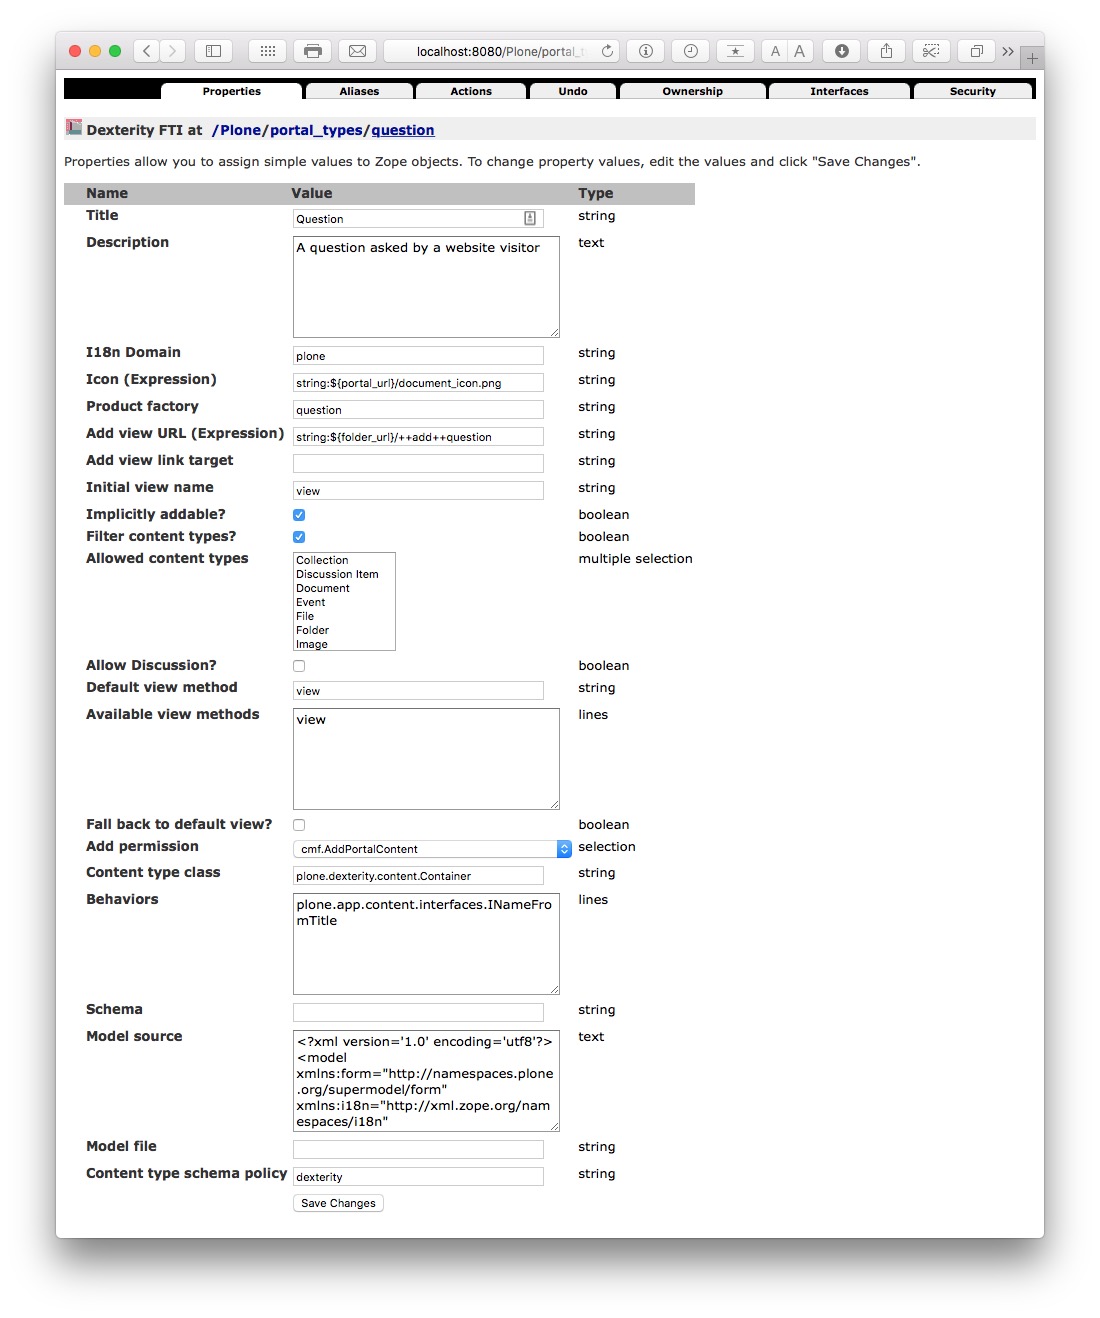
In the “Default view method” field, change “view” to “question_view”.

In the “Available view methods” field, add a new line containing the word “question_view”, then press the “Save Changes” button at the bottom of the page.

From now on, whenever anyone views a Question item, the new “question_view” will be used to display the item.
Test the New Default View#
Let’s verify that Question items now use this new default view.
In the same browser window, navigate to http://localhost:8080/Plone/questions/question
You should see a blank page
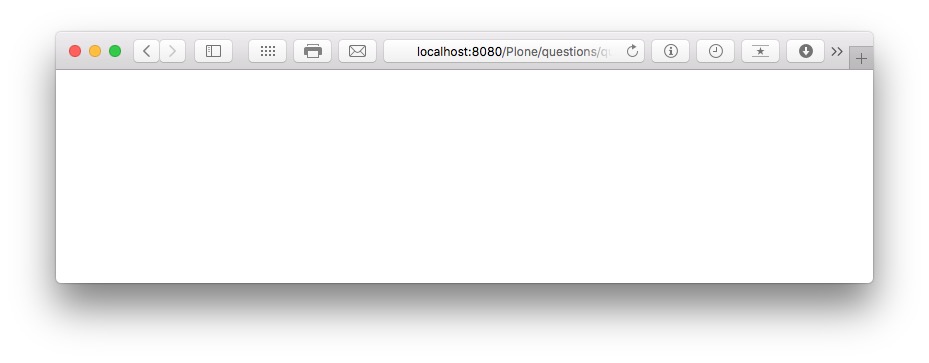
You see a blank page because the new view displays something (the thank you message) only if the user does not have edit permission on the Question item. Because in this browser window you do have edit permission on the Question item (you are logged in as “admin”, which has Manager role, giving it all permissions on the entire site), the new view shows you nothing.
Now let’s verify how the new view works for an anonymous web visitor who just filled out a new Question form:
In a new incognito or private browsing window, go to http://localhost:8080/Plone/questions/question
You should see the thank you message.
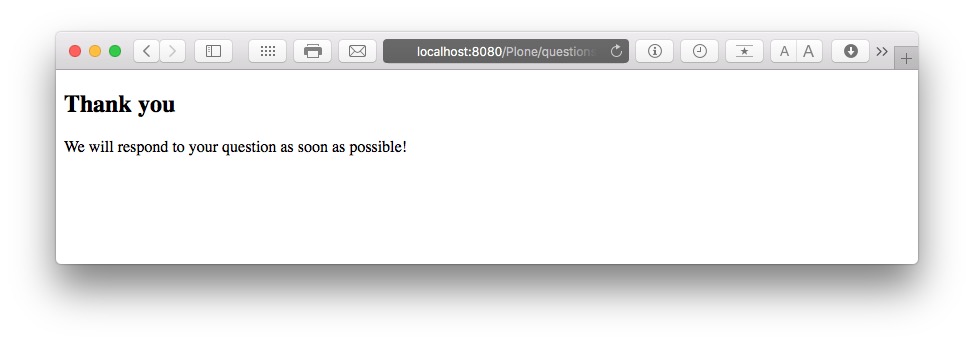
In an incognito or private browsing window, you are not logged into the Plone site, so you have no permissions to edit anything. The new Question view determines that you have no edit permissions then displays the thank you message.
Add Replying to the New View#
Let’s go back and enhance the new Question view to handle the case when the user does have edit permission on the Question item.
In a normal browser window or tab (in which you are logged into the Plone site as “admin”), go to http://localhost:8080/Plone/portal_skins/custom/question_view/pt_editForm
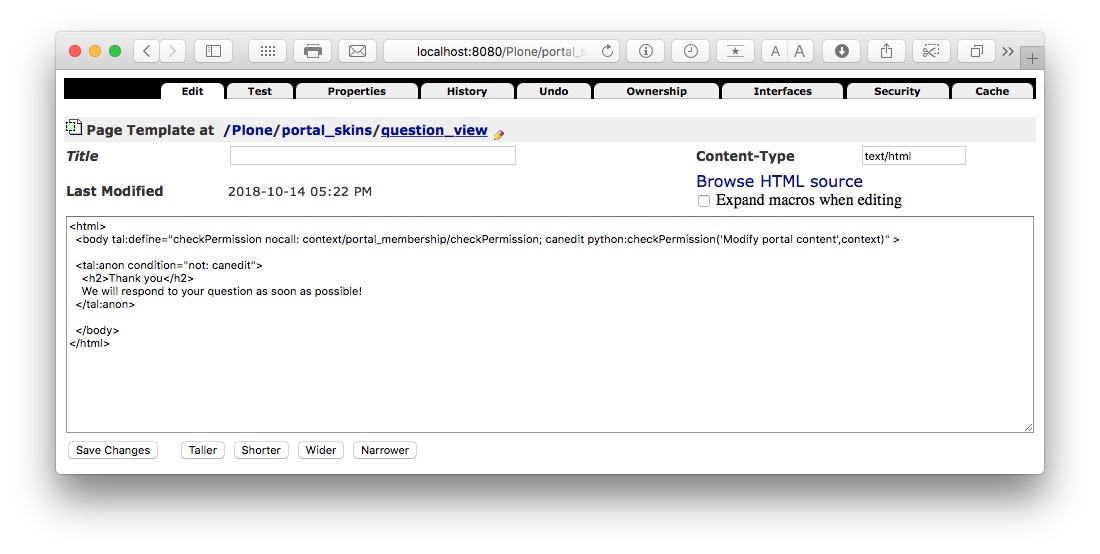
Replace the page template’s HTML with the following, then press the “Save Changes” button:
<html>
<body tal:define="checkPermission nocall: context/portal_membership/checkPermission; canedit python:checkPermission('Modify portal content',context)" >
<tal:anon condition="not: canedit">
<h2>Thank you</h2>
We will respond to your question as soon as possible!
</tal:anon>
<tal:canedit condition="canedit">
<div tal:define="portal_name here/portal_url/Title;
subject python: 'Your inquiry at ' + portal_name;
question_encoded python: context.your_question.replace('&', '&').replace('<', '<').replace('>', '>').replace(' ', '%20');
question_encoded_quoted python: '> ' + question_encoded;
subject_encoded python: subject.replace('&', '&').replace('<', '<').replace('>', '>').replace(' ', '%20');">
<h3>From: <span tal:replace="here/your_full_name">[name]</span></h3>
<p>Question: <span tal:replace="here/your_question">[question]</span></p>
<p><a tal:attributes="href python: 'mailto:' + context.your_email_address + '?subject=' + subject_encoded + '&body=' + question_encoded_quoted">[reply]</a></p>
</div>
</tal:canedit>
</body>
</html>
The page template now handles the condition in which the user has edit permissions on the Question item by displaying the name of the person asking the question, their question, and a “reply” link that you can click on to compose an email reply.
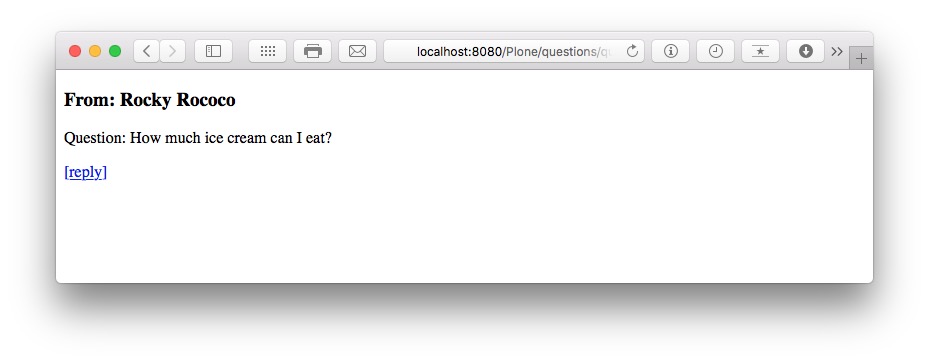
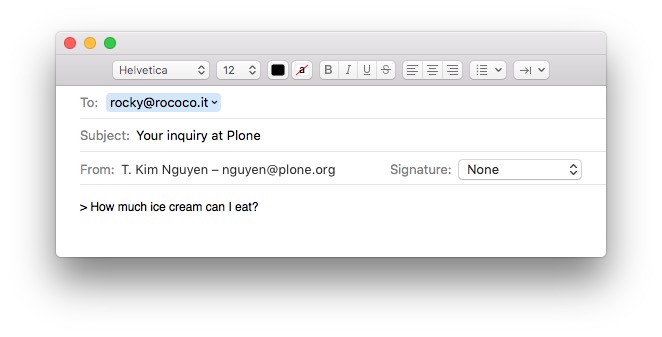
If you click on the “reply” link, your email client is invoked to compose a reply, filled in with the recipient email address, subject, and their question:
Design the Workflow#
So far, we have done the following:
created a Question content type
created a folder to hold all Question items
tested the “add form” for Questions
created a default view for Questions that works for anonymous website visitors and users who have edit permission
The next step is to make it possible to track Questions according to whether they have been handled or not. By “handled”, in our example scenario, we mean whether someone has replied to a question.
Workflow States and Transitions#
The workflow should therefore have these states:
an initial state, typically “private”; this is the state a newly-created Question will be placed in
“replied”, the state a Question should be transitioned to once an administrator has replied to a Question (by clicking on the “reply” link and sending the question submitter an email response)
The workflow will need only one transition:
“reply”, which moves a Question from the “private” state to the “replied” state
Workflow Security#
An important aspect of designing a workflow is to define its security: who can do what, and when.
In the simplest case, a state’s security definition specifies which roles (e.g. “Manager”, “Anonymous”) can view or edit the item, and a transition’s security definition specifies which role, group membership, or permission a user must have to be able to execute the transition.
In our example scenario, we will use the following workflow security:
in the “private” state, only a “Manager” or “Site Administrator” can view or edit the item
in the “replied” state, only a “Manager” or “Site Administrator” can view or edit the item
the “reply” transition requires “Manager” or “Site Administrator” role
A good strategy when creating a new workflow is to copy an existing one. This reduces the amount of work required in setting up the security of states and transitions, and, in many cases, a new workflow will be similar to the Simple Publication Workflow, so we will start by cloning the Simple Publication Workflow.
Create the Workflow#
We will use Plone’s Management Interface to create the new workflow.
Using your logged in browser window (in which you are logged in as “admin”), navigate to the Management Interface. You can get there by clicking on your personal menu at the bottom of the toolbar, choosing “Site Setup”, then scrolling down a bit and clicking on “Management Interface”. Alternatively, use your browser’s URL bar to go to http://localhost:8080/Plone/manage_main
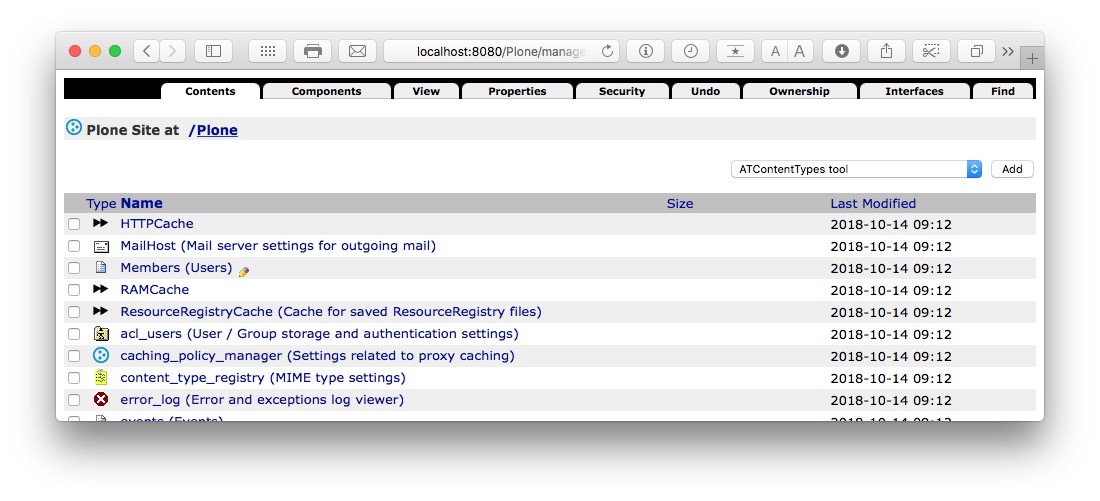
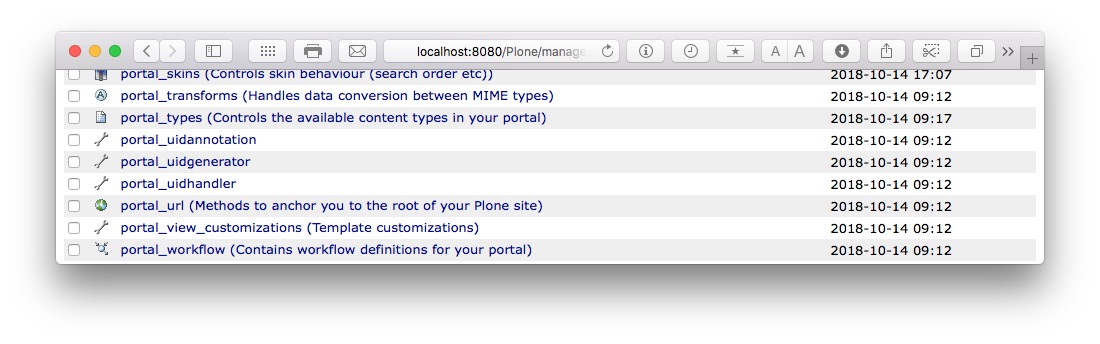
Scroll to the bottom of the page and click on “portal_workflow”:
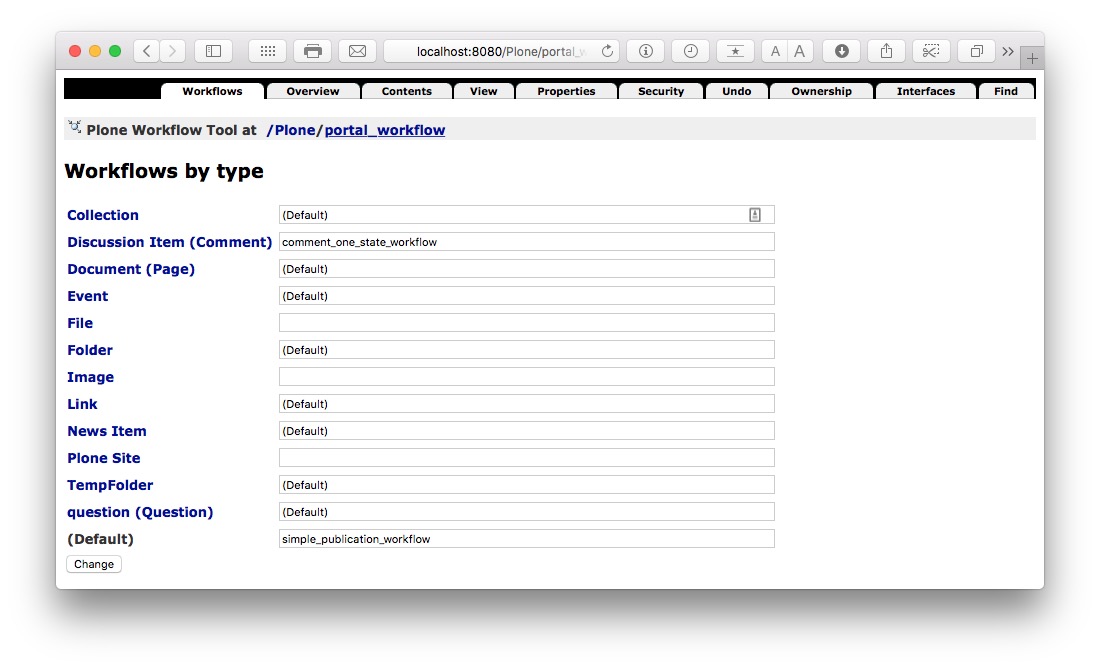
You can see that the Question content type (with ID “question”) uses the site’s default workflow, “Simple Publication Workflow” (with ID “simple_publication_workflow”). We are going to change that shortly.
Click on the Contents tab:
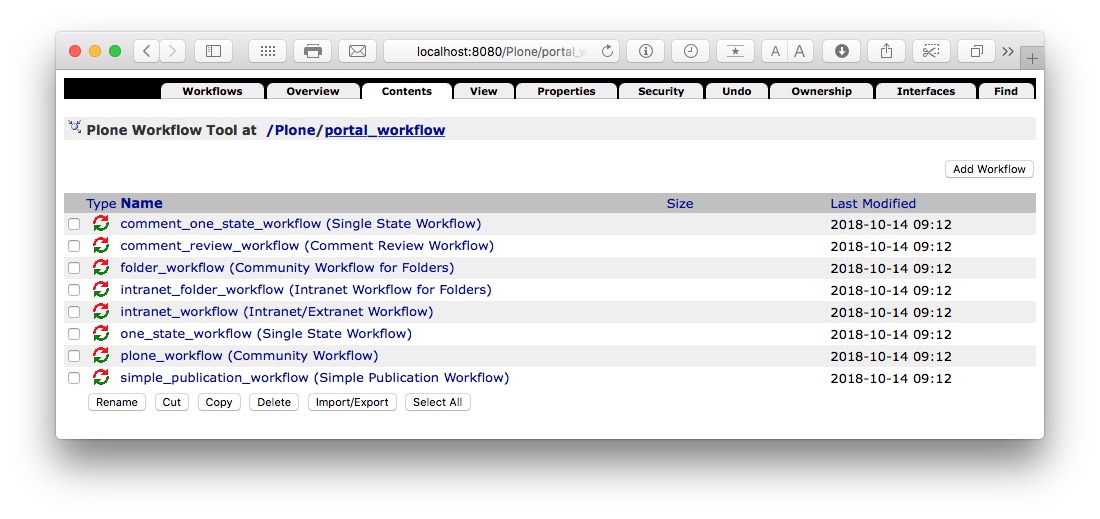
Check the box next to “simple_publication_workflow”, click the “Copy” button, then click the “Paste” button. You will see a new workflow in the list, with a new ID “copy_of_simple_publication_workflow” but the same title “Simple Publication Workflow”:

Click the box next to it, then click the “Rename” button. Rename (this will change only the workflow ID) it by changing “copy_of_simple_publication_workflow” to “question_workflow” and pressing the “Ok” button:

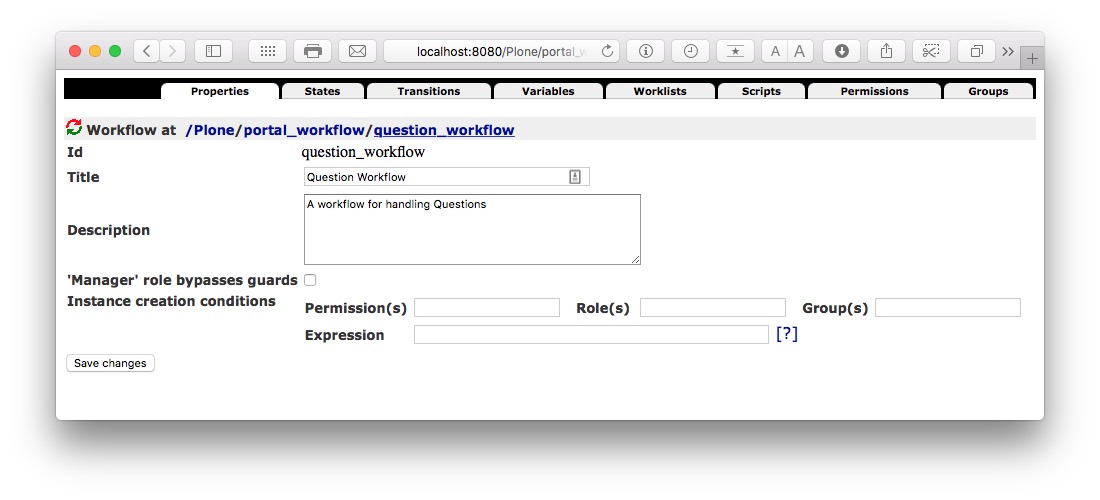
Click on “question_workflow”:
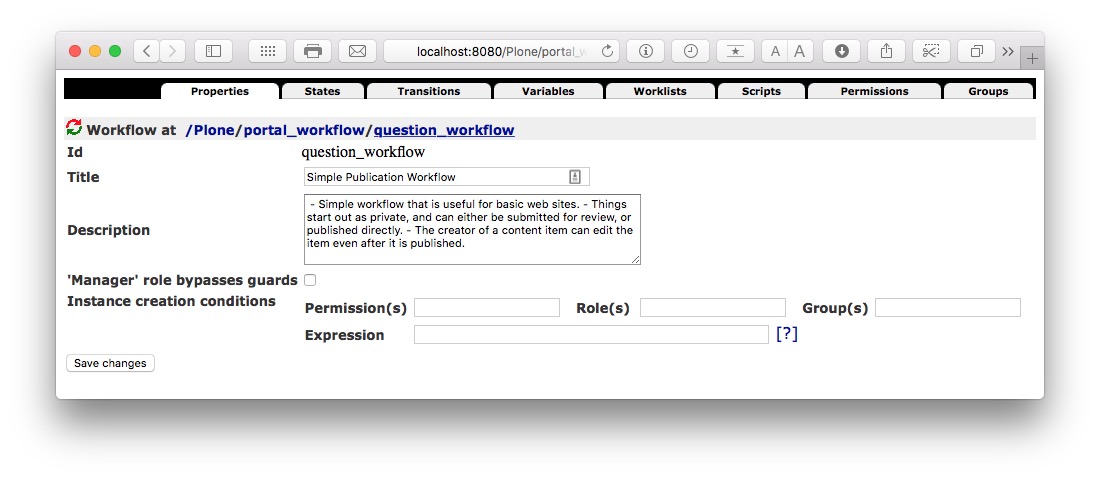
Change the title of this workflow to “Question Workflow”, change the description to “A workflow for handling Questions”, and press the “Save changes” button.
Create the Workflow States#
Because we cloned the Simple Publication Workflow, we have reduced the amount of work needed to create the states.
Create the Initial Private State#
Continue from or navigate to the “question_workflow” in the Management Interface, at http://localhost:8080/Plone/portal_workflow/question_workflow/manage_properties
Click on the “States” tab.
The “private” state we want already exists. Click on it.
Change the description to “Can only be seen and edited by Manager and Site Administrator roles”, then press “Save changes”.
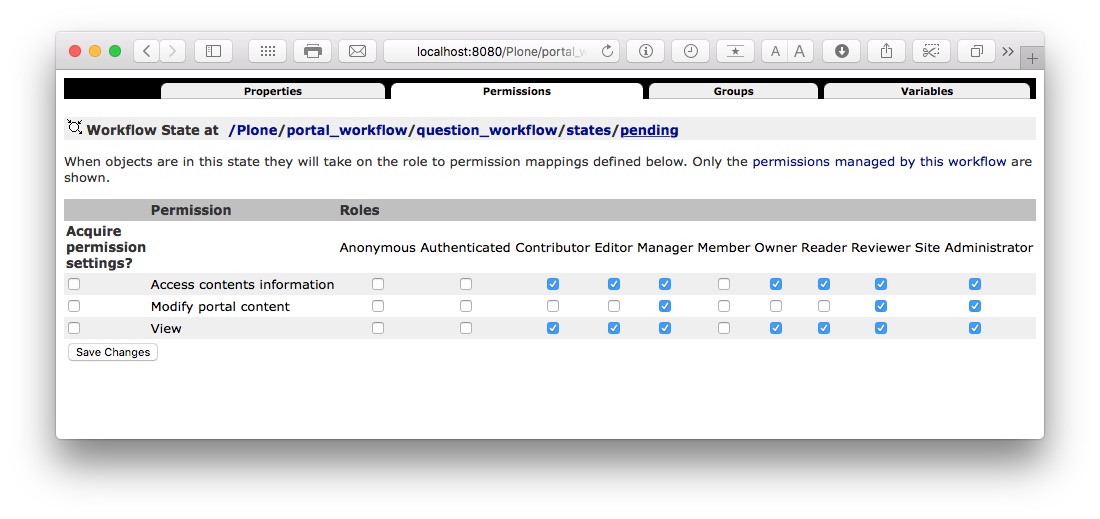
Click on the “Permissions” tab to view the state’s security settings.
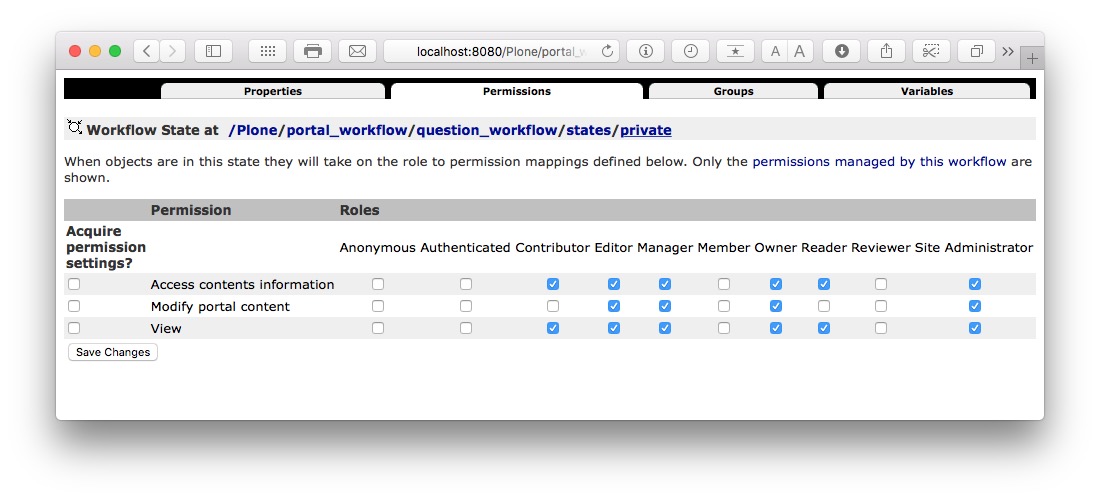
We don’t need to change anything because Manager and Site Administrator role are already set to have the permissions we want: “Access contents information”, “Modify portal content” (this is Plone’s default “Edit” permission), and “View”. We can ignore the fact that the Owner role also gets these permissions because no one is logged in when they fill out a Question form, making it impossible to know the owner. We can also ignore the other roles.
Remove Any Unneeded States#
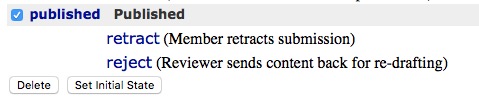
Next, we remove the unneeded “published” state:
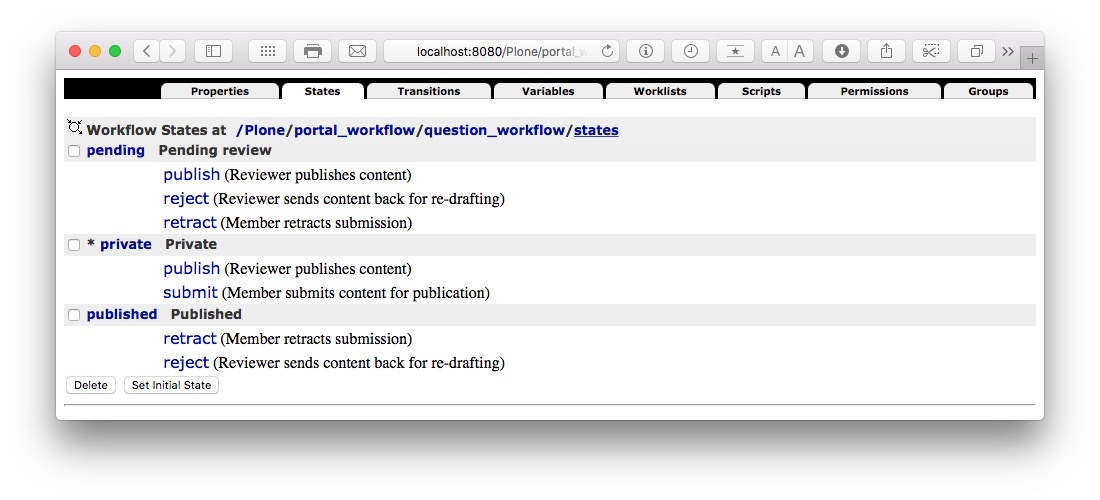
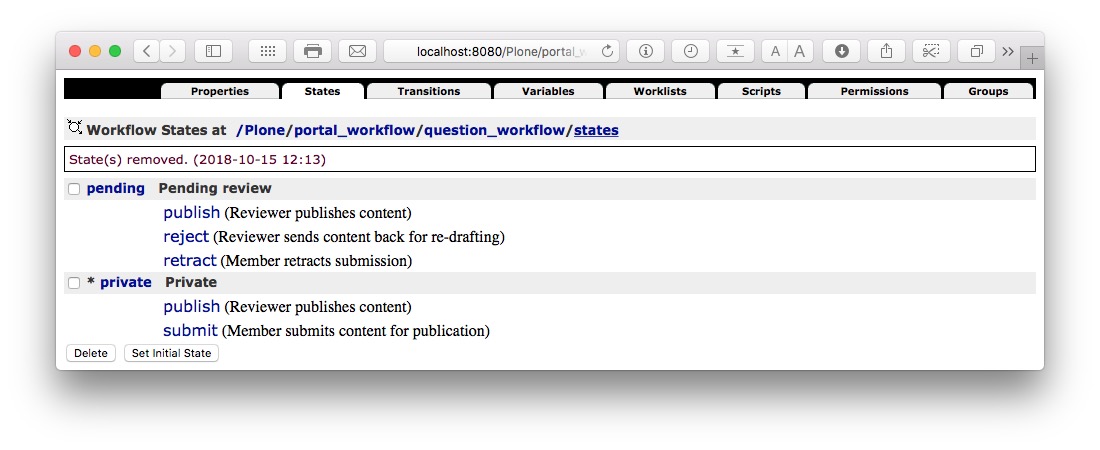
Click on “states” in the breadcrumbs below the tabs, to return to the list of states in this workflow:

Check the box next to “published” then press the “Delete” button:
Create the Replied State#
Instead of creating the “Replied” state from scratch, we will rename the “pending” state. With the Management Interface, it’s not possible to change the ID of a state but it is possible to change its title.
(This would be a practical reason to use the Workflow Manager instead: it lets you clone states and transitions, so we would have been able to clone the “pending” state before deleting it).
While still viewing the list of states in this workflow:
Click on “pending”:
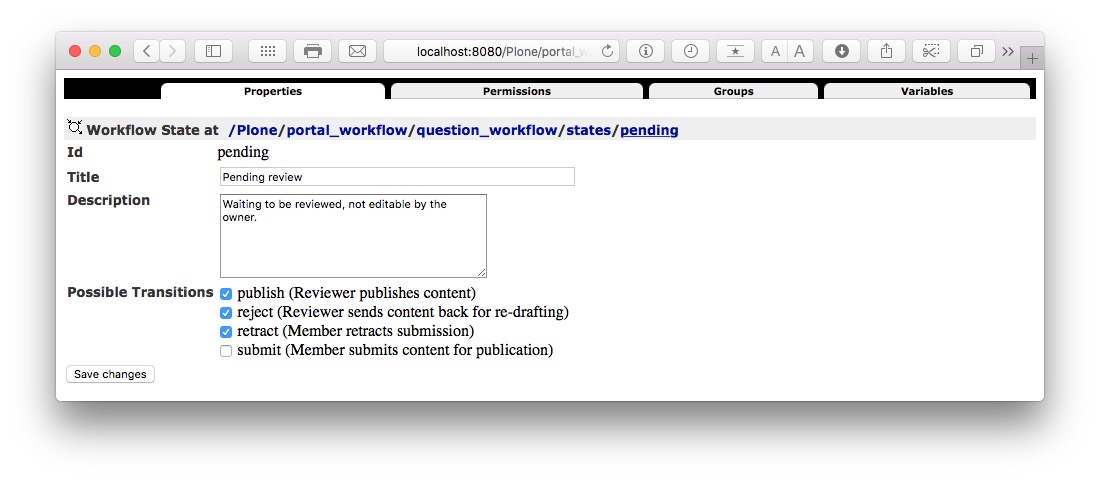
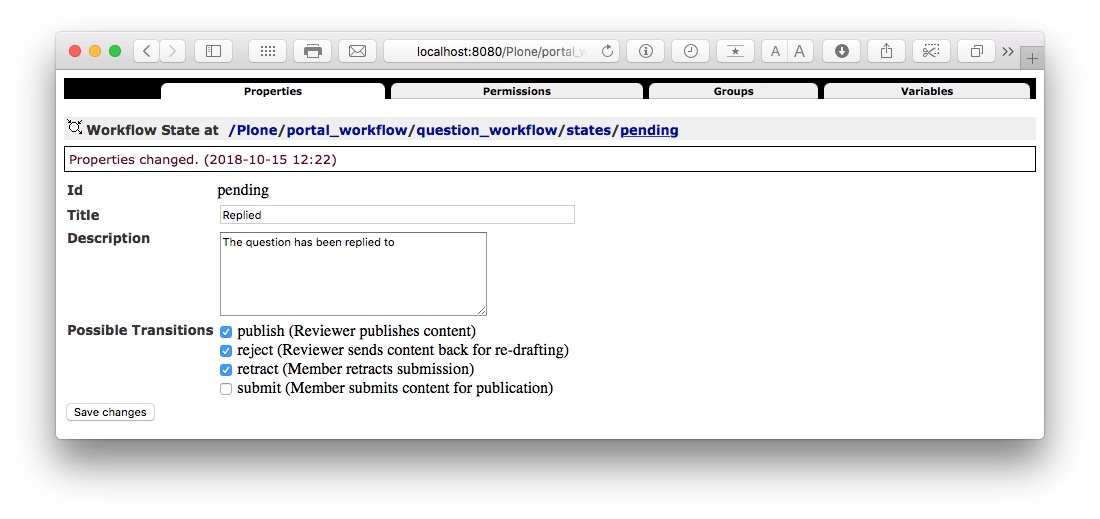
Change the title to “Replied” and the description to “The question has been replied to” and press the “Save changes” button
Click the “Permissions” tab.
We don’t need to change anything because Manager and Site Administrator role are already set to have the permissions we want and we can ignore the other roles.
We have finished setting up all the states for this workflow.
Create the Workflow Transitions#
We now need to define the transitions for this workflow. In this particular example, there needs to be only one transition, “Reply” (with ID “reply”).
Click on “Transitions” tab:
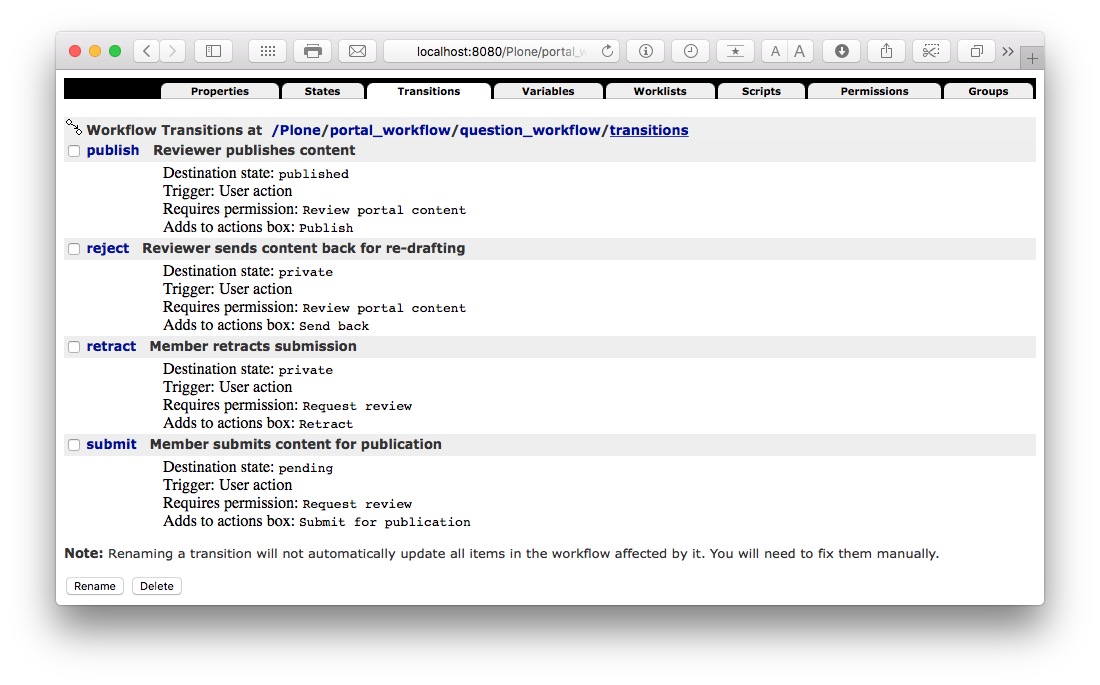
We are going to delete all the transitions except “submit”. Click on the boxes next to each transition except “submit” then press the “Delete” button:

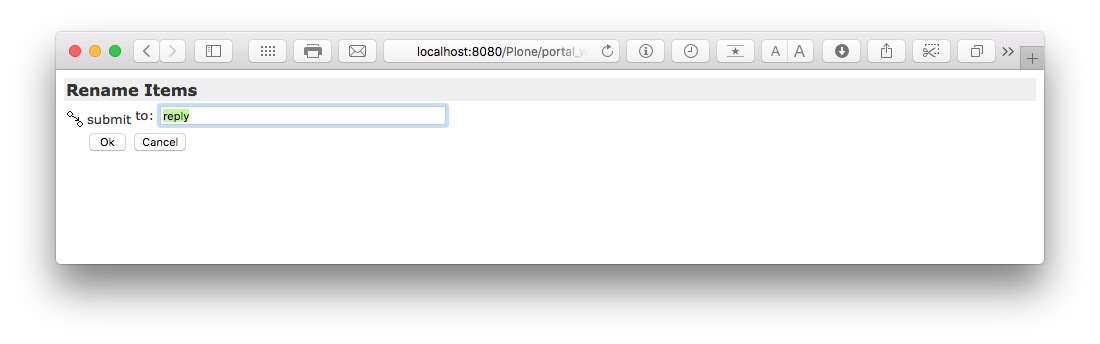
Check the box next to “submit” and press the “Rename” button. Change the transition’s ID to “reply” then press the “Ok” button:
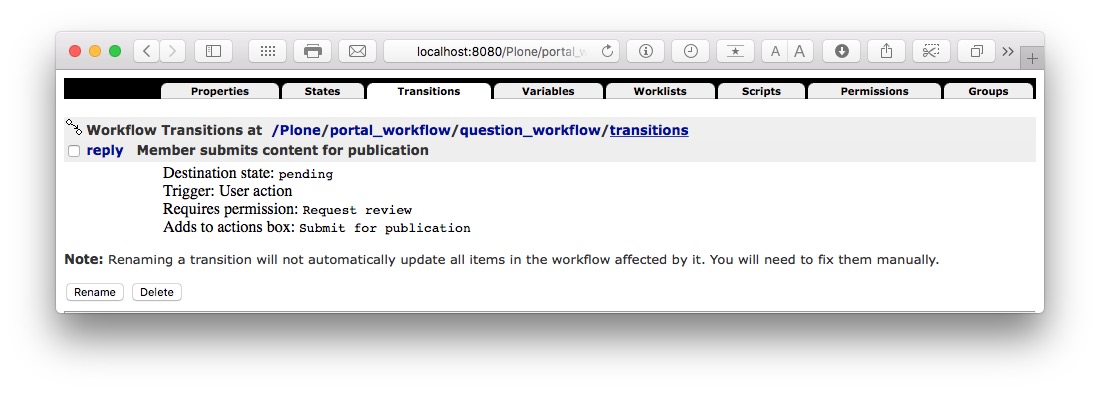
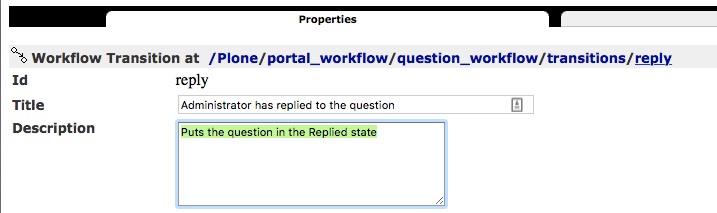
Click on the “reply” transition:
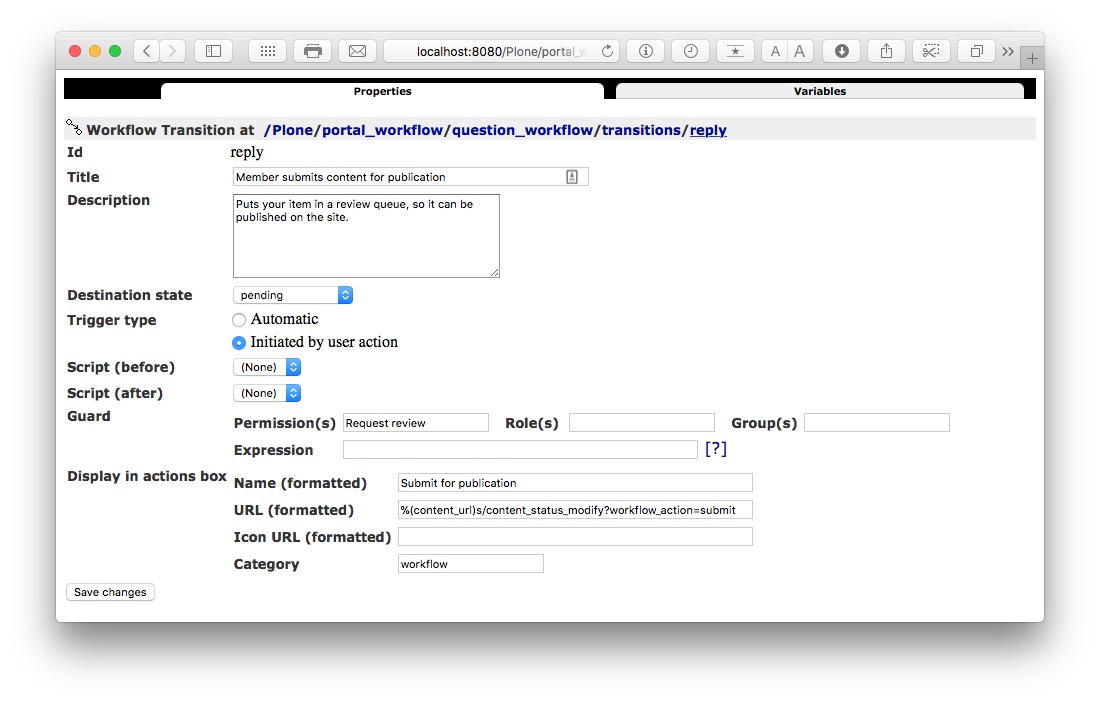
Change the title to “Administrator has replied to the question” and the description to “Puts the question in the Replied state”.
In the “Display in actions box” fields, change “Name (formatted)” from “Submit for publication” to “Mark as replied”, and change “URL (formatted)” from “%(content_url)s/content_status_modify?workflow_action=submit” to “%(content_url)s/content_status_modify?workflow_action=reply” (ie. change the word “submit” to “reply”).
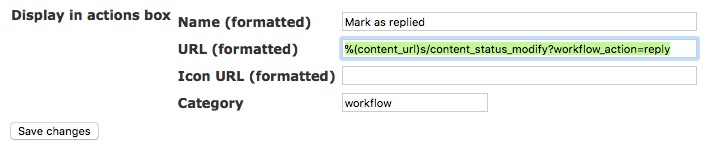
Press the “Save changes” button.
We will leave this transition’s security settings (the “Guard” fields) unchanged, because Manager and Site Administrator roles are already assigned the “Request review” permission. This means that users with Manager and Site Administrator roles will be authorized to execute this transition.

Connect States Using Transitions#
We need to connect the “reply” transition to the “private” state.
Click on “question_workflow” in the breadcrumbs.

Click on the States tab.

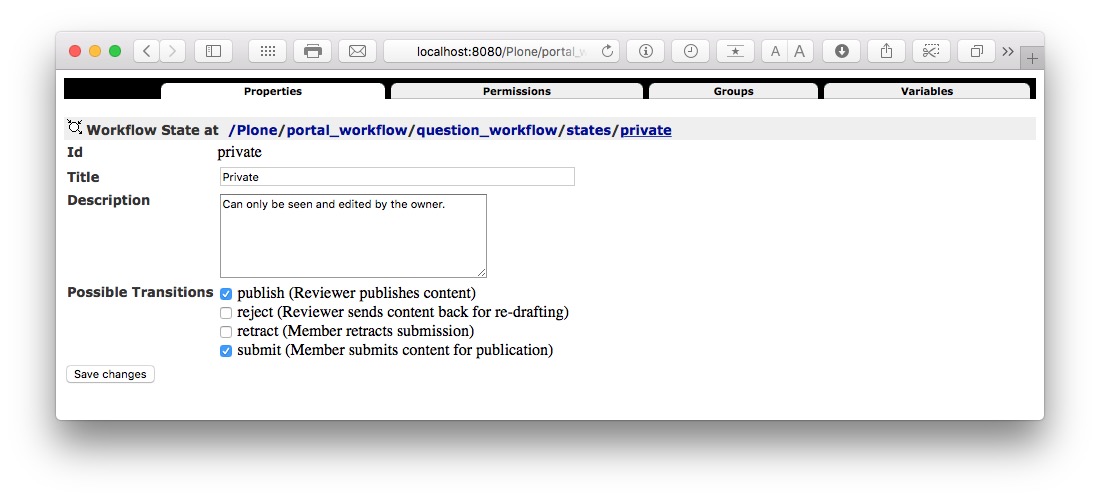
Click on the “private” state:
Check the box in “Possible Transitions” next to “reply” and press the “Save changes” button.
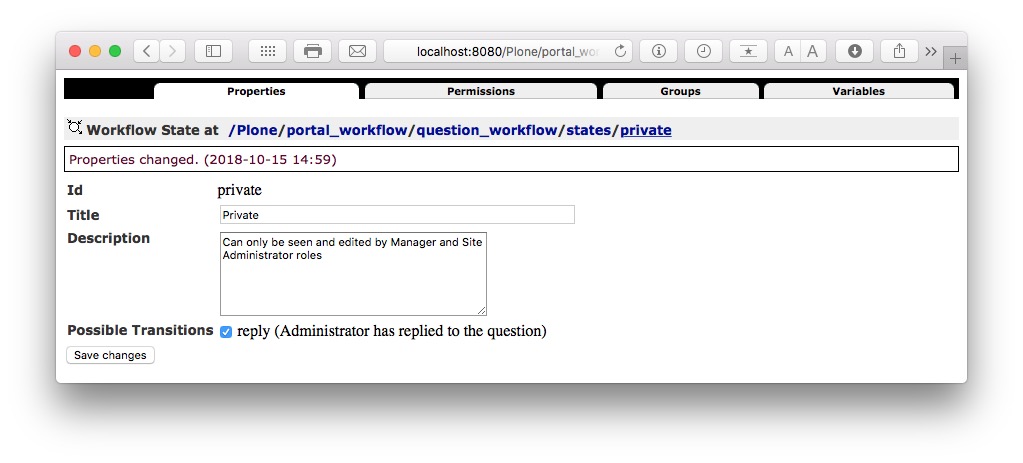
Click on “states” in the breadcrumbs
Verify that the “private” state now has one transition (“reply”).
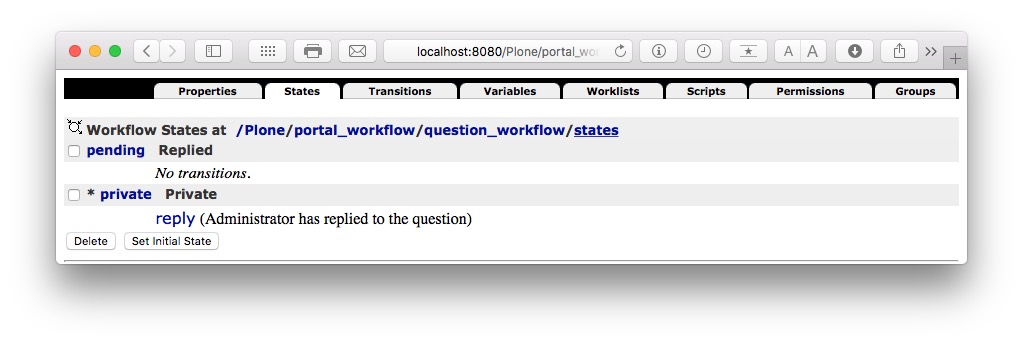
We have finished setting up the workflow.
Assign the Workflow to the Question Content Type#
We need to assign the new workflow to the Question content type.
Navigate to the “portal_workflow” by clicking on it in the breadcrumbs:

Change the workflow for “question (Question)” from “(Default)” to “question_workflow” then press the “Change” button:

Since we have some Question items on the site, we need to update them so they are changed to use their new workflow. We do this by pressing the “Update security settings” button:

You will want to be careful using this button on sites containing a lot of content because it can be a long-running operation and will likely time out in a browser unless you are browsing directly to a ZEO client or instance (ie. not browsing via an intermediate web server such as Apache or nginx). Plone has to check every content item and update its workflow-related security settings (permissions) based on the item’s state.
Display Workflow State in the View#
Now that we have created the workflow and assigned it to the Question content type, we need to have a way of seeing a Question’s workflow state (“private” or “replied”) and of transitioning a Question to the “replied” state.
The easiest way to do this is to modify the view template to use macros in Plone’s main_template.
Navigate to the Management Interface, portal_skins, custom, question_view: http://localhost:8080/Plone/portal_skins/custom/question_view/pt_editForm
Change the contents of the page template to the following, then press the “Save Changes” button:
<html xmlns="http://www.w3.org/1999/xhtml" xml:lang="en"
xmlns:tal="http://xml.zope.org/namespaces/tal"
xmlns:metal="http://xml.zope.org/namespaces/metal"
xmlns:i18n="http://xml.zope.org/namespaces/i18n"
lang="en"
metal:use-macro="context/main_template/macros/master"
i18n:domain="Plone.dexterity">
<body>
<metal:main fill-slot="main">
<tal:canorcannot define="checkPermission nocall: context/portal_membership/checkPermission; canedit python:checkPermission('Modify portal content',context)" >
<tal:anon condition="not: canedit">
<h2>Thank you</h2>
We will respond to your question as soon as possible!
</tal:anon>
<tal:canedit condition="canedit">
<div tal:define="portal_name here/portal_url/Title;
subject python: 'Your inquiry at ' + portal_name;
question_encoded python: context.your_question.replace('&', '&').replace('<', '<').replace('>', '>').replace(' ', '%20');
question_encoded_quoted python: '> ' + question_encoded;
subject_encoded python: subject.replace('&', '&').replace('<', '<').replace('>', '>').replace(' ', '%20');">
<h3>From: <span tal:replace="here/your_full_name">[name]</span></h3>
<p>Question: <span tal:replace="here/your_question">[question]</span></p>
<p><a tal:attributes="href python: 'mailto:' + context.your_email_address + '?subject=' + subject_encoded + '&body=' + question_encoded_quoted">[reply]</a></p>
</div>
</tal:canedit>
</tal:canorcannot>
</metal:main>
</body>
</html>
What this does is use the Plone “main_template” macro called “master”, which defines slots on the page, and places the HTML we generate (for anonymous users or users who have edit permission on the question) into the slot called “main”.
This “wraps” the HTML we were generating before with the normal Plone site header, footer, and toolbar.
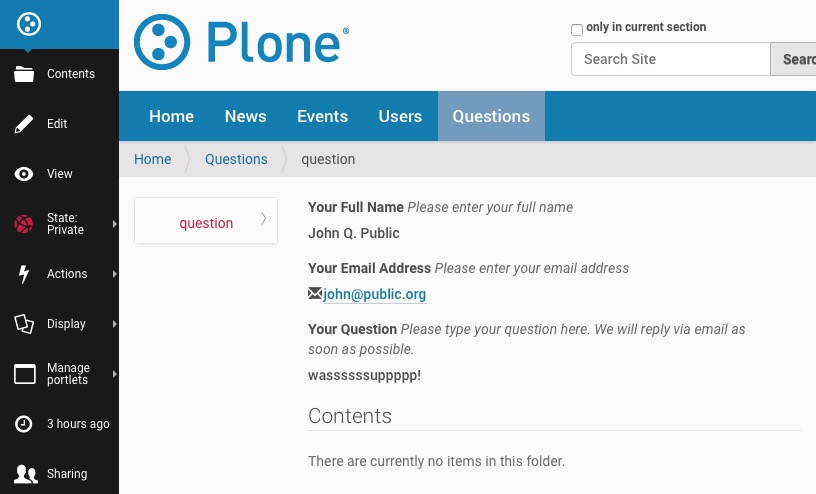
Test the View#
We navigate back to a question in the Questions folder, e.g. http://localhost:8080/Plone/questions/question
As Manager, we now see the following:
As an anonymous website visitor, we see
Redirect to Homepage#
Let’s modify the view template so that, for the Anonymous user, it redirects the browser to the homepage of the site and displays an informational message indicating that their question had been submitted.
We will use these two methods:
the addPortalMessage() method in a TAL expression:
<tal:block tal:define="temp python:context.plone_utils.addPortalMessage('A random info message')" />the redirect() method in a TAL expression:
dummy python: request.response.redirect(portal_url)(look above for how to obtain the URL of the site home)
The template’s tal:anon block should look like this:
<tal:anon condition="not: canedit">
  <html xmlns="http://www.w3.org/1999/xhtml" xml:lang="en"
      xmlns:tal="http://xml.zope.org/namespaces/tal"
      xmlns:metal="http://xml.zope.org/namespaces/metal"
      xmlns:i18n="http://xml.zope.org/namespaces/i18n"
      lang="en"
      i18n:domain="Plone.dexterity">
  <body tal:define="portal_url here/portal_url;
                      utils context/plone_utils;
                      temp python:utils.addPortalMessage('Your question has been submitted. We will respond to it as soon as possible!', 'info');
                      dummy python:request.response.redirect(portal_url);
                      ">
      <h2>Thank you</h2>
      We will respond to your question as soon as possible!
      <p><a tal:attributes="href here/portal_url; title string: home">[return to home]</a></p>

  </body>
  </html>
</tal:anon>
The final HTML for the page template should look like this:
<html xmlns="http://www.w3.org/1999/xhtml" xml:lang="en"
xmlns:tal="http://xml.zope.org/namespaces/tal"
xmlns:metal="http://xml.zope.org/namespaces/metal"
xmlns:i18n="http://xml.zope.org/namespaces/i18n"
lang="en"
i18n:domain="Plone.dexterity">
<body>
<tal:canorcannot define="checkPermission nocall: context/portal_membership/checkPermission; canedit python:checkPermission('Modify portal content',context)" >
<tal:anon condition="not: canedit">
<html xmlns="http://www.w3.org/1999/xhtml" xml:lang="en"
xmlns:tal="http://xml.zope.org/namespaces/tal"
xmlns:metal="http://xml.zope.org/namespaces/metal"
xmlns:i18n="http://xml.zope.org/namespaces/i18n"
lang="en"
i18n:domain="Plone.dexterity">
<body tal:define="portal_url here/portal_url;
utils context/plone_utils;
temp python:utils.addPortalMessage('Your question has been submitted. We will respond to it as soon as possible!', 'info');
dummy python:request.response.redirect(portal_url);
">
<h2>Thank you</h2>
We will respond to your question as soon as possible!
<p><a tal:attributes="href here/portal_url; title string: home">[return to home]</a></p>
</body>
</html>
</tal:anon>
<tal:canedit condition="canedit">
<html xmlns="http://www.w3.org/1999/xhtml" xml:lang="en"
xmlns:tal="http://xml.zope.org/namespaces/tal"
xmlns:metal="http://xml.zope.org/namespaces/metal"
xmlns:i18n="http://xml.zope.org/namespaces/i18n"
lang="en"
metal:use-macro="context/main_template/macros/master"
i18n:domain="Plone.dexterity">
<body>
<metal:main fill-slot="main">
<div tal:define="portal_name here/portal_url/Title;
subject python: 'Your inquiry at ' + portal_name;
question_encoded python: context.your_question.replace('&', '&').replace('<', '<').replace('>', '>').replace(' ', '%20');
question_encoded_quoted python: '> ' + question_encoded;
subject_encoded python: subject.replace('&', '&').replace('<', '<').replace('>', '>').replace(' ', '%20');">
<h3>From: <span tal:replace="here/your_full_name">[name]</span></h3>
<p>Question: <span tal:replace="here/your_question">[question]</span></p>
<p><a tal:attributes="href python: 'mailto:' + context.your_email_address + '?subject=' + subject_encoded + '&body=' + question_encoded_quoted">[reply]</a></p>
</div>
</metal:main>
</body>
</html>
</tal:canedit>
</tal:canorcannot>
</body>
</html>
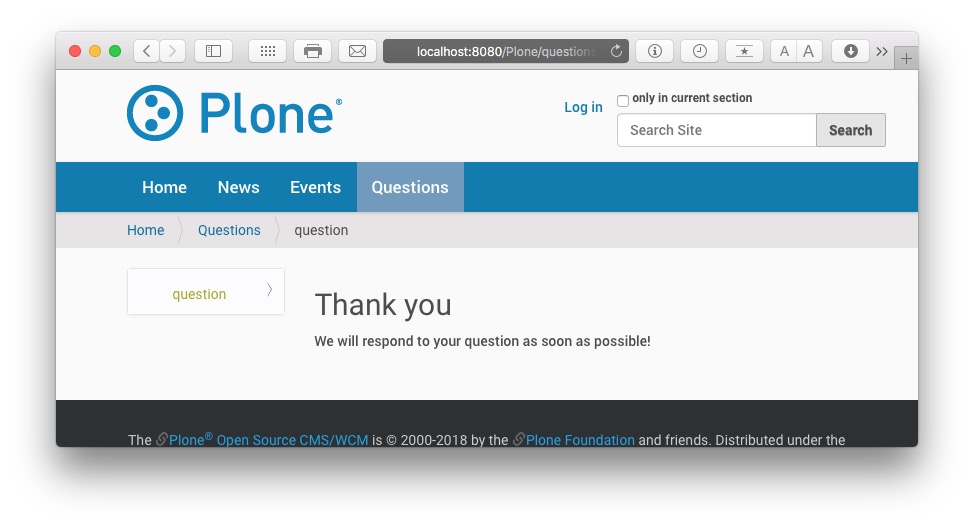
When we try this view as an anonymous user, we are redirected to the homepage and are given a thank you message.
Test the Workflow#
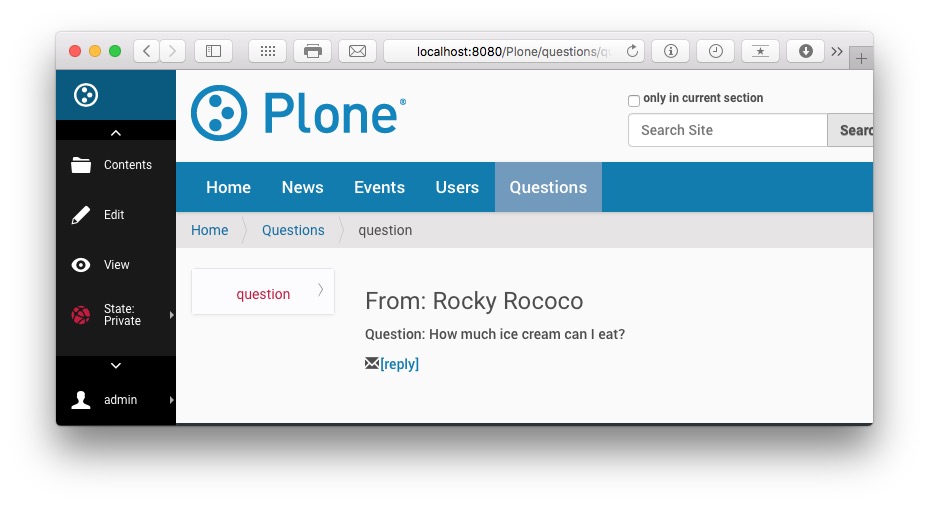
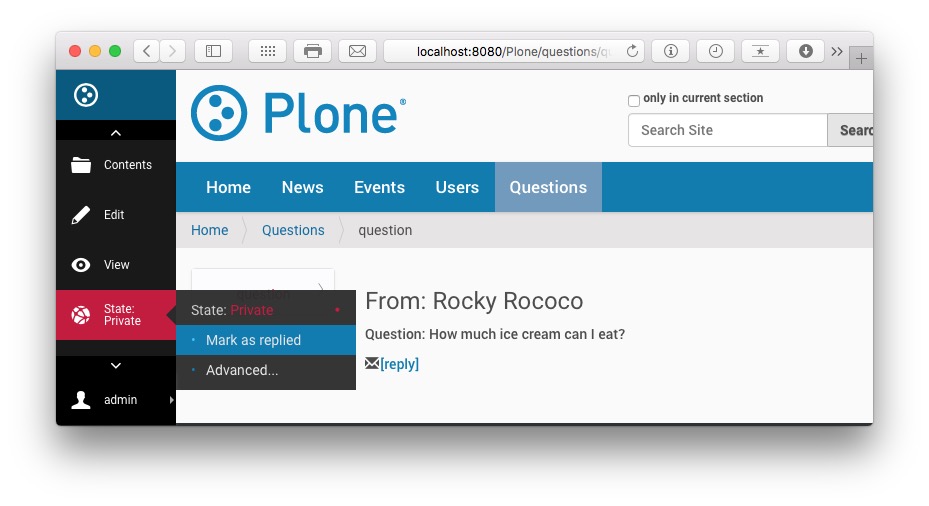
Returning to the question at http://localhost:8080/Plone/questions/question as “admin”, we see in the left toolbar that the question is in the private state, and if we click on that State button, we see the available transition “Mark as replied”:
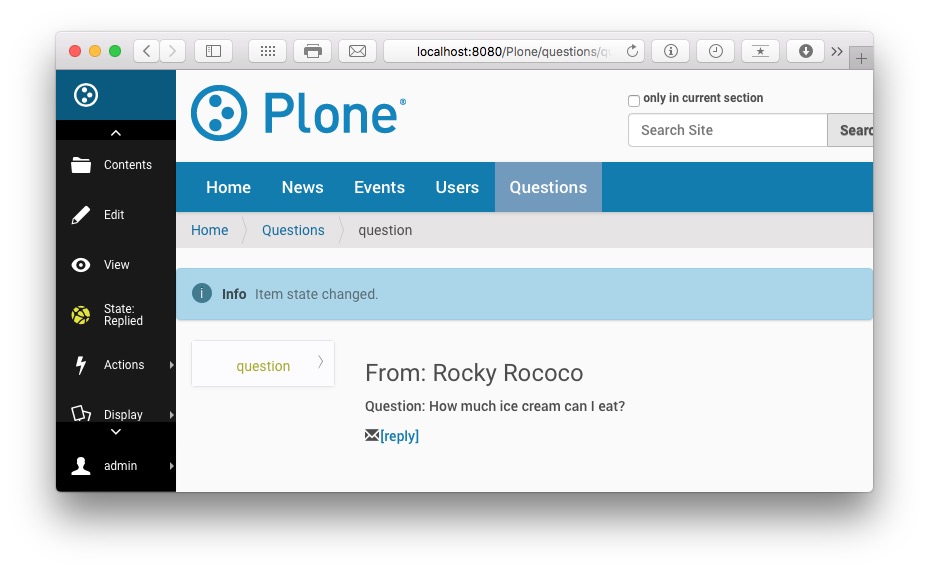
If we click on “Mark as replied”, the question transitions to the “Replied” state:
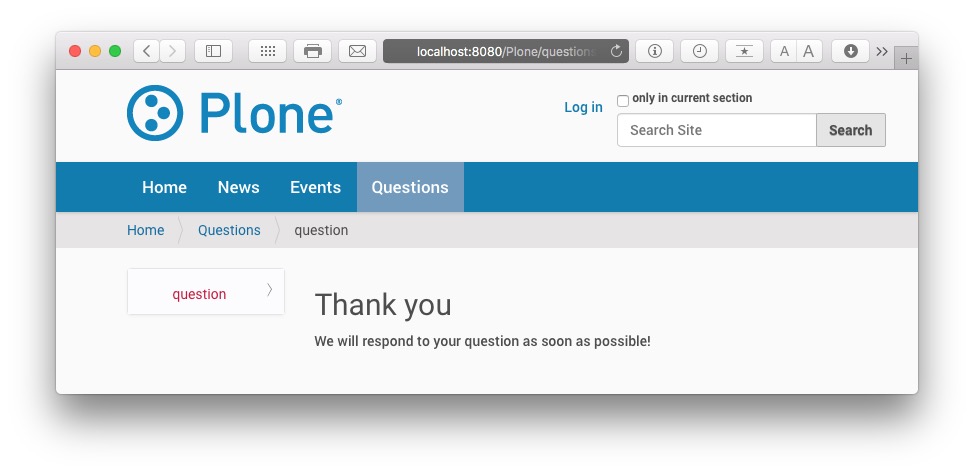
As an anonymous website visitor looking at the same question now sees this:
Bonus Exercise#
You could modify the view template so that it determines the current workflow state of the item, and if the item is in the “Replied” state, instead of the thank you message it displays a message like “Replied: This question has been replied to”.
For even more bonus points, the view template could look up the date on which the question was transitioned to the Replied state, and display it, as in “Replied: This question was replied to on [replied-date]”.
Put It All Together#
We have created a Question content type, created a workflow, assigned the workflow to the content type, and created a view template that works for anonymous user and administrators and that lets administrators transition Question items to the “Replied” state.
In a live deployment of a workflow application, it is important to be able to view which items have or have not yet been processed (in this case, replied to).
Create a Collection#
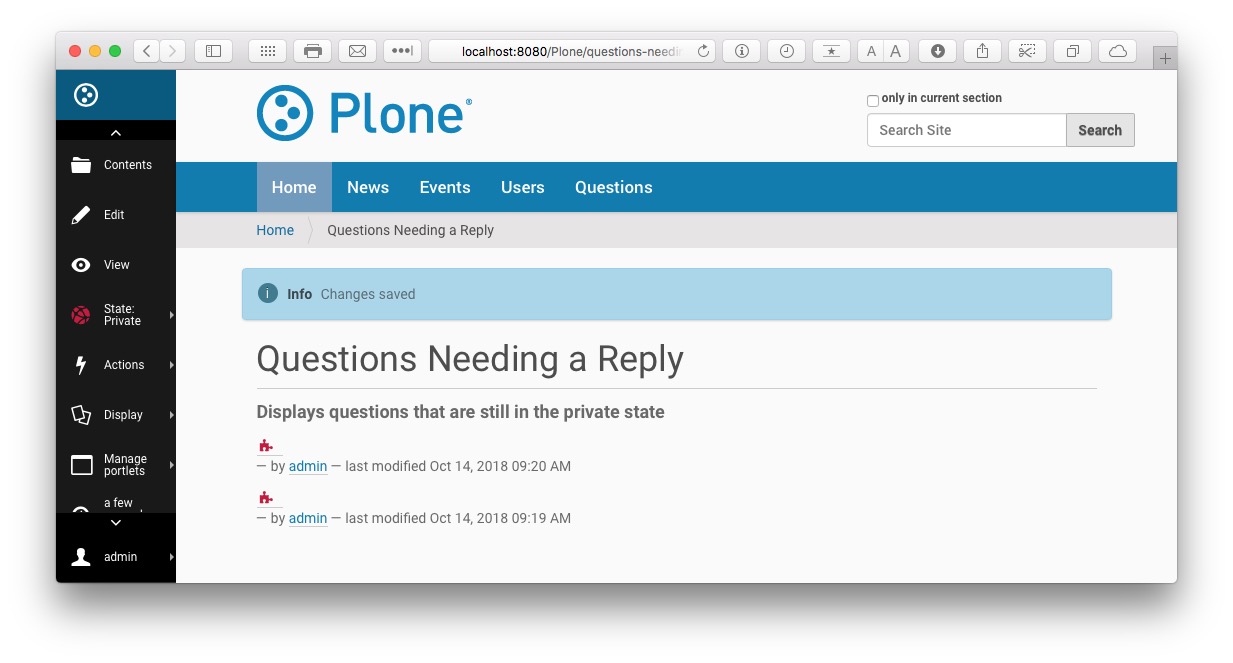
We are going to create a collection that shows all Question items that have not yet been replied to (ie. they are in the private state).
Navigate to the home of the site, http://localhost:8080/Plone
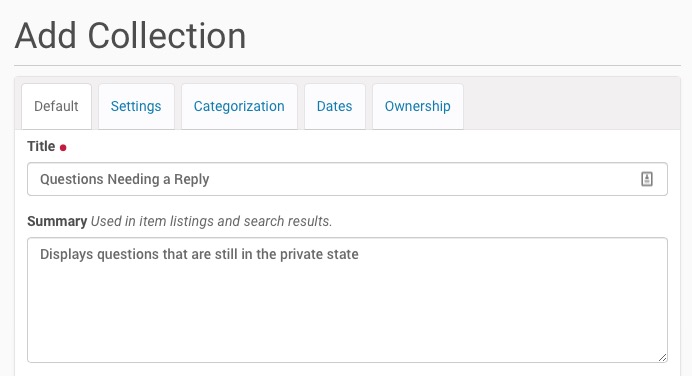
Click “Add new…” and choose “Collection”

Give the new collection the title “Questions Needing a Reply”, and the description “Displays questions that are still in the private state”.
In the “Search terms” fields, click the “Select criteria” drop down and choose “Type”
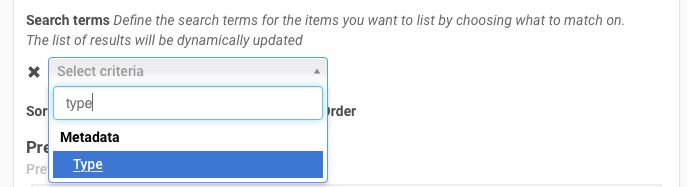
In the field that appears to the right, start typing “que” and select “Question”

Click on “Select criteria”, start typing “sta”, and select “Review state”:
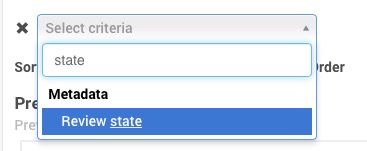
In the field that appears to the right, start typing “pri” and select “Private”

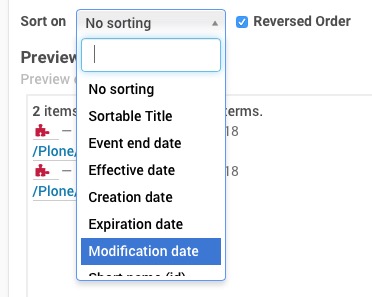
In the “Sort on” field, choose “Modification date” and check the box for “Reversed Order”
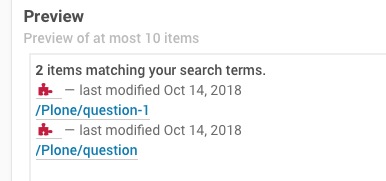
If you have a few Question items already in the site (you should have at least one), you will see them appear in the Preview field
Scroll to the bottom and press the “Save” button.
Change the Home Page#
We want the home page of the site to do two things:
Give instructions to (anonymous) website visitors on how they can submit a question
Show administrators where they can find the list of questions they need to reply to
Navigate to the home page, http://localhost:8080/Plone
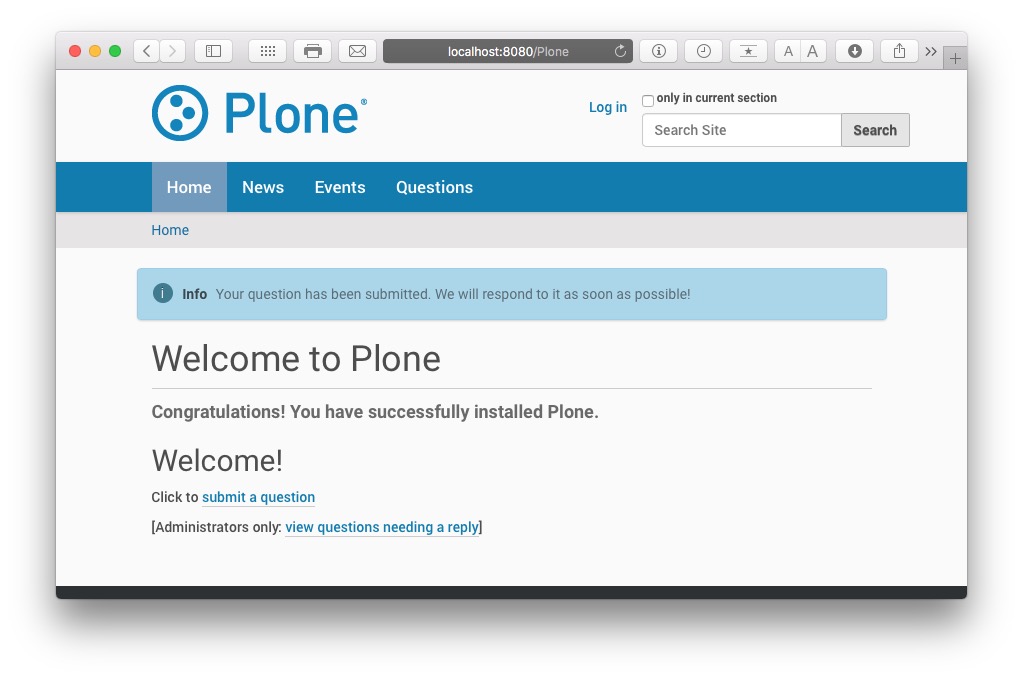
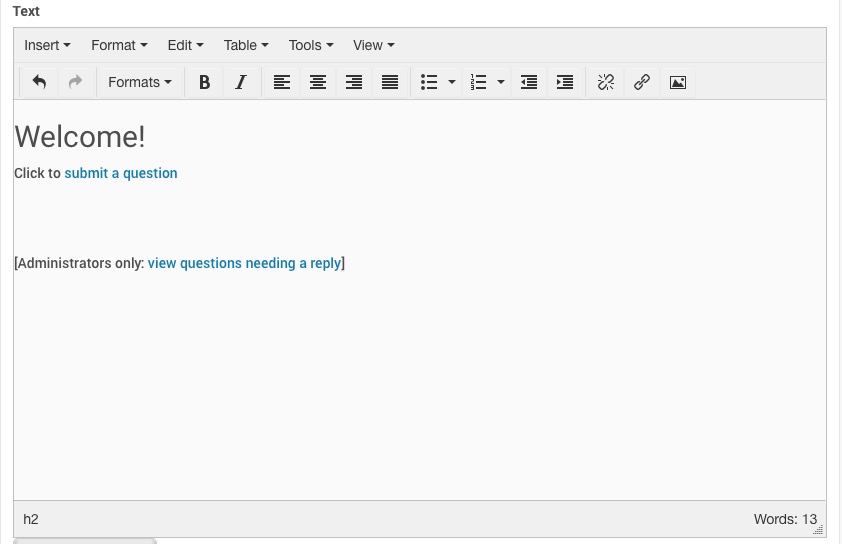
Click Edit in the toolbar, delete everything in the Text field, and add something like this, then scroll down and press the “Save” button:
Your front page should now look something like this:
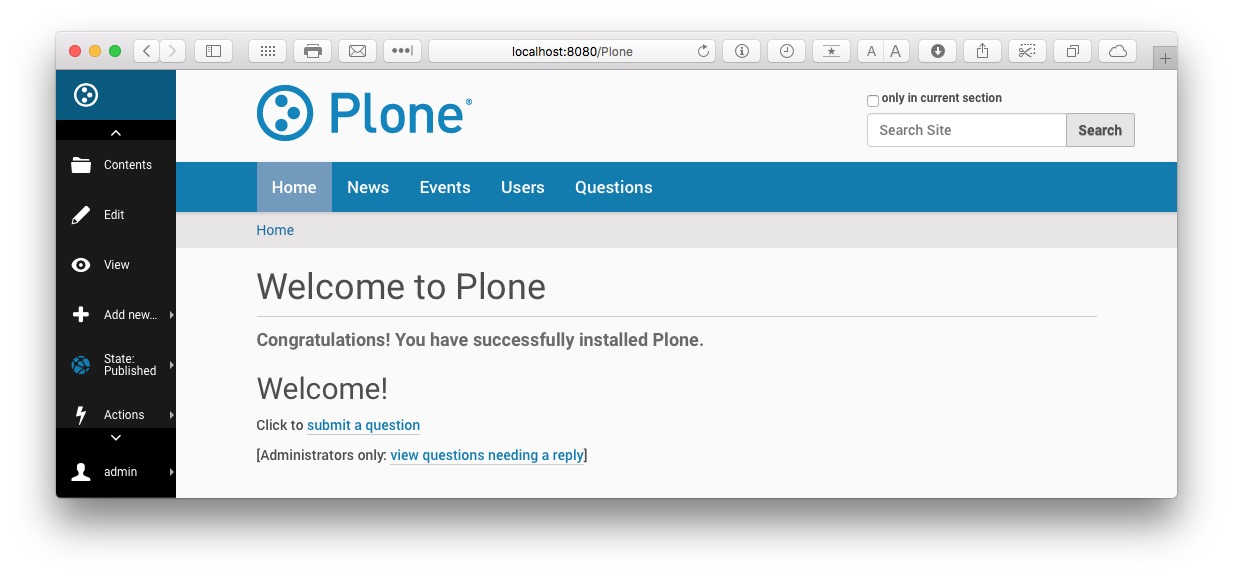
You should test the “submit a question” link on the front page as an anonymous website visitor.
Bonus Exercise#
As a bonus, create a content rule that sends an email to administrators when a question has been submitted.
For extra points, add a collection portlet to the front page that shows the “Questions Needing a Reply” collection.
Review#
In this training class we have covered the following:
what Plone workflow is and does
the benefits of using workflow to replace paper-based forms and processes
the concept of a workflow application
the tools for building workflow applications (built-in and add-ons)
using Dexterity to build a content type
creating a content type view that can act as a thank-you page
creating a containing folder for submitted forms
using the Management Interface to create a workflow and assign it
creating a helpful front page that guides users and administrators
We hope this has served you as a practical introduction to making the most of of Plone’s workflow tool, exploiting it to improve the speed and efficiency of your organization’s business processes.
Further Reading#
General Plone documentation: https://6.docs.plone.org
Plone workflow documentation: https://5.docs.plone.org/working-with-content/collaboration-and-workflow/index.html
Dexterity workflow documentation: https://5.docs.plone.org/external/plone.app.dexterity/docs/advanced/workflow.html
Martin Aspeli's famed "DCWorkflow's Hidden Gems" blog post: https://web.archive.org/web/20190221025627/http://www.martinaspeli.net/articles/dcworkflows-hidden-gems
Page templates: https://5.docs.plone.org/adapt-and-extend/theming/templates_css/template_basics.html#id1
Plone developer training: https://2022.training.plone.org/mastering-plone/index.html
Existing workflow training class: https://2022.training.plone.org/workflow/index.html (it’s more developer oriented)
Alternative tools for building forms in Plone:
A fantastic tool for building workflows in Plone:
Workflow Manager: https://pypi.org/project/plone.app.workflowmanager/
A tool for importing and exporting workflows in a relatively friendly way, as CSV files: https://pypi.org/project/collective.wtf/
Presentations on workflow applications, given at various Plone Conferences and Symposia:
“Building Workflow Applications Through the Web” https://www.slideshare.net/tkimnguyen/building-workflow-applications-through-the-web
“Killer Workflow Apps! Get Rich Quick With an Intranet!” https://www.slideshare.net/tkimnguyen/killer-workflow-apps-get-rich-quick-with-an-intranet
“Easy online business processes with Plone forms and workflow” https://www.slideshare.net/tkimnguyen/easy-online-business-processes-with-plone-forms-and-workflow