8. Extending Plone with add-on packages#
Backend chapter
For frontend add-ons see chapter Using Volto add-ons.
The creation of a custom backend add-on is explained in Roundtrip [The voting story] frontend, backend, and REST
Plone add-ons enrich the CMS by
adding content types
adding behaviors with new fields, relations and other features for existing and custom content types
adding blocks to add elementary content snippets to a page
designing the layout
customizing the editor experience
adding content assembling features for overview pages
Plone 6 knows two groups of add-ons: add-ons for Plone and such for the frontend Volto.
Plone backend add-ons provide
content types
behaviors to enrich content types
Plone frontend add-ons provide
new blocks
variations and enhancements of blocks
a theme to design the layout of a site
components independent of blocks like a dropdown navigation
Both can be coupled, if a frontend feature depends on a new content type, a new behavior or any other change needed in data structure. For example an add-on that has the goal to provide a bookmarking feature depends on a backend add-on that handles the storing of the bookmarks.
Have a look at the curated lists of add-ons:
Awesome Plone: backend add-ons
Awesome Volto: frontend add-ons
8.1. How to find appropriate add-ons#
It can be hard to find the right add-on for your requirements. Here are some tips.
Make a list of required features.
Find candidates on PyPI, npm or GitHub:
curated list of backend add-ons
curated list of frontend add-ons
Python packages on PyPI: https://pypi.org/search/?c=Framework+%3A%3A+Plone
Plone add-ons on GitHub: collective
Plone core packages on GitHub: plone
Google (for example Plone+Slider)
JavaScript packages on npm: https://www.npmjs.com/search?q=Volto
Once you have a shortlist, test these add-ons. Here are the main issues you need to test before you install an add-on on a production site:
Test all required features. Read but do not trust the documentation.
Check if the add-on runs on your required Plone and Python version.
Check if it is currently maintained.
Does it have i18n-support and is the user interface translated to your language?
Does it uninstall cleanly? A tough one. See https://lucafbb.blogspot.com/2013/05/how-to-make-your-plone-add-on-products.html for the reason why.
Check for unwanted dependencies.
Once you found an add-on you like, you can ask the community if you made a good choice or if you missed something:
Message Board: https://community.plone.org
There is also a talk that discusses in depth how to find the right add-on: https://www.youtube-nocookie.com/embed/Sc6NkqaSjqw?privacy_mode=1
Either extend an existing add-on to fit your needs or create a new add-on that does exactly what you need.
8.2. Installing Plone add-ons#
We have two groups of add-ons: backend and frontend.
The training setup starts without any frontend add-on. Later on we will add features via a frontend add-on. See chapter Using Volto add-ons how to install a frontend add-on.
The training setup starts with one backend add-on ploneconf.site.
Let's see how it is installed.
Making a backend add-on package available to Zope#
First, we must make the add-on package available to Zope. This means that Zope can import the code.
A backend add-on is a Python package. Therefore we install it with pip.
Look at the requirements.txt file.
You add a package to the configuration by adding a new line containing the package name.
If the add-on is not released on PyPI, we tell Zope where to find the package on Github or another repository platform by including the necessary information in mx.ini.
[training.votable]
url=git@github.com:collective/training.votable.git
branch=main
; tag=volto
Adding the package to instance.yaml causes the generation of the Zope configuration to make the package available in a Zope app.
zcml_package_includes: training.votable, ploneconf.site
Running make build has three effects:
The build installs the python package with
pip.The build generates in
instance/a Zope instance configuration that makes the package available in our Zope app.As soon as the Zope app is started via
make start, the add-on can be enabled per Plone instance. A Zope app can include multiple Plone instances. So an add-on can be enabled per Plone instance.
See also
Documentation Install Plone add-ons
Enabling add-ons in your Plone site#
An add-on can be enabled per Plone instance.
In your browser, go to Site Setup at http://localhost:3000/controlpanel, and open the Add-ons control panel. You will see a list of available add-ons.
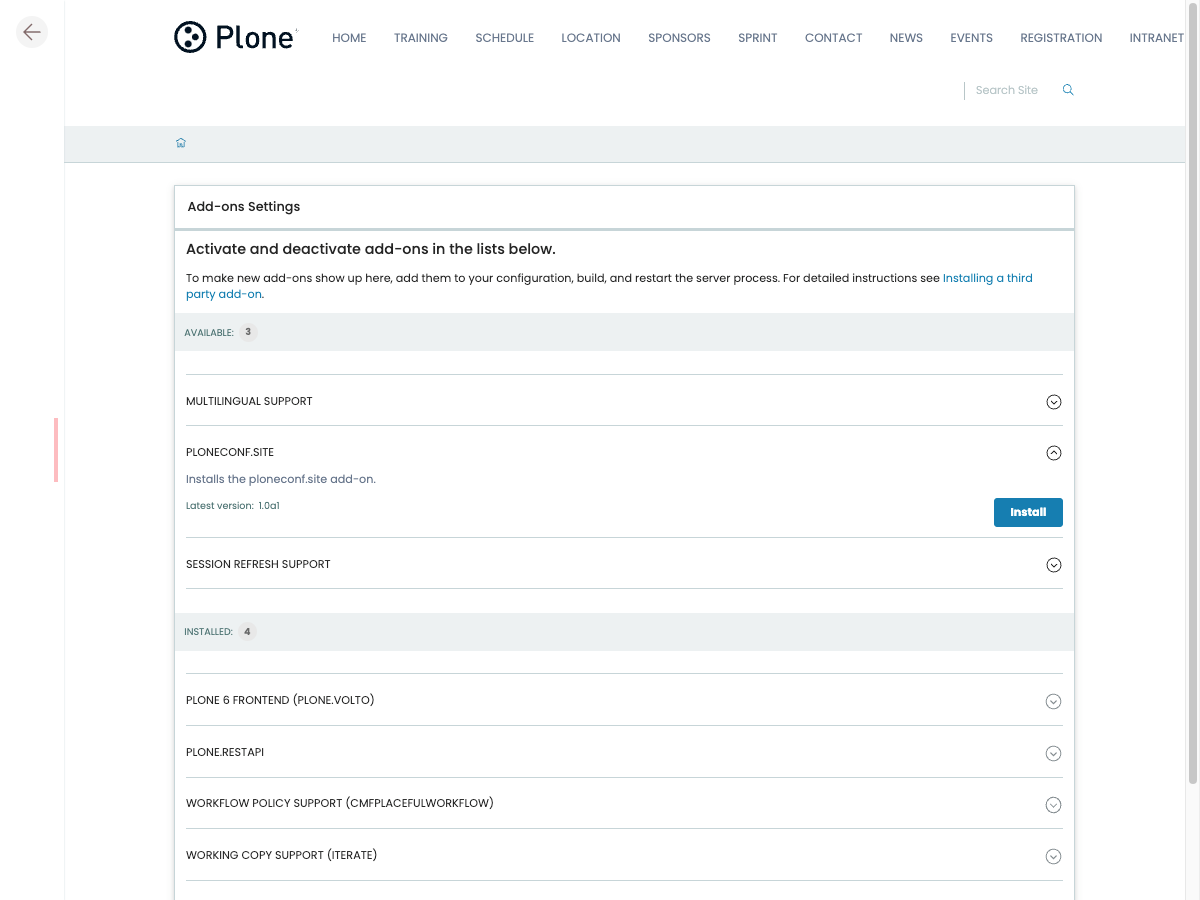
Enable ploneconf.site now if you haven't done already.
This is what happens: The GenericSetup profile of the product gets loaded. This does things like:
Registering new content types
Registering behaviors
Configuring new actions
Create catalog indexes
All this is configured in the default GenericSetup profile, which can be found in backend/sources/<package name>/src/<package name>/profiles/default.
In the next chapters we will add here our content type talk, configure a catalog index, and some more.
8.3. Summary#
We have seen in short how to extend a vanilla Plone website with third party add-ons to add new functionality. Even if you do not use many of these, they are nonetheless an inspiration on how to implement features in Plone.
For frontend add-ons see chapter Using Volto add-ons