5. Create a theme based on Diazo#
We're going to create a theme package for Plone 6 Classic UI, that is based on the Business Casual theme from startbootstrap.com.
Integrating a custom layout (static mockup) with Plone classic UI,
Use Case
You have an existing static layout coming from a website or a designer.
You want to integrate this layout without changing too much.
You want to use the Plone default layout for all edit-/backend-view's.
What you will learn
How to create your theme package with
plonecliHow to create the content structure for your theme
How to integrate your static layout into the theme
How to add and compile your styles
How to create HTML snippets as TinyMCE templates
How to create content type's and views
5.1. Creating a theme package#
To create a file system based theme, we first create a new addon package for Plone:
$ plonecli create addon plonetheme.businesscasual22
Answer some questions about the package:
--> Author's name [Your Name]:

--> Author's email [yourname@example.com]:

--> Author's GitHub username: your_github_name_

--> Package description [An add-on for Plone]:

--> Do you want me to initialize a GIT repository in your new package?

--> Plone version [6.0.0]:

--> Python version for virtualenv [python3]:

--> Do you want me to activate VS Code support? (y/n) [y]:

Generated file structure at ... ./plonetheme.businesscasual22
Change into the generated package folder:
$ cd plonetheme.businesscasual22
now we want to add a theme, to the addon:
$ plonecli add theme
--> Theme name [My Theme]: Plone Theme Business casual 2022
5.2. Integrate the static layout#
Download the Bootstrap theme Business Casual and extract the content into the theme folder under src/plonetheme/businesscasual22/theme/.
Your folder structure should now look like this:
├── about.html
├── assets
│   ├── favicon.ico
│   └── img
│       ├── about.jpg
│       ├── bg.jpg
│       ├── intro.jpg
│       ├── products-01.jpg
│       ├── products-02.jpg
│       └── products-03.jpg
├── css
│   └── styles.css
├── index.html
├── js
│   └── scripts.js
├── manifest.cfg
├── package.json
├── products.html
├── README.rst
├── rules.xml
├── store.html
└── tinymce-templates
    ├── bs-dark-hero.html
    ├── bs-hero-left.html
    └── bs-pricing.html
5.3. Showtime, build your setup and test your theme#
Run plonecli build to get build a development setup with Plone.
$ plonecli build
After that you can start your Plone site with:
$ plonecli serve

[...]

Serving on http://0.0.0.0:8080
Open http://localhost:8080 in a Browser and see that Plone is running.
Click Create a new Plone site and enter admin for Username and also for Password
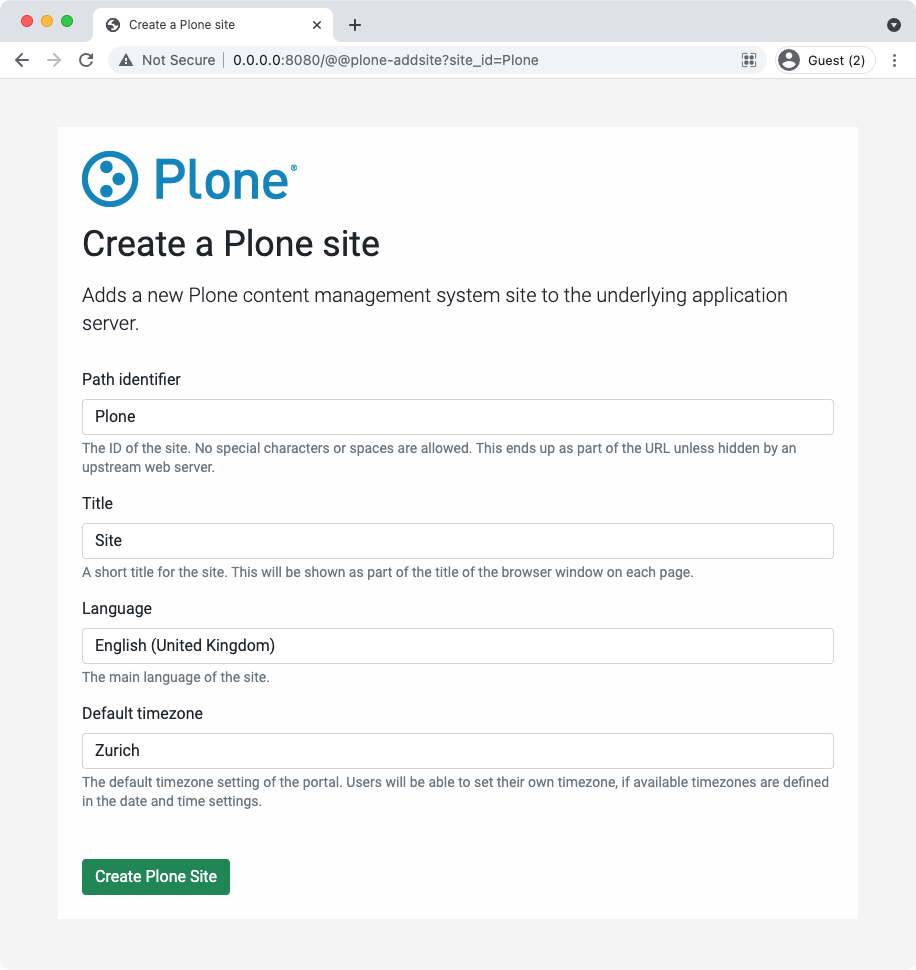
Click Create Plone Site to complete the setup of your Plone instance.
To enable your theme:
Go to the Plone Control Panel: {menuselection}
toolbar --> admin --> Site SetupGo to the "Add-ons" control panel.
You will see this form:
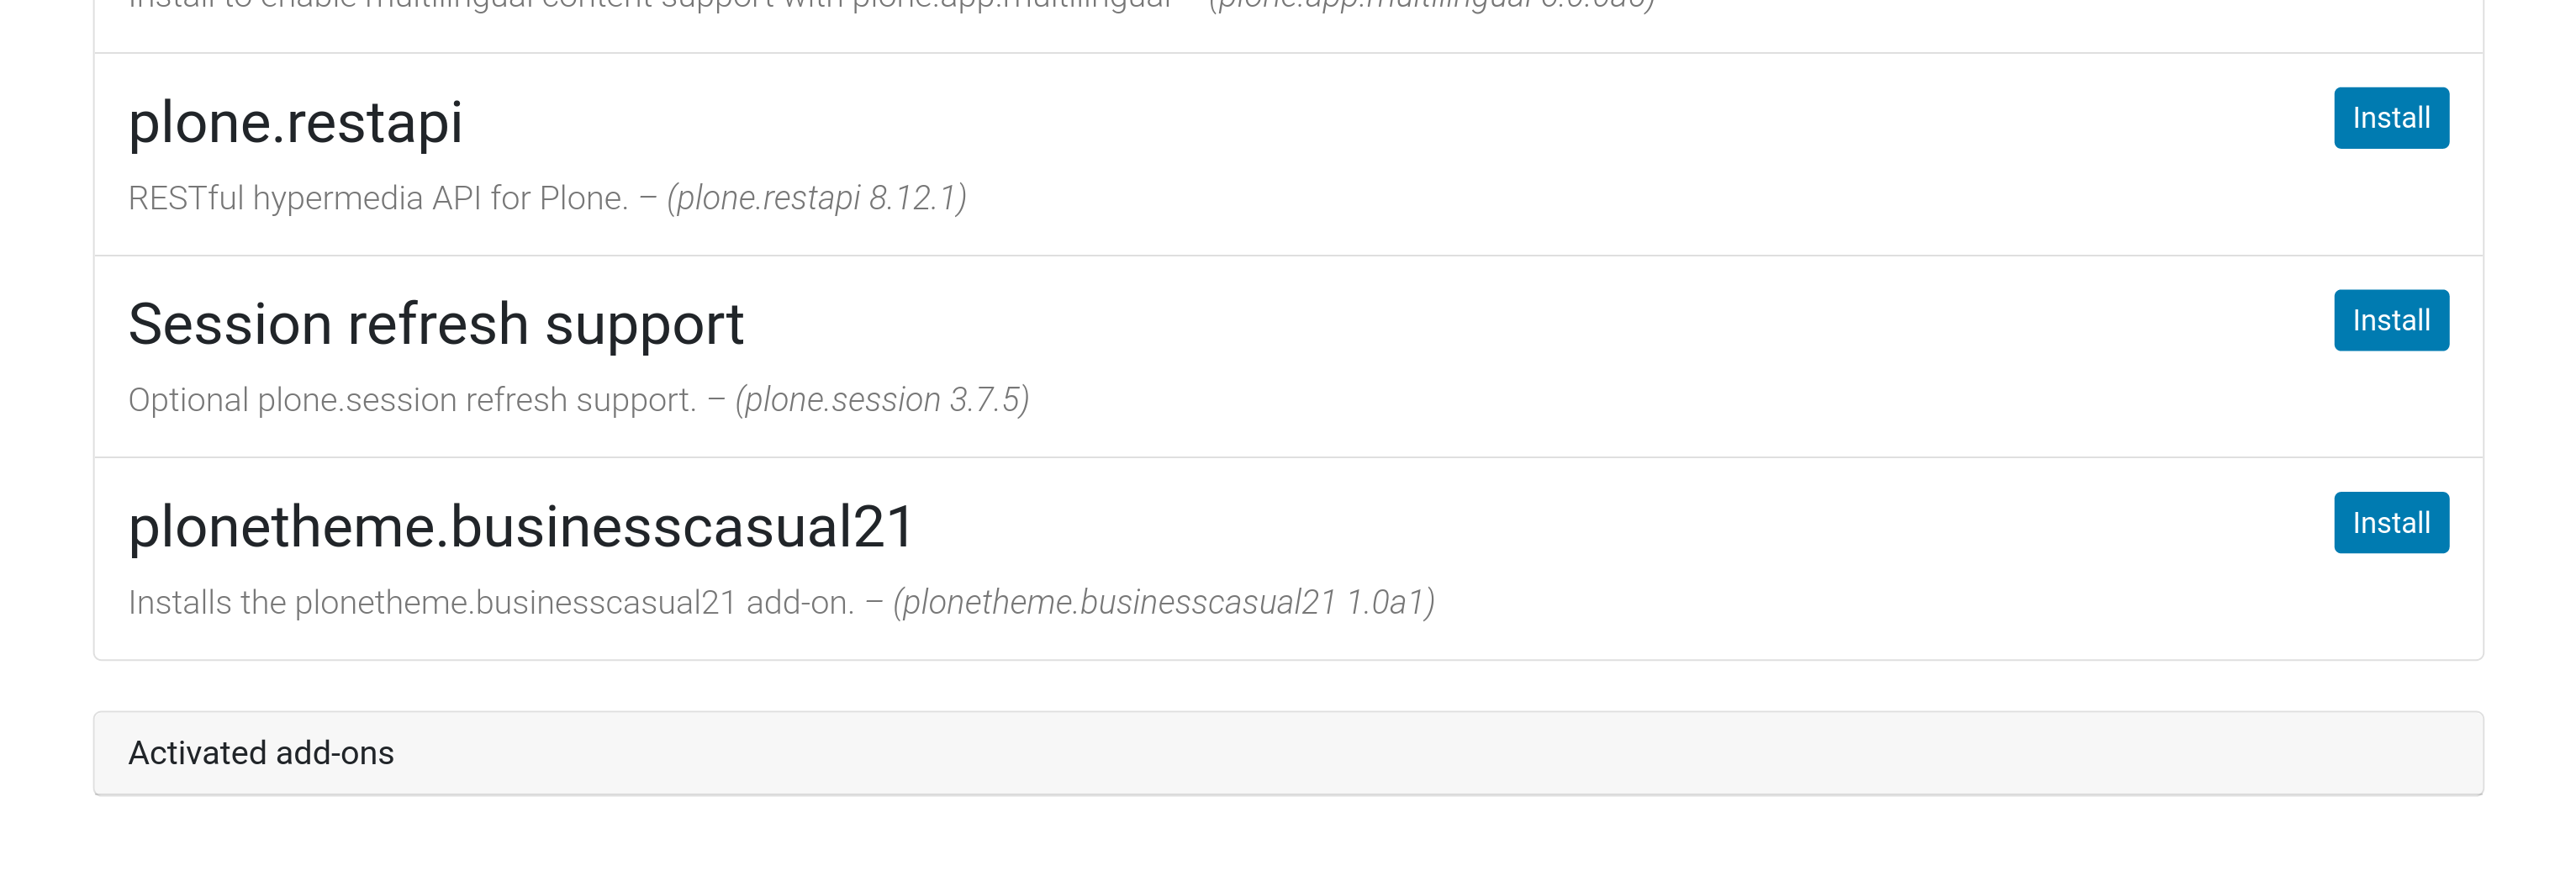
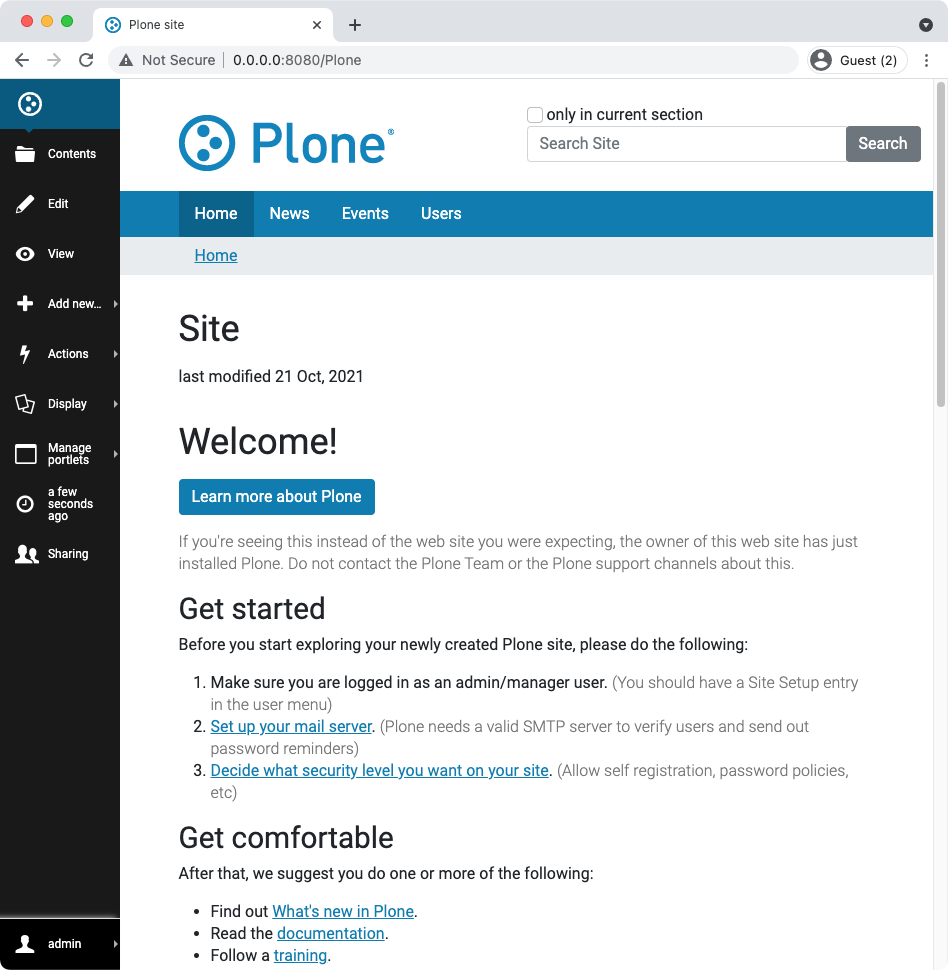
Click Install to enable your addon package. To see the theme layout, go to the start page.
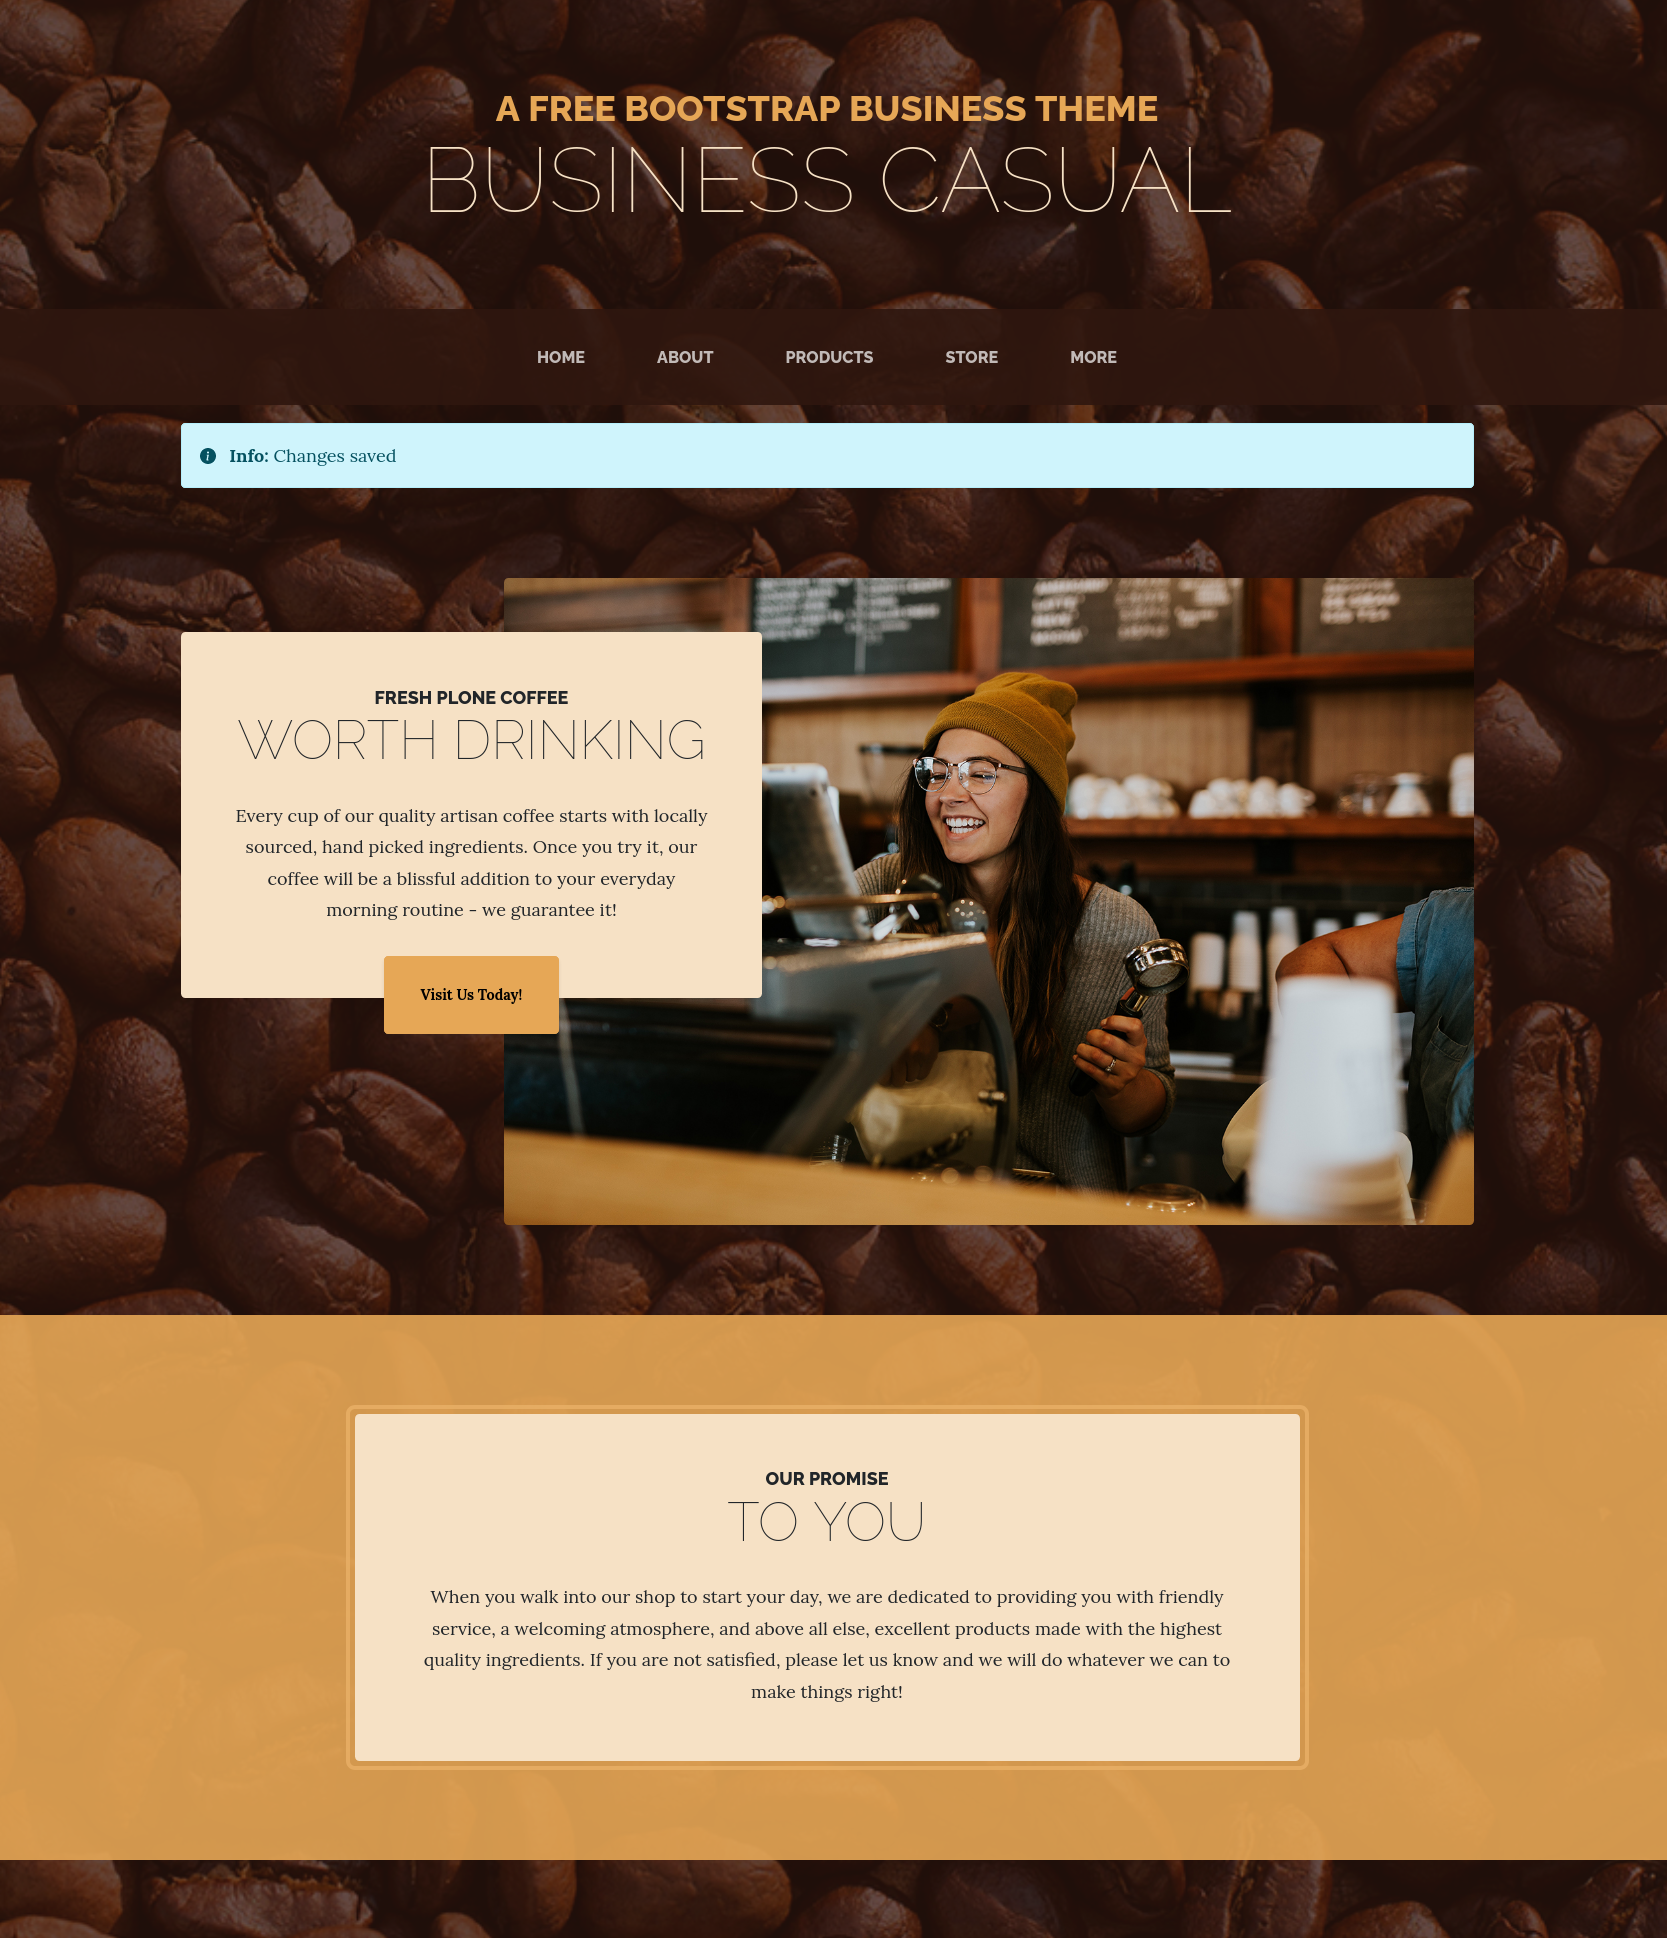
Since the theme for now is rather static, we will deactivate it for now. For that go to the Plone Control Panel: {menuselection} toolbar --> admin --> Site Setup and then to Theming and click on activate on the Barceloneta theme. We now have again the default theme active.
5.4. Creating content for our theme to shine#
On the root level, we add the following folders:
About
Products
Store
More
In the folders About and Store we add a Page and make it the default page.
For the folder Products we are going to use a Collection instead and making it the default page. The criteria for the Collection we will define later.
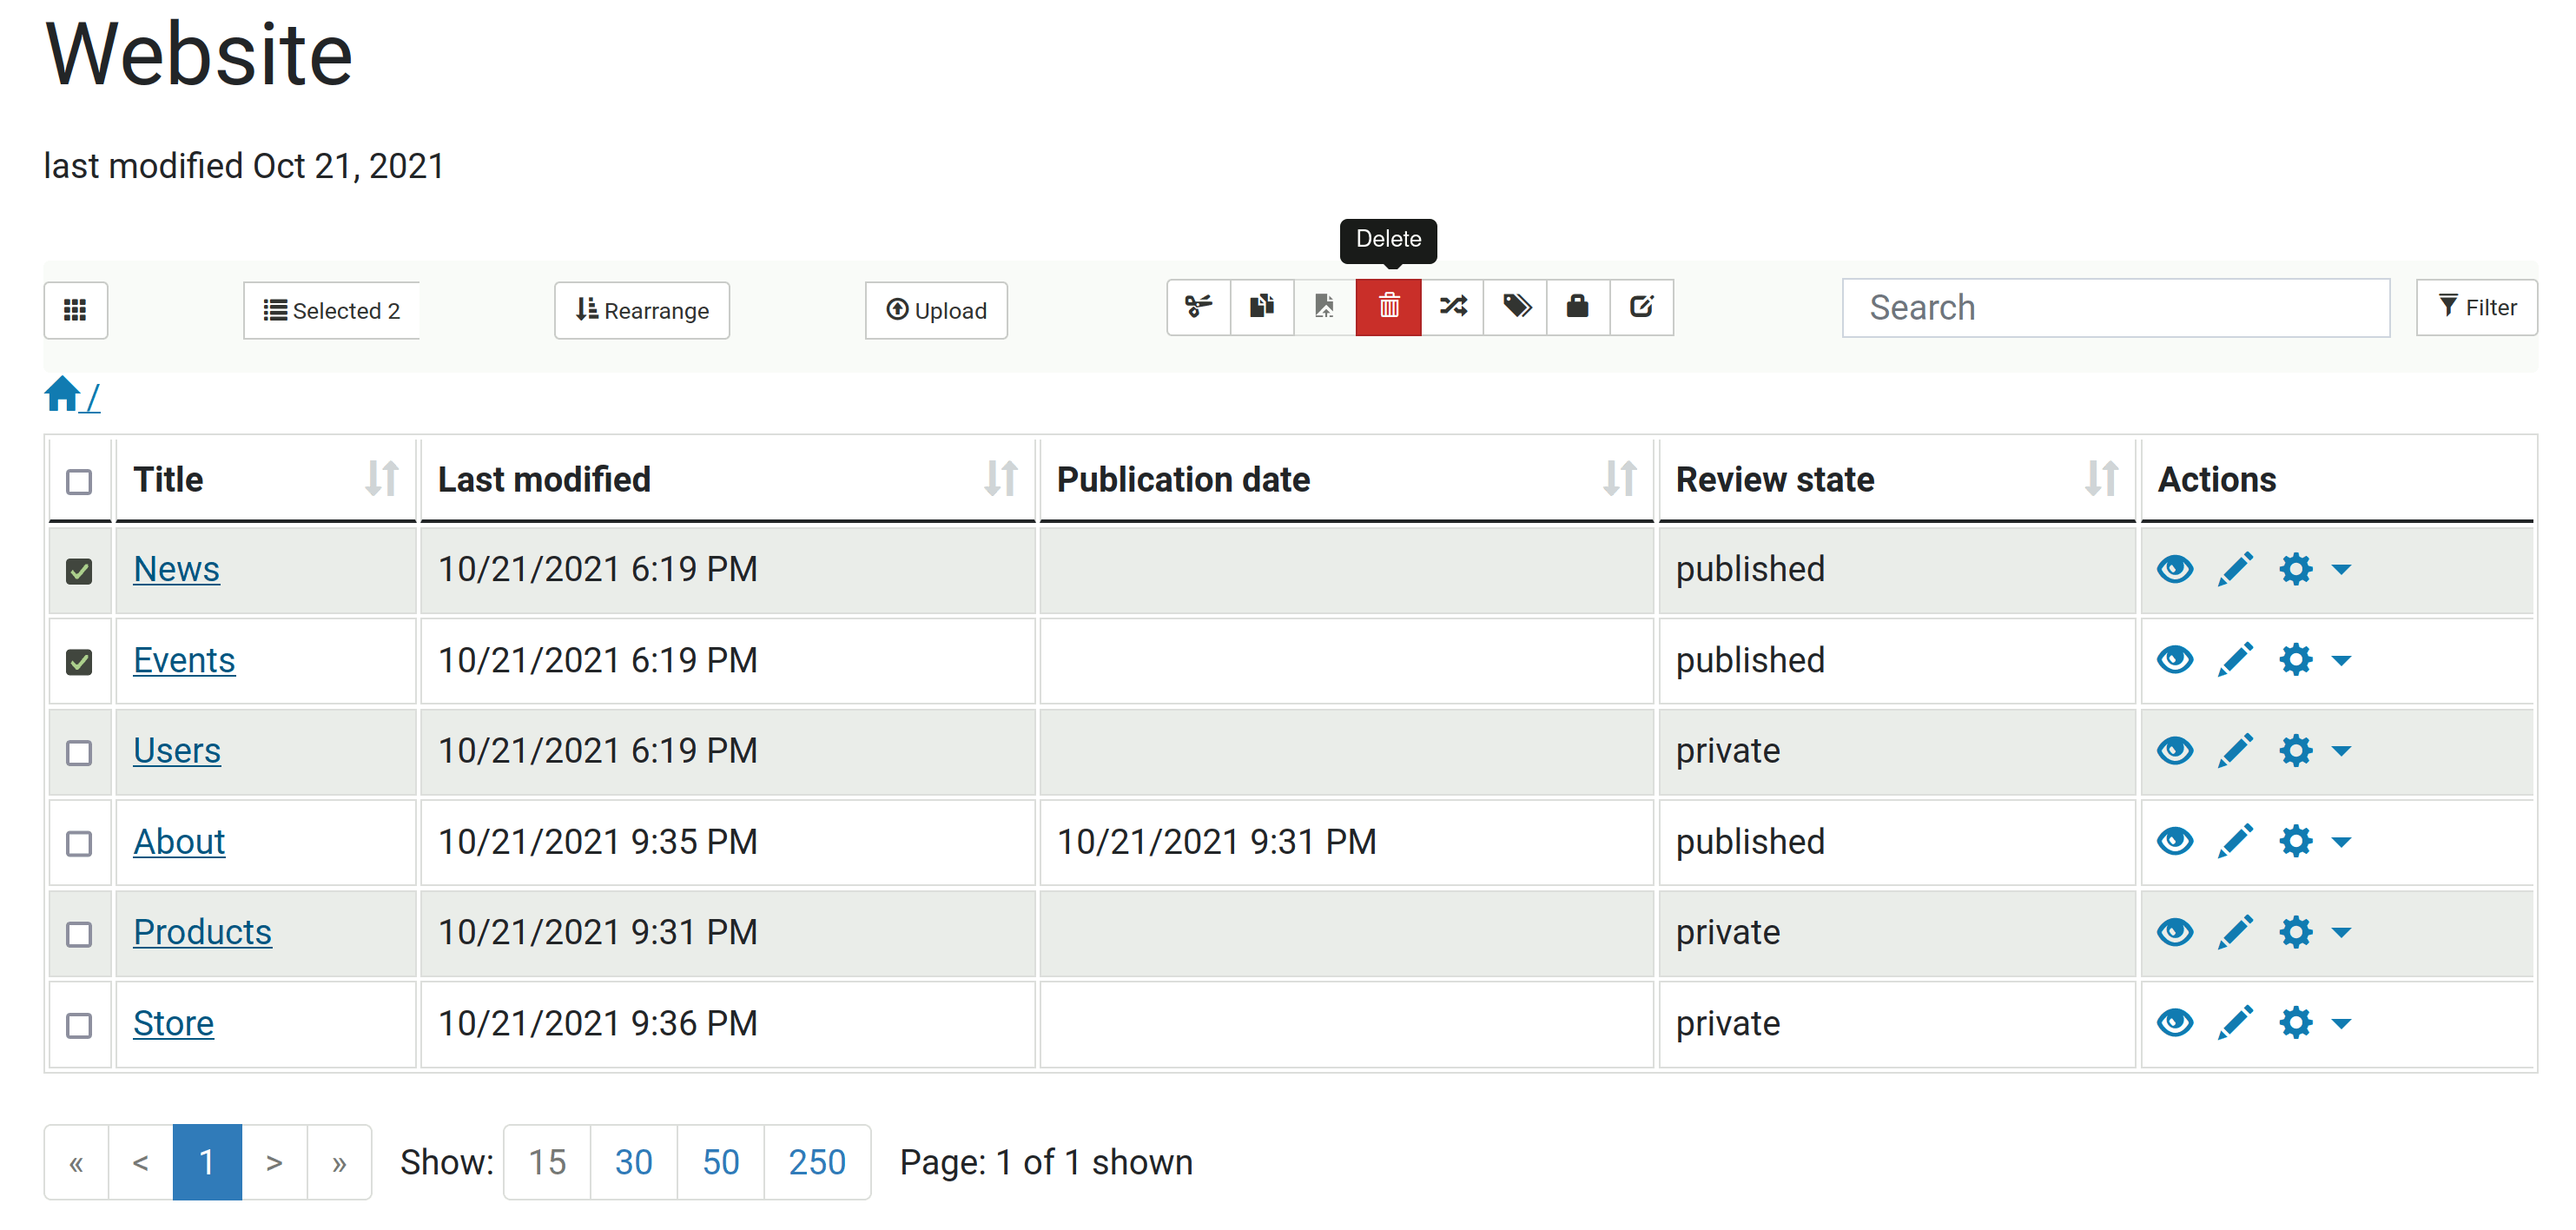
Let's cleanup some of the default content. In the toolbar click on Contents, mark news, events and users folders and press the delete button.
5.5. Adding HTML snippets as TinyMCE templates#
Since our layout requires a specific content layout, which would be hard to create manually, we will create these HTML structures as TinyMCE templates. To do so, we copy the desired HTML snippets from the layout and add them to the tinymce-templates folder in our theme.
Let's start with the About section. With the inspector from of the Browser we simple copy the HTML and insert it in the section-about.HTML file. We also wrap it in the <div class="mceTmpl"> tag.
section-about.html:
<div class="mceTmpl">
  <section class="page-section about-heading">
    <div class="container">
      <img class="img-fluid rounded about-heading-img mb-3 mb-lg-0" src="++theme++plone-theme-business-casual-2022/assets/img/about.jpg" alt="...">
      <div class="about-heading-content">
        <div class="row">
          <div class="col-xl-9 col-lg-10 mx-auto">
            <div class="bg-faded rounded p-5">
              <h2 class="section-heading mb-4">
                <span class="section-heading-upper">Strong Coffee, Strong Roots</span>
                <span class="section-heading-lower">About Our Cafe</span>
              </h2>
              <p>Founded in 1987 by the Hernandez brothers, our establishment has been serving up rich coffee sourced from
                artisan farmers in various regions of South and Central America. We are dedicated to travelling the world,
                finding the best coffee, and bringing back to you here in our cafe.</p>
              <p class="mb-0">
                We guarantee that you will fall in
                <em>lust</em>
                with our decadent blends the moment you walk inside until you finish your last sip. Join us for your daily
                routine, an outing with friends, or simply just to enjoy some alone time.
              </p>
            </div>
          </div>
        </div>
      </div>
    </div>
  </section>
</div>
Note
Please make sure to prepend the image paths with ++theme++plone-theme-business-casual-2022/
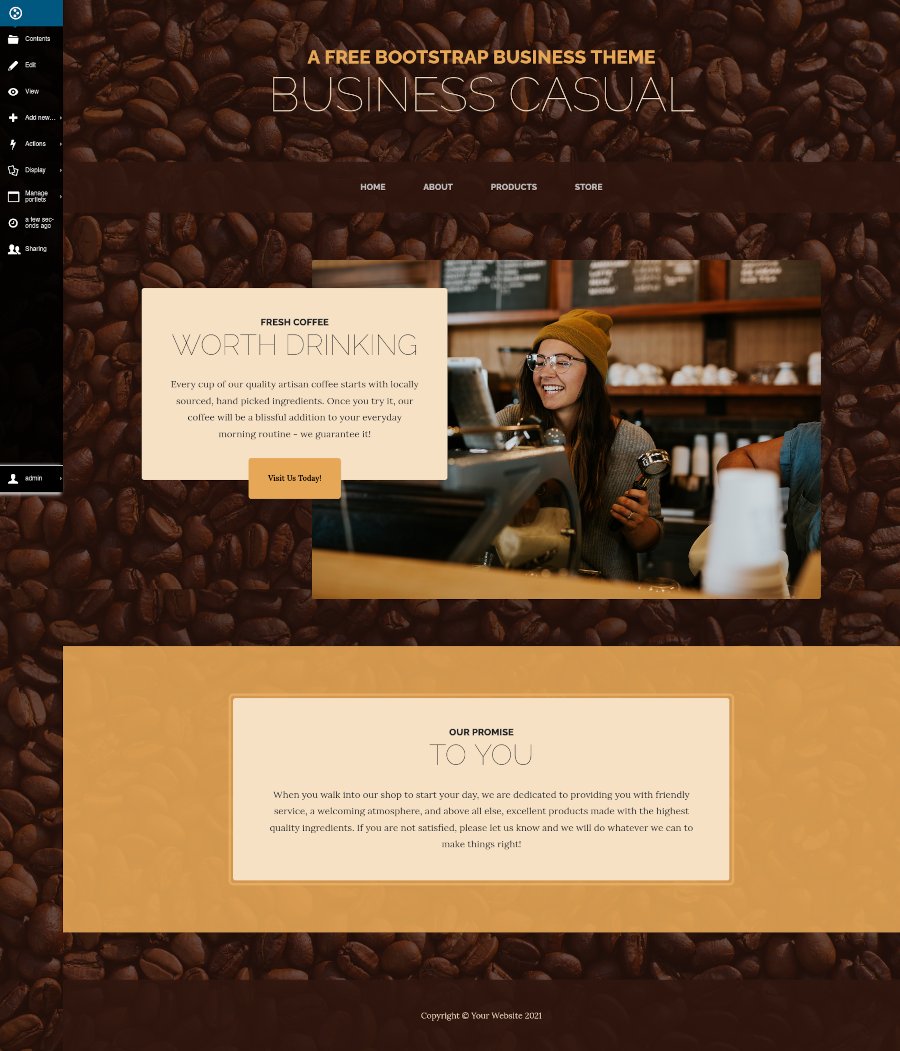
section-intro.html:
<div class="mceTmpl">
  <section class="page-section clearfix">
    <div class="container">
      <div class="intro">
        <img class="intro-img img-fluid mb-3 mb-lg-0 rounded" src="++theme++plone-theme-business-casual-2022/assets/img/intro.jpg" alt="...">
        <div class="intro-text left-0 text-center bg-faded p-5 rounded">
          <h2 class="section-heading mb-4">
            <span class="section-heading-upper">Fresh Coffee</span>
            <span class="section-heading-lower">Worth Drinking</span>
          </h2>
          <p class="mb-3">Every cup of our quality artisan coffee starts with locally sourced, hand picked ingredients.
            Once you try it, our coffee will be a blissful addition to your everyday morning routine - we guarantee it!
          </p>
          <div class="intro-button mx-auto"><a class="btn btn-primary btn-xl" href="#!">Visit Us Today!</a></div>
        </div>
      </div>
    </div>
  </section>
</div>
Note
Please make sure to prepend the image paths with ++theme++plone-theme-business-casual-2022/
section-promise.html:
<div class="mceTmpl">
  <section class="page-section cta">
    <div class="container">
      <div class="row">
        <div class="col-xl-9 mx-auto">
          <div class="cta-inner bg-faded text-center rounded">
            <h2 class="section-heading mb-4">
              <span class="section-heading-upper">Our Promise</span>
              <span class="section-heading-lower">To You</span>
            </h2>
            <p class="mb-0">When you walk into our shop to start your day, we are dedicated to providing you with
              friendly service, a welcoming atmosphere, and above all else, excellent products made with the highest
              quality ingredients. If you are not satisfied, please let us know and we will do whatever we can to make
              things right!</p>
          </div>
        </div>
      </div>
    </div>
  </section>
</div>
section-opening-hours.html:
<div class="mceTmpl">
  <section class="page-section cta">
    <div class="container">
      <div class="row">
        <div class="col-xl-9 mx-auto">
          <div class="cta-inner bg-faded text-center rounded">
            <h2 class="section-heading mb-5">
              <span class="section-heading-upper">Come On In</span>
              <span class="section-heading-lower">We're Open</span>
            </h2>
            <ul class="list-unstyled list-hours mb-5 text-left mx-auto">
              <li class="list-unstyled-item list-hours-item d-flex">
                Sunday
                <span class="ms-auto">Closed</span>
              </li>
              <li class="list-unstyled-item list-hours-item d-flex">
                Monday
                <span class="ms-auto">7:00 AM to 8:00 PM</span>
              </li>
              <li class="list-unstyled-item list-hours-item d-flex">
                Tuesday
                <span class="ms-auto">7:00 AM to 8:00 PM</span>
              </li>
              <li class="list-unstyled-item list-hours-item d-flex">
                Wednesday
                <span class="ms-auto">7:00 AM to 8:00 PM</span>
              </li>
              <li class="list-unstyled-item list-hours-item d-flex today">
                Thursday
                <span class="ms-auto">7:00 AM to 8:00 PM</span>
              </li>
              <li class="list-unstyled-item list-hours-item d-flex">
                Friday
                <span class="ms-auto">7:00 AM to 8:00 PM</span>
              </li>
              <li class="list-unstyled-item list-hours-item d-flex">
                Saturday
                <span class="ms-auto">9:00 AM to 5:00 PM</span>
              </li>
            </ul>
            <p class="address mb-5">
              <em>
                <strong>1116 Orchard Street</strong>
                <br>
                Golden Valley, Minnesota
              </em>
            </p>
            <p class="mb-0">
              <small><em>Call Anytime</em></small>
              <br>
              (317) 585-8468
            </p>
          </div>
        </div>
      </div>
    </div>
  </section>
</div>
when you are done with it, the tinymce-templates folder should look like this:
tinymce-templates/
├── bs-dark-hero.html
├── bs-hero-left.html
├── bs-pricing.html
├── section-about.html
├── section-intro.html
├── section-opening-hours.html
└── section-promise.html
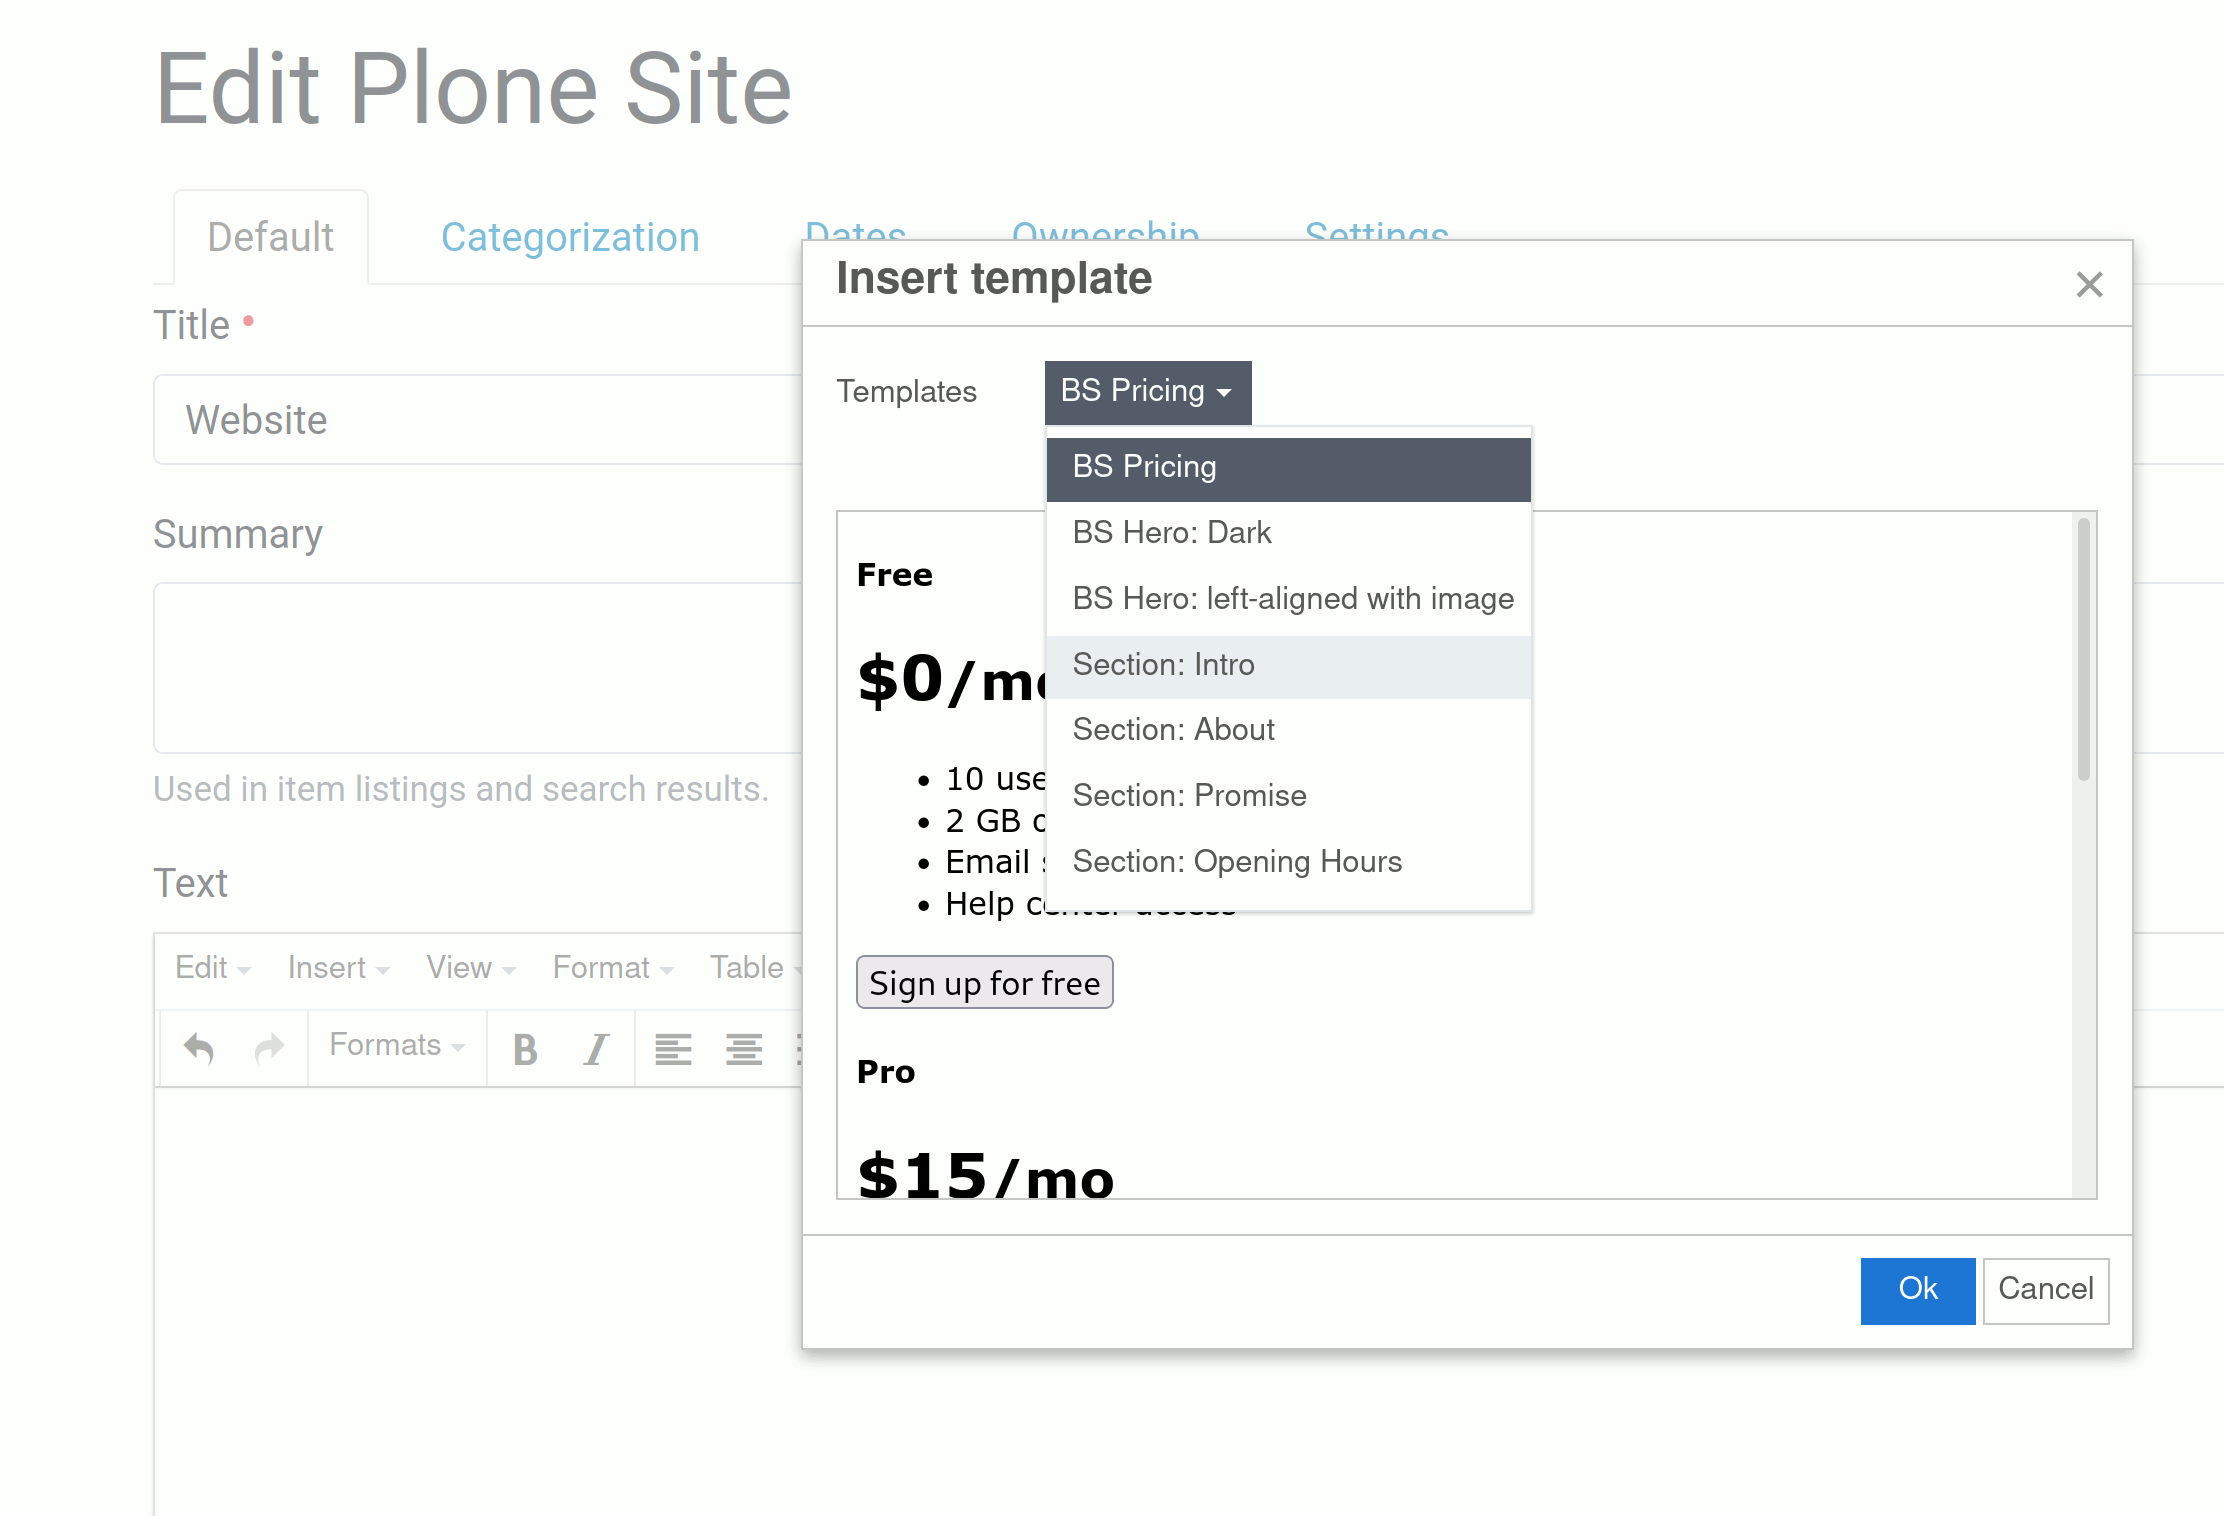
Now we need to register the templates for the TinyMCE editor. You could do this manually in the TinyMCE control panel, but we will do the registration with the package in profiles/default/registry/tinymce.xml.
Right now it should look like this:
<?xml version="1.0"?>
<registry>

  <record name="plone.templates" interface="Products.CMFPlone.interfaces.controlpanel.ITinyMCESchema" field="templates">
    <field type="plone.registry.field.Text">
      <default></default>
      <description xmlns:ns0="http://xml.zope.org/namespaces/i18n" ns0:domain="plone" ns0:translate="help_tinymce_templates">Enter the list of templates in json format http://www.tinymce.com/wiki.php/Plugin:template</description>
      <required>False</required>
      <title xmlns:ns0="http://xml.zope.org/namespaces/i18n" ns0:domain="plone" ns0:translate="label_tinymce_templates">Templates</title>
    </field>
    <value>[
      {"title": "BS Pricing", "url": "++theme++plone-theme-business-casual-2022/tinymce-templates/bs-pricing.html"},
      {"title": "BS Hero: Dark", "url": "++theme++plone-theme-business-casual-2022/tinymce-templates/bs-dark-hero.html"},
      {"title": "BS Hero: left-aligned with image", "url": "++theme++plone-theme-business-casual-2022/tinymce-templates/bs-hero-left.html"}
      ]
    </value>
  </record>

  <record name="plone.custom_plugins" interface="Products.CMFPlone.interfaces.controlpanel.ITinyMCESchema" field="custom_plugins">
    <field type="plone.registry.field.List">
      <default/>
      <description xmlns:ns0="http://xml.zope.org/namespaces/i18n" ns0:domain="plone" ns0:translate="">Enter a list of custom plugins which will be loaded in the editor. Format is pluginname|location, one per line.</description>
      <required>False</required>
      <title xmlns:ns0="http://xml.zope.org/namespaces/i18n" ns0:domain="plone" ns0:translate="">Custom plugins</title>
      <value_type type="plone.registry.field.TextLine"/>
    </field>
    <value>
      <element>template|++plone++static/components/tinymce-builded/js/tinymce/plugins/template</element>
    </value>
  </record>

 <!-- <records interface="Products.CMFPlone.interfaces.controlpanel.IFilterSchema" prefix="plone">
    <value key="custom_attributes" purge="false">
      <element></element>
    </value>
  </records> -->

  <records interface="Products.CMFPlone.interfaces.controlpanel.IFilterSchema" prefix="plone">
    <value key="valid_tags" purge="false">
      <element>button</element>
    </value>
  </records>

</registry>
In the first record, we add our new template files as follow:
    <value>[
      {"title": "BS Pricing", "url": "++theme++plone-theme-business-casual-2022/tinymce-templates/bs-pricing.html"},
      {"title": "BS Hero: Dark", "url": "++theme++plone-theme-business-casual-2022/tinymce-templates/bs-dark-hero.html"},
      {"title": "BS Hero: left-aligned with image", "url": "++theme++plone-theme-business-casual-2022/tinymce-templates/bs-hero-left.html"},
      {"title": "Section: Intro", "url": "++theme++plone-theme-business-casual-2022/tinymce-templates/section-intro.html"},
      {"title": "Section: About", "url": "++theme++plone-theme-business-casual-2022/tinymce-templates/section-about.html"},
      {"title": "Section: Promise", "url": "++theme++plone-theme-business-casual-2022/tinymce-templates/section-promise.html"},
      {"title": "Section: Opening Hours", "url": "++theme++plone-theme-business-casual-2022/tinymce-templates/section-opening-hours.html"}
      ]
    </value>
That's all, after uninstalling/installing the addon we will have the new templates in the TinyMCE.
5.6. Inspect and optimize our layout file#
The index.html file of the Bootstrap theme we got, looks as follow:
<!DOCTYPE html>
<html lang="en">
<head>
<meta charset="utf-8" />
<meta name="viewport" content="width=device-width, initial-scale=1, shrink-to-fit=no" />
<meta name="description" content="" />
<meta name="author" content="" />
<title>Business Casual - Start Bootstrap Theme</title>
<link rel="icon" type="image/x-icon" href="assets/favicon.ico" />
<!-- Font Awesome icons (free version)-->
<script src="https://use.fontawesome.com/releases/v5.15.4/js/all.js" crossorigin="anonymous"></script>
<!-- Google fonts-->
<link href="https://fonts.googleapis.com/css?family=Raleway:100,100i,200,200i,300,300i,400,400i,500,500i,600,600i,700,700i,800,800i,900,900i" rel="stylesheet" />
<link href="https://fonts.googleapis.com/css?family=Lora:400,400i,700,700i" rel="stylesheet" />
<!-- Core theme CSS (includes Bootstrap)-->
<link href="css/styles.css" rel="stylesheet" />
</head>
<body>
<header>
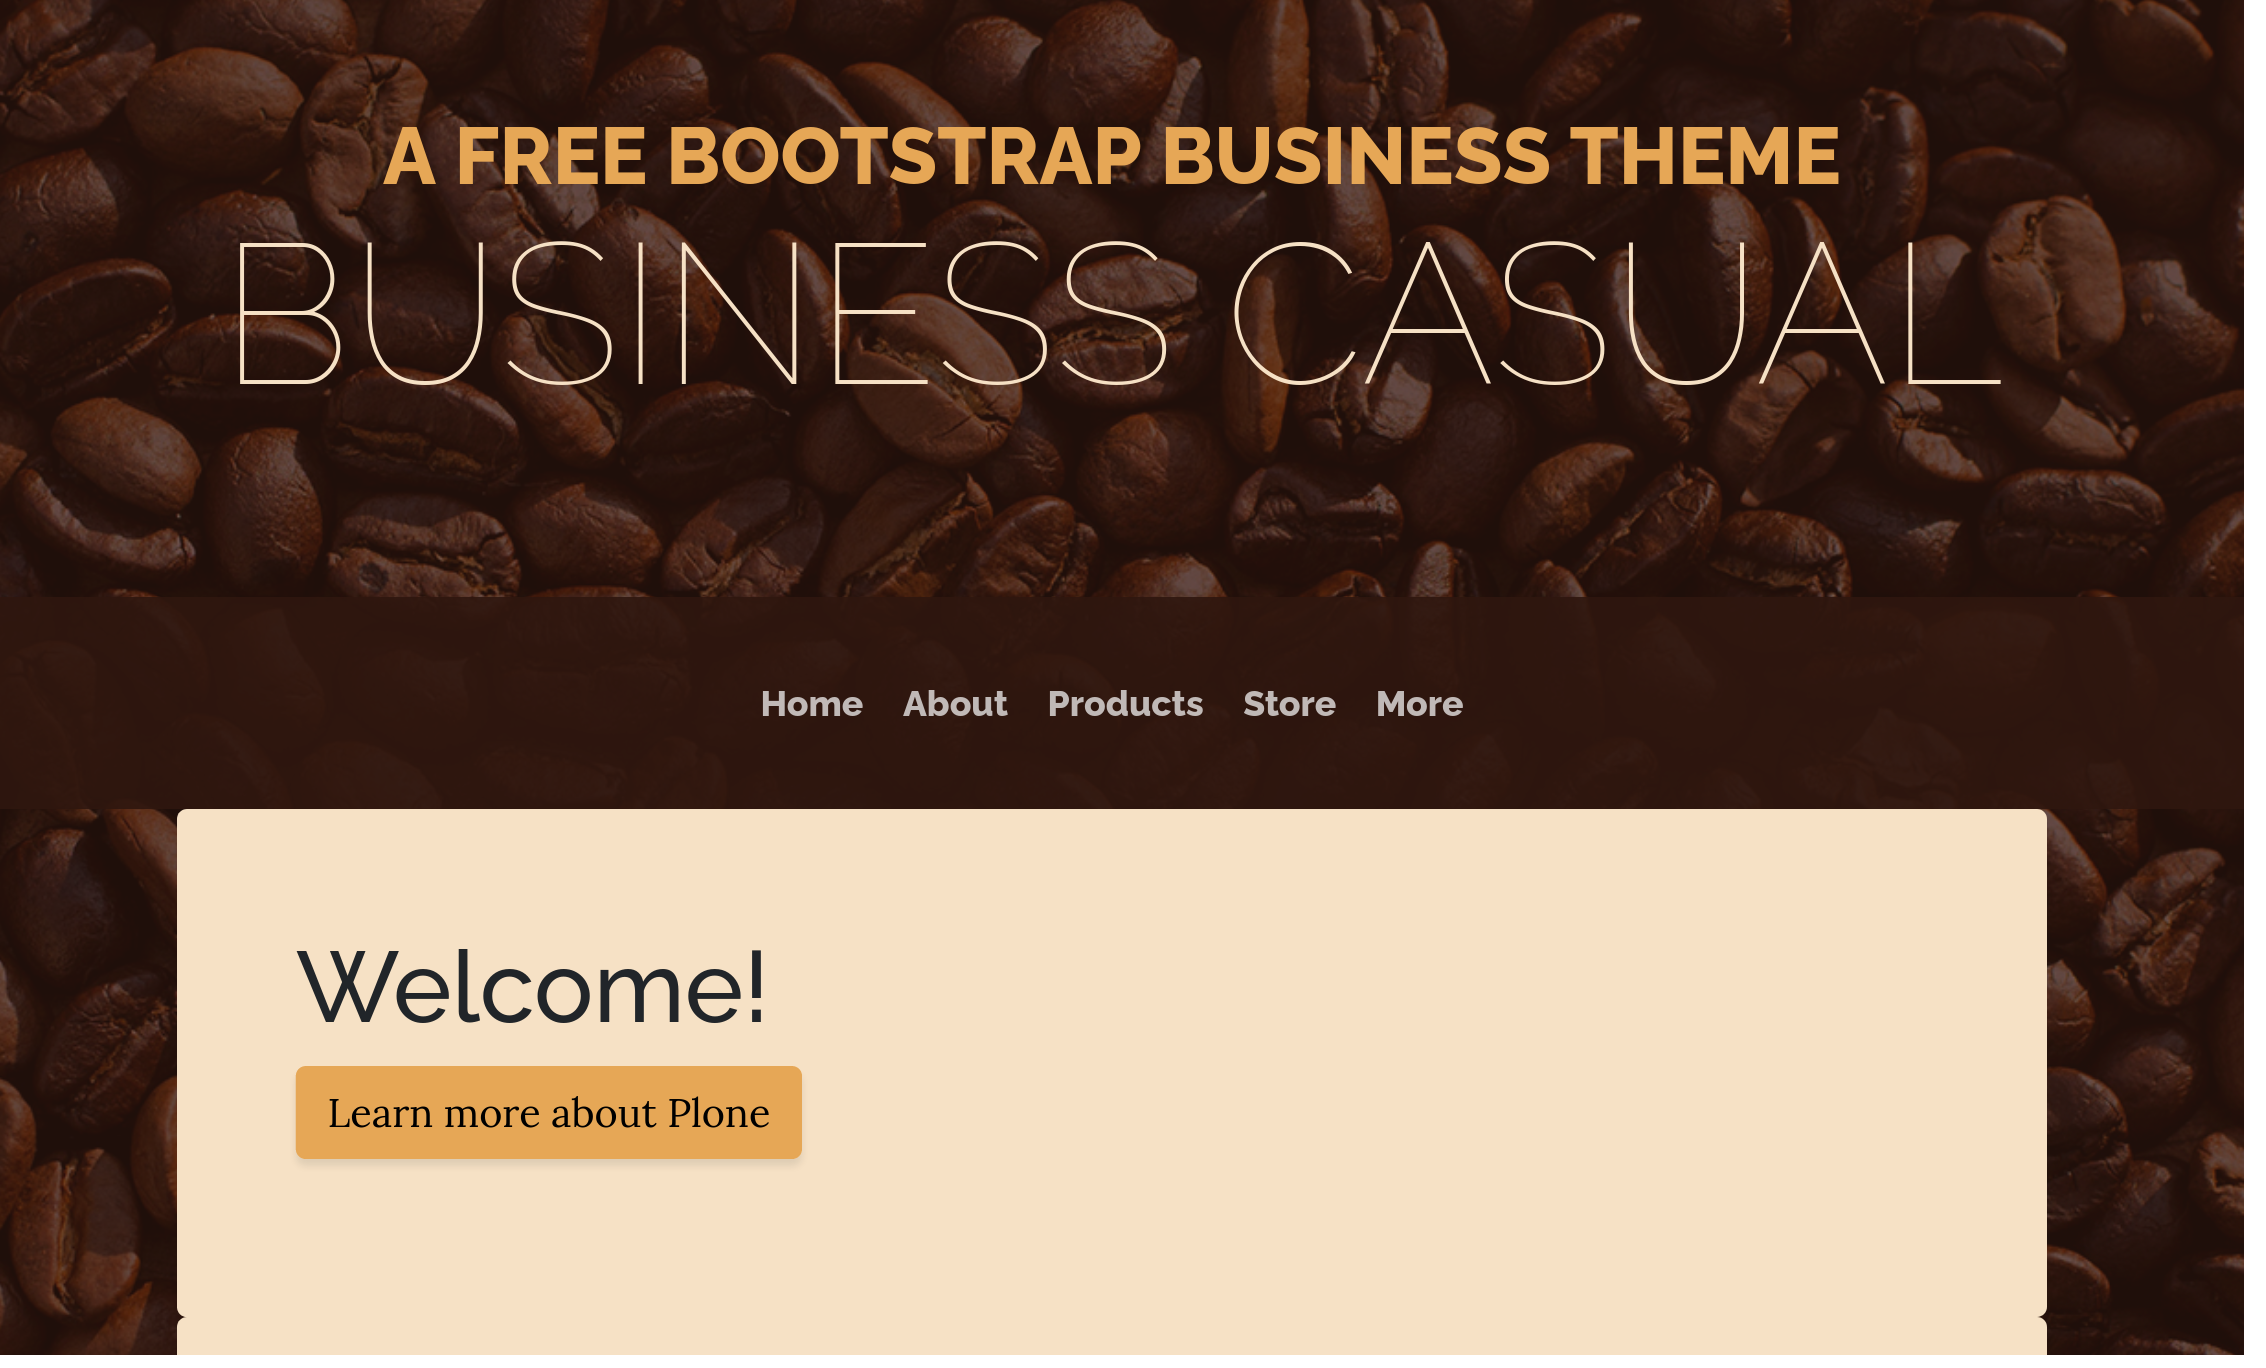
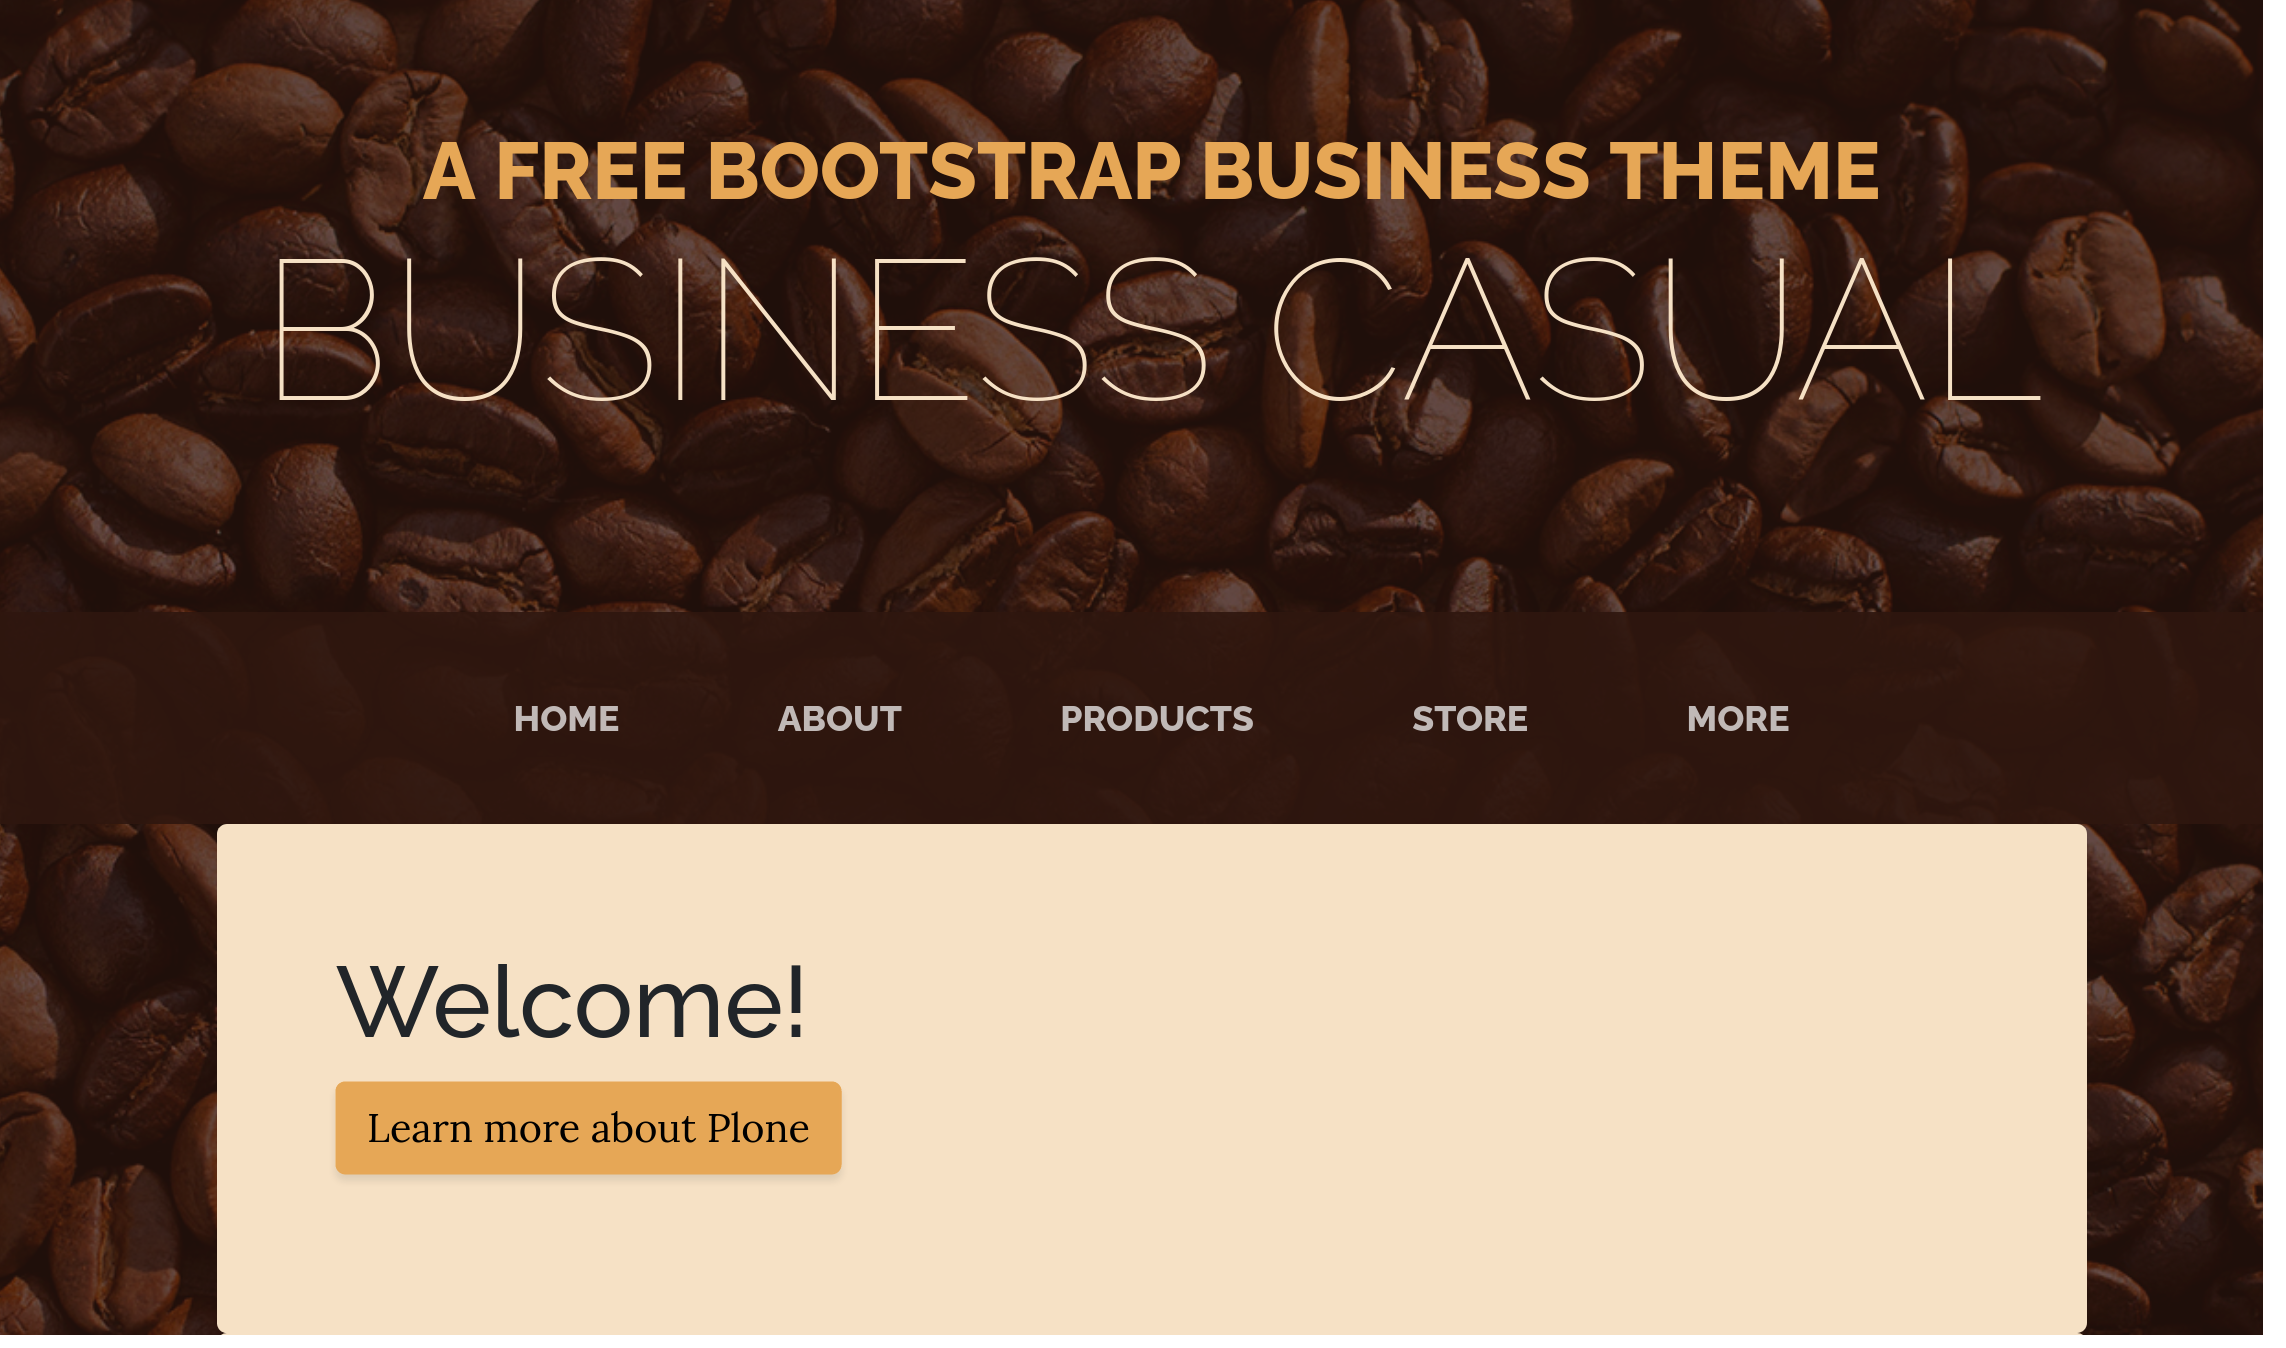
<h1 class="site-heading text-center text-faded d-none d-lg-block">
<span class="site-heading-upper text-primary mb-3">A Free Bootstrap Business Theme</span>
<span class="site-heading-lower">Business Casual</span>
</h1>
</header>
<!-- Navigation-->
<nav class="navbar navbar-expand-lg navbar-dark py-lg-4" id="mainNav">
<div class="container">
<a class="navbar-brand text-uppercase fw-bold d-lg-none" href="index.html">Start Bootstrap</a>
<button class="navbar-toggler" type="button" data-bs-toggle="collapse" data-bs-target="#navbarSupportedContent" aria-controls="navbarSupportedContent" aria-expanded="false" aria-label="Toggle navigation"><span class="navbar-toggler-icon"></span></button>
<div class="collapse navbar-collapse" id="navbarSupportedContent">
<ul class="navbar-nav mx-auto">
<li class="nav-item px-lg-4"><a class="nav-link text-uppercase" href="index.html">Home</a></li>
<li class="nav-item px-lg-4"><a class="nav-link text-uppercase" href="about.html">About</a></li>
<li class="nav-item px-lg-4"><a class="nav-link text-uppercase" href="products.html">Products</a></li>
<li class="nav-item px-lg-4"><a class="nav-link text-uppercase" href="store.html">Store</a></li>
</ul>
</div>
</div>
</nav>
<section class="page-section clearfix">
<div class="container">
<div class="intro">
<img class="intro-img img-fluid mb-3 mb-lg-0 rounded" src="assets/img/intro.jpg" alt="..." />
<div class="intro-text left-0 text-center bg-faded p-5 rounded">
<h2 class="section-heading mb-4">
<span class="section-heading-upper">Fresh Coffee</span>
<span class="section-heading-lower">Worth Drinking</span>
</h2>
<p class="mb-3">Every cup of our quality artisan coffee starts with locally sourced, hand picked ingredients. Once you try it, our coffee will be a blissful addition to your everyday morning routine - we guarantee it!</p>
<div class="intro-button mx-auto"><a class="btn btn-primary btn-xl" href="#!">Visit Us Today!</a></div>
</div>
</div>
</div>
</section>
<section class="page-section cta">
<div class="container">
<div class="row">
<div class="col-xl-9 mx-auto">
<div class="cta-inner bg-faded text-center rounded">
<h2 class="section-heading mb-4">
<span class="section-heading-upper">Our Promise</span>
<span class="section-heading-lower">To You</span>
</h2>
<p class="mb-0">When you walk into our shop to start your day, we are dedicated to providing you with friendly service, a welcoming atmosphere, and above all else, excellent products made with the highest quality ingredients. If you are not satisfied, please let us know and we will do whatever we can to make things right!</p>
</div>
</div>
</div>
</div>
</section>
<footer class="footer text-faded text-center py-5">
<div class="container"><p class="m-0 small">Copyright © Your Website 2022</p></div>
</footer>
        <!-- Bootstrap core JS-->
        <script src="https://cdn.jsdelivr.net/npm/bootstrap@5.1.1/dist/js/bootstrap.bundle.min.js"></script>
        <!-- Core theme JS-->
        <script src="js/scripts.js"></script>
</body>
</html>
Let's focus on the styles in the header for now. You will find here a line like this:
<link href="css/styles.css" rel="stylesheet" />
Since we will include the css later via our manifest file, we will delete this line here.
Now to the JavaScript in the footer of the body.
<!-- Bootstrap core JS-->
<script src="https://cdn.jsdelivr.net/npm/bootstrap@5.1.1/dist/js/bootstrap.bundle.min.js"></script>
<!-- Core theme JS-->
<script src="js/scripts.js"></script>
the first line which includes the Bootstrap JavaScript, we will delete, since Plone come with it by default. The second line we will keep.
Now let's make two more little changes to the markup.
Let's add a tag where we will show portal messages from Plone later. Add this right under the <nav> tag.
<div id="global_statusmessage" class="container"></div>
The second change is, to wrap the sections in a <main></main> tag.
Now the file should look like this:
<!DOCTYPE html>
<html lang="en">
<head>
<meta charset="utf-8" />
<meta name="viewport" content="width=device-width, initial-scale=1, shrink-to-fit=no" />
<meta name="description" content="" />
<meta name="author" content="" />
<title>Business Casual - Start Bootstrap Theme</title>
<link rel="icon" type="image/x-icon" href="assets/favicon.ico" />
<!-- Font Awesome icons (free version)-->
<script src="https://use.fontawesome.com/releases/v5.15.4/js/all.js" crossorigin="anonymous"></script>
<!-- Google fonts-->
<link
href="https://fonts.googleapis.com/css?family=Raleway:100,100i,200,200i,300,300i,400,400i,500,500i,600,600i,700,700i,800,800i,900,900i"
rel="stylesheet" />
<link href="https://fonts.googleapis.com/css?family=Lora:400,400i,700,700i" rel="stylesheet" />
</head>
<body>
<header>
<h1 class="site-heading text-center text-faded d-none d-lg-block">
<span class="site-heading-upper text-primary mb-3">A Free Bootstrap Business Theme</span>
<span class="site-heading-lower">Business Casual</span>
</h1>
</header>
<!-- Navigation-->
<nav class="navbar navbar-expand-lg navbar-dark py-lg-4" id="mainNav">
<div class="container">
<a class="navbar-brand text-uppercase fw-bold d-lg-none" href="index.html">Start Bootstrap</a>
<button class="navbar-toggler" type="button" data-bs-toggle="collapse" data-bs-target="#navbarSupportedContent"
aria-controls="navbarSupportedContent" aria-expanded="false" aria-label="Toggle navigation"><span
class="navbar-toggler-icon"></span></button>
<div class="collapse navbar-collapse" id="navbarSupportedContent">
<ul class="navbar-nav mx-auto">
<li class="nav-item px-lg-4"><a class="nav-link text-uppercase" href="index.html">Home</a></li>
<li class="nav-item px-lg-4"><a class="nav-link text-uppercase" href="about.html">About</a></li>
<li class="nav-item px-lg-4"><a class="nav-link text-uppercase" href="products.html">Products</a></li>
<li class="nav-item px-lg-4"><a class="nav-link text-uppercase" href="store.html">Store</a></li>
</ul>
</div>
</div>
</nav>
<div id="global_statusmessage" class="container"></div>
<main>
<section class="page-section clearfix">
<div class="container">
<div class="intro">
<img class="intro-img img-fluid mb-3 mb-lg-0 rounded" src="assets/img/intro.jpg" alt="..." />
<div class="intro-text left-0 text-center bg-faded p-5 rounded">
<h2 class="section-heading mb-4">
<span class="section-heading-upper">Fresh Coffee</span>
<span class="section-heading-lower">Worth Drinking</span>
</h2>
<p class="mb-3">Every cup of our quality artisan coffee starts with locally sourced, hand picked
ingredients. Once you try it, our coffee will be a blissful addition to your everyday morning routine - we
guarantee it!</p>
<div class="intro-button mx-auto"><a class="btn btn-primary btn-xl" href="#!">Visit Us Today!</a></div>
</div>
</div>
</div>
</section>
<section class="page-section cta">
<div class="container">
<div class="row">
<div class="col-xl-9 mx-auto">
<div class="cta-inner bg-faded text-center rounded">
<h2 class="section-heading mb-4">
<span class="section-heading-upper">Our Promise</span>
<span class="section-heading-lower">To You</span>
</h2>
<p class="mb-0">When you walk into our shop to start your day, we are dedicated to providing you with
friendly service, a welcoming atmosphere, and above all else, excellent products made with the highest
quality ingredients. If you are not satisfied, please let us know and we will do whatever we can to make
things right!</p>
</div>
</div>
</div>
</div>
</section>
</main>
<footer class="footer text-faded text-center py-5">
<div class="container">
<p class="m-0 small">Copyright © Your Website 2022</p>
</div>
</footer>
<!-- Core theme JS-->
<script src="js/scripts.js"></script>
</body>
</html>
To include the CSS, we will create a SCSS file theme.scss in the css folder and import the styles.css provided by the Bootstrap theme in there.
@import "styles";
5.7. Adjust and use the package.json#
The theme provides some useful scripts to compile and optimize SCSS into CSS. These commands are defined in the script area of the package.json.
  "scripts": {
    "dev": "npm-run-all --parallel reload-browser watch",
    "watch": "nodemon --watch css/ --ext scss --exec \"npm run css-main\"",
    "build": "npm-run-all fetch-vendor-files css-compile-main css-prefix-main css-minify-main",
    "css-main": "npm-run-all css-compile-main css-prefix-main css-minify-main",
    "css-compile-main": "sass --load-path=node_modules --style expanded --source-map --embed-sources --no-error-css styles/theme.scss:styles/theme.css",
    "css-prefix-main": "postcss --config postcss.config.js --replace \"styles/*.css\" \"!styles/*.min.css\"",
    "css-minify-main": "cleancss -O1 --format breakWith=lf --with-rebase --source-map --source-map-inline-sources --output styles/theme.min.css styles/theme.css",
    "css-lint": "stylelint \"styles/**/*.scss\" --cache --cache-location .cache/.stylelintcache",
    "fetch-vendor-files": "./node_modules/.bin/copy-node-modules ./ ./vendor --verbose",
    "reload-browser": "reload -b --exts html,js,css"
  },
Here we can see, that the scripts are searching for SCSS files inside a folder called styles. Our theme has a slightly different structure. One way to fix this is to adjust the script definitions here to our needs.
Let's change the path from styles/ to css/.
the script area should now look like this:
  "scripts": {
    "dev": "npm-run-all --parallel reload-browser watch",
    "watch": "nodemon --watch css/ --ext scss --exec \"npm run css-main\"",
    "build": "npm-run-all fetch-vendor-files css-compile-main css-prefix-main css-minify-main",
    "css-main": "npm-run-all css-compile-main css-prefix-main css-minify-main",
    "css-compile-main": "sass --load-path=node_modules --style expanded --source-map --embed-sources --no-error-css css/theme.scss:css/theme.css",
    "css-prefix-main": "postcss --config postcss.config.js --replace \"css/*.css\" \"!css/*.min.css\"",
    "css-minify-main": "cleancss -O1 --format breakWith=lf --with-rebase --source-map --source-map-inline-sources --output css/theme.min.css css/theme.css",
    "css-lint": "stylelint \"css/**/*.scss\" --cache --cache-location .cache/.stylelintcache",
    "fetch-vendor-files": "./node_modules/.bin/copy-node-modules ./ ./vendor --verbose",
    "reload-browser": "reload -b --exts html,js,css"
  },
now that we fixed the package.json, let's use it and run the following commands.
Let's
npm install
We now have a new folder called node_modules in our theme folder, where all build tools and CSS/JavaScript resources are installed.
The following command will build our resource files to a bundle.
npm run build
You will now find new folder vendor:
vendor/
└── node_modules
Inside the vendor/node_modules you will find all dependencies declared in the package.json.
For example if you install a JQuery library you will find all JavaScript and CSS files in that place and can include them from there. The main node_modules in the theme folder contains much more, because there we also have all the devDependencies needed to build the bundles an so on. But we don't want them shipped with our theme, that's why we separate what we need into the vendor folder.
5.8. Adjust the layout and manifest files#
We need to adjust a bit the manifest.cfg, to reflect the layout structure of the Bootstrap theme we got.
By default the manifest.cfg will look like this:
[theme]
title = Plone Theme: Business casual (2022)
description = A Diazo based Plone theme
doctype = <!DOCTYPE html>
rules = /++theme++plone-theme-business-casual-2022/rules.xml
prefix = /++theme++plone-theme-business-casual-2022

production-css = ++theme++plone-theme-business-casual-2022/styles/theme.min.css
tinymce-content-css = ++theme++plone-theme-business-casual-2022/styles/theme.min.css

# production-js = ++theme++plone-theme-business-casual-2022/js/theme.min.js

[theme:parameters]
# portal_url = python: portal.absolute_url()
Since our styles are located inside the css folder and not in styles, we will change the paths:
production-css = ++theme++plone-theme-business-casual-2022/css/theme.min.css
tinymce-content-css = ++theme++plone-theme-business-casual-2022/css/theme.min.css
Now let's do the actual integration.
We can use npm run watch to have the CSS build when ever we make changes.
And in a second terminal we start Plone with plonecli serve.
5.9. Diazo to rule them all#
With Diazo Plone provides an easy way, to map the dynamic content of the CMS to places in the given layout. We will go thru some examples, but feel free to consult the Diazo documentation for more details.
We will start by bringing in the top navigation. To do that, we will activate the following rule in the rules.xml file.
<replace css:theme-children=".navbar" css:content-children=".navbar-nav" />
To understand better, whats happening here, let's open this URL http://127.0.0.1:8080 in another browser window. You will notice that your Plone is completely unstyled. This is because, in the theming control panel we can define URL's where Diazo should be turned off and http://127.0.0.1 is in there by default. This is useful, because we now see the vanilla markup Plone is rendering on one side and the layout template on the other side. This way we can easily map the two with our rules.
In the layout template (the theme side), we can find the .navbar element:
<ul class="navbar-nav mx-auto">
On the Plone side (the content side), we can find a .navbar-nav element:
<ul class="navbar-nav" id="portal-globalnav">
  <li class="index_html nav-item inPath"><a href="http://127.0.0.1:8080/Plone" class="state-None nav-link">Home</a></li>
  <li class="about nav-item"><a href="http://127.0.0.1:8080/Plone/about" class="state-published nav-link">About</a></li>
  <li class="products nav-item inPath current"><a href="http://127.0.0.1:8080/Plone/products" class="state-private nav-link">Products</a></li>
  <li class="store nav-item"><a href="http://127.0.0.1:8080/Plone/store" class="state-private nav-link">Store</a></li>
  <li class="more nav-item"><a href="http://127.0.0.1:8080/Plone/more" class="state-published nav-link">More</a></li>
</ul>
These li-tag's we want to place in the layout. Our rule will replace the children of element .navbar-nav on the theme side, with the children of the .navbar-nav from the content side.
If we now reload the themed website URL http://localhost:8080/Plone, we will see that the top navigation now contains our menu items.
In the next step, we will activate the following rule, to integrate portal messages from Plone.
<replace
  css:theme-children="#global_statusmessage"
  css:content-children="#global_statusmessage"
  />
You can test it, by going on edit and save the page. You should see a message under the navigation.
Now let's come to the most important mapping, our content area. We will activate the following rule in our rules.xml:
<!-- Copy Document Content -->
<replace
  css:content="#content-core"
  css:theme-children="main"
  />
We can see the content now in our themed side. The styling need's some improvement's, which will do in a moment.
The last thing for now we wanna do, is to map the footer.
<replace
  css:content-children="footer"
  css:theme-children="footer"
  />
5.10. Styling the themed content#
Let's make sure that Plone content will look decent by default. For that we will import the bootstrap grid and define some grid settings.
@import "bootstrap/scss/bootstrap-grid";
@import "styles";

$grid-columns:                12 !default;
$grid-gutter-width:           1.5rem !default;
$grid-row-columns:            6 !default;

$grid-main-breakpoint: md!default;
$nav-main-breakpoint: $grid-main-breakpoint!default;
Now we add some definitions to style common content and give it a background.
#parent-fieldname-text > *:not(.mceTmpl),
.entries > article,
#content-core > .item,
#content-core > p,
#content-core .field{
  max-width: 850px;
  margin: 0 auto;
  @extend .bg-faded;
  @extend .rounded;
  @extend .p-5;
}
If we have a close look at the navbar, we will notice that the styling is not exactly as it is in the layout.
The following SCSS will fix that extending the bootstrap utility classes, missing in our markup:
.nav-item{
  @extend .px-lg-4;
}

.nav-link{
  @extend .text-uppercase;
}
Let's give the portal message a margin-top, so that it's not to clode to the navbar:
#global_statusmessage{
  margin-top: 1rem;
}
Similar to the status message, our footer need a margin to the top:
footer{
  margin-top: 3rem;
}
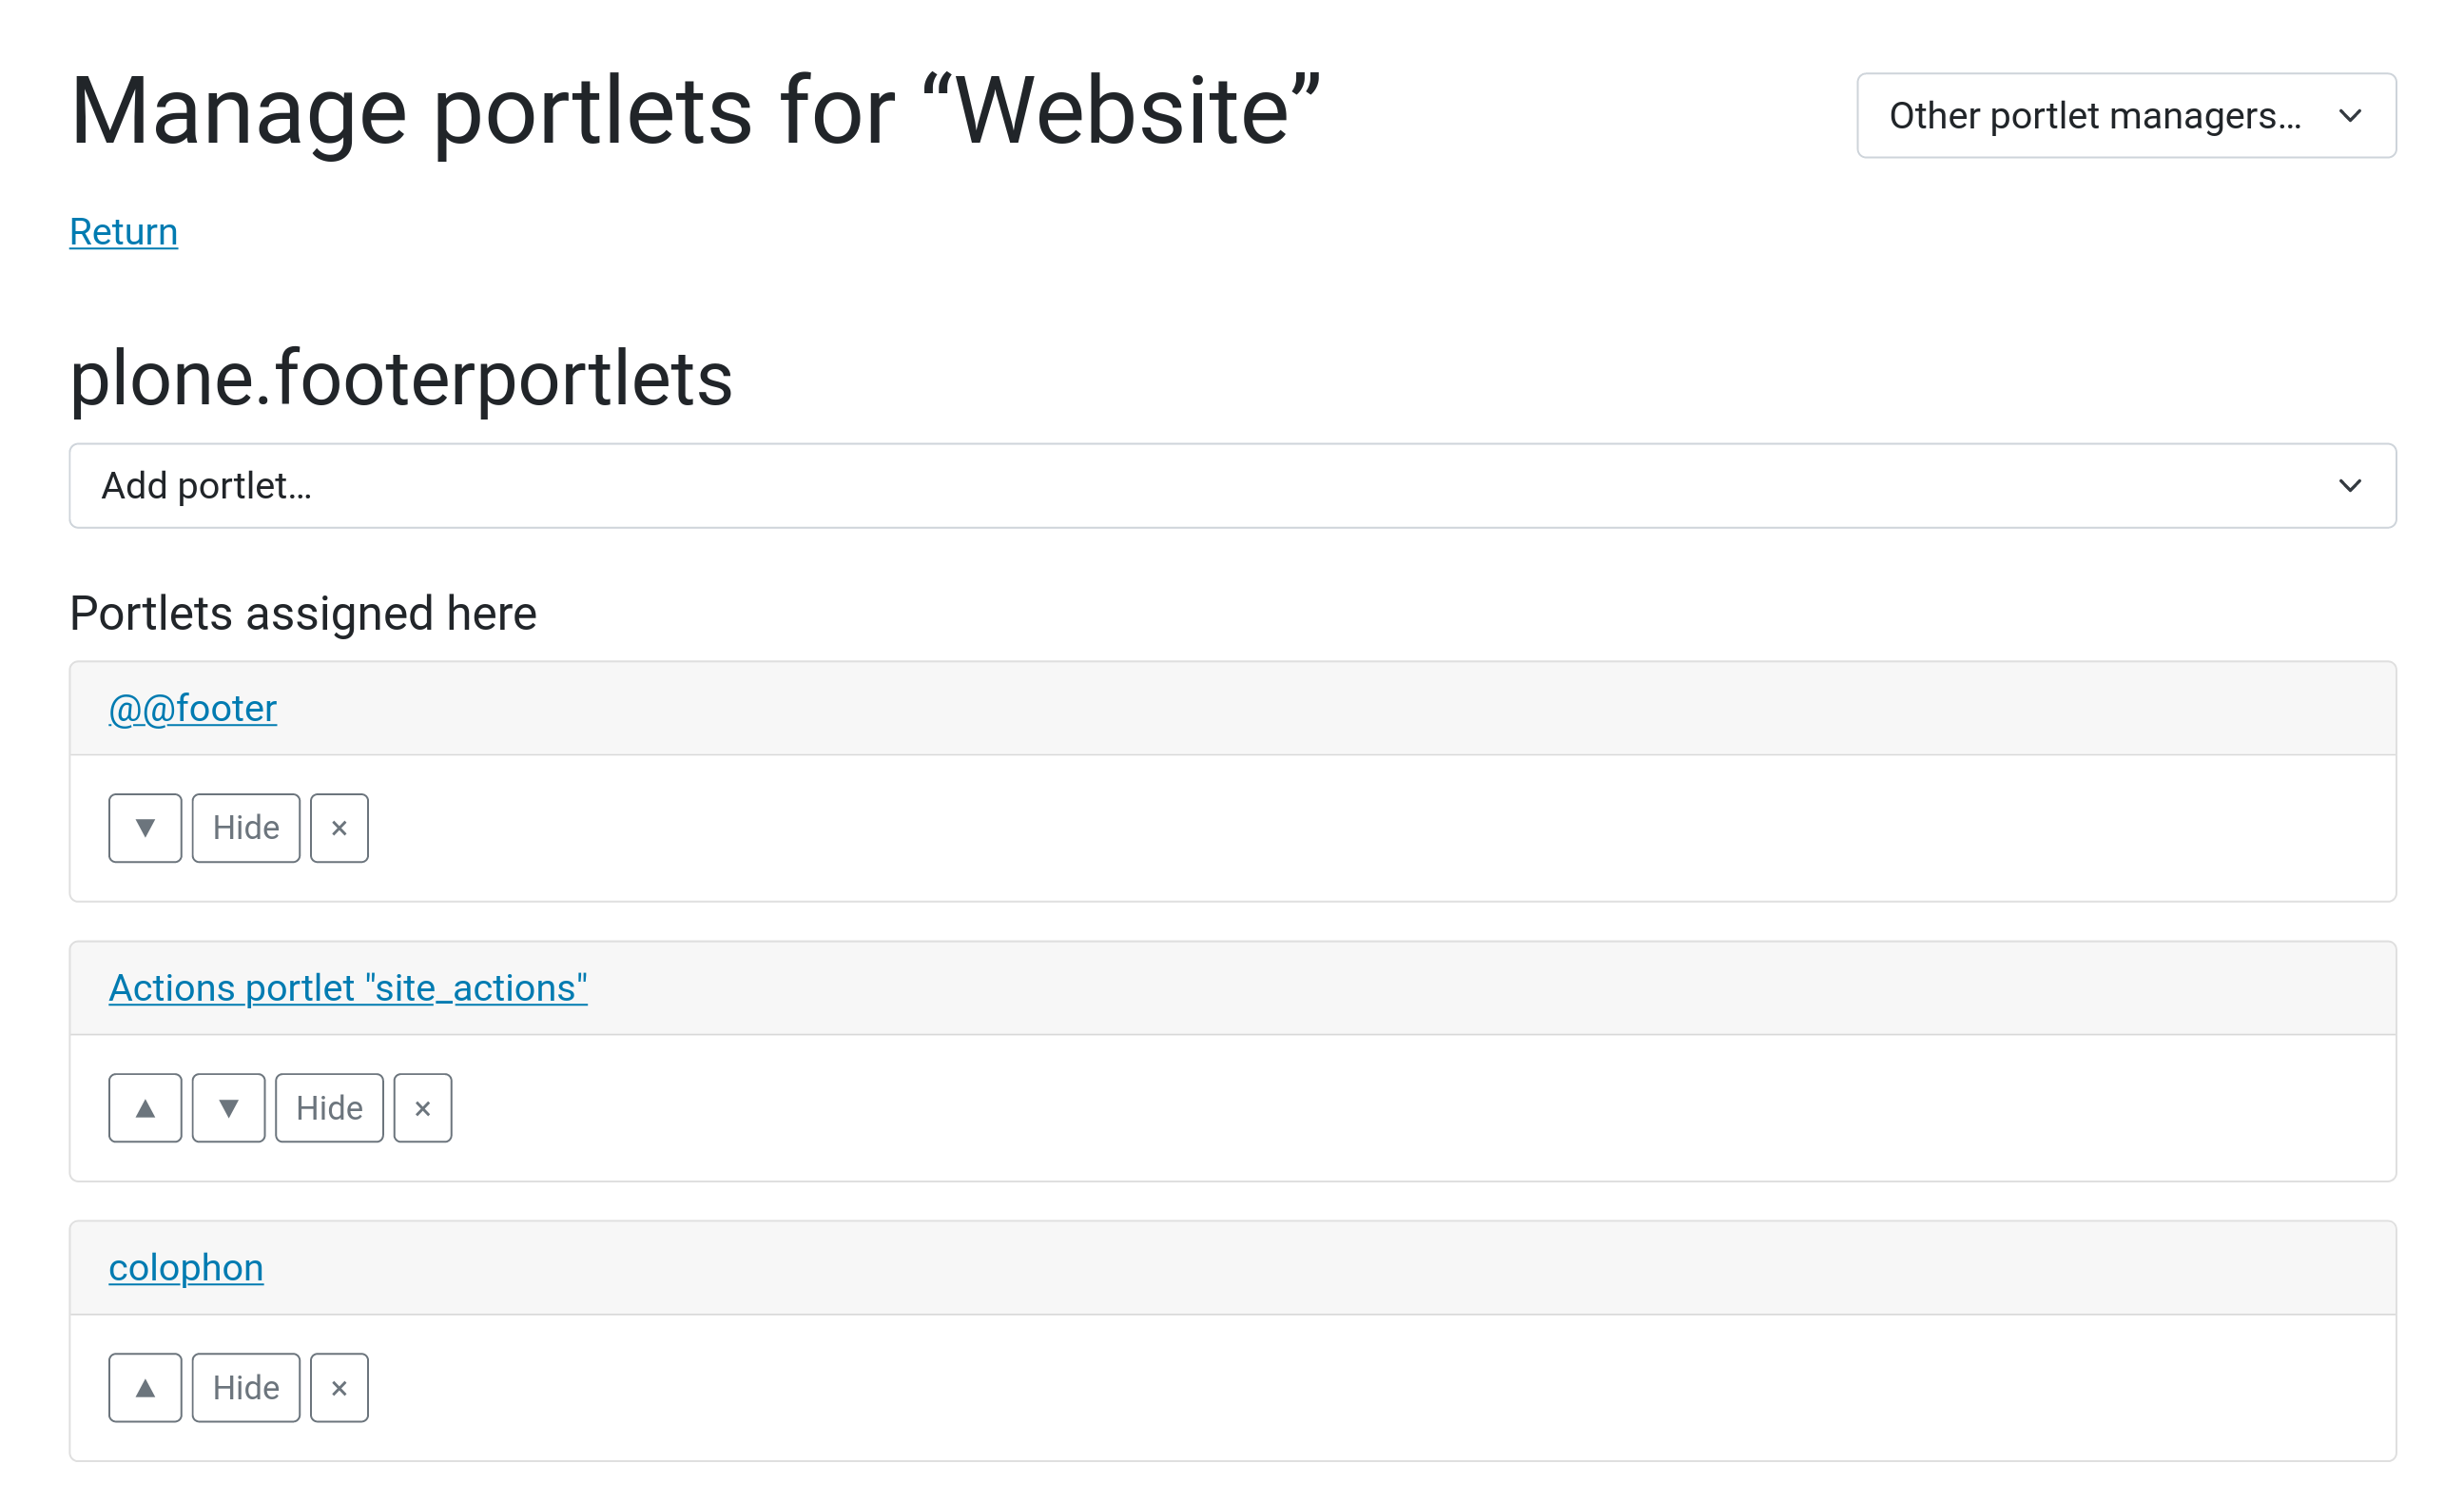
The navbar does not look like in the layout yet, but that we can fix by managing the footer Portlet's in Plone.

We can manage the footer portlets directly in Plone:

Were we can hide the existing footer portlets:
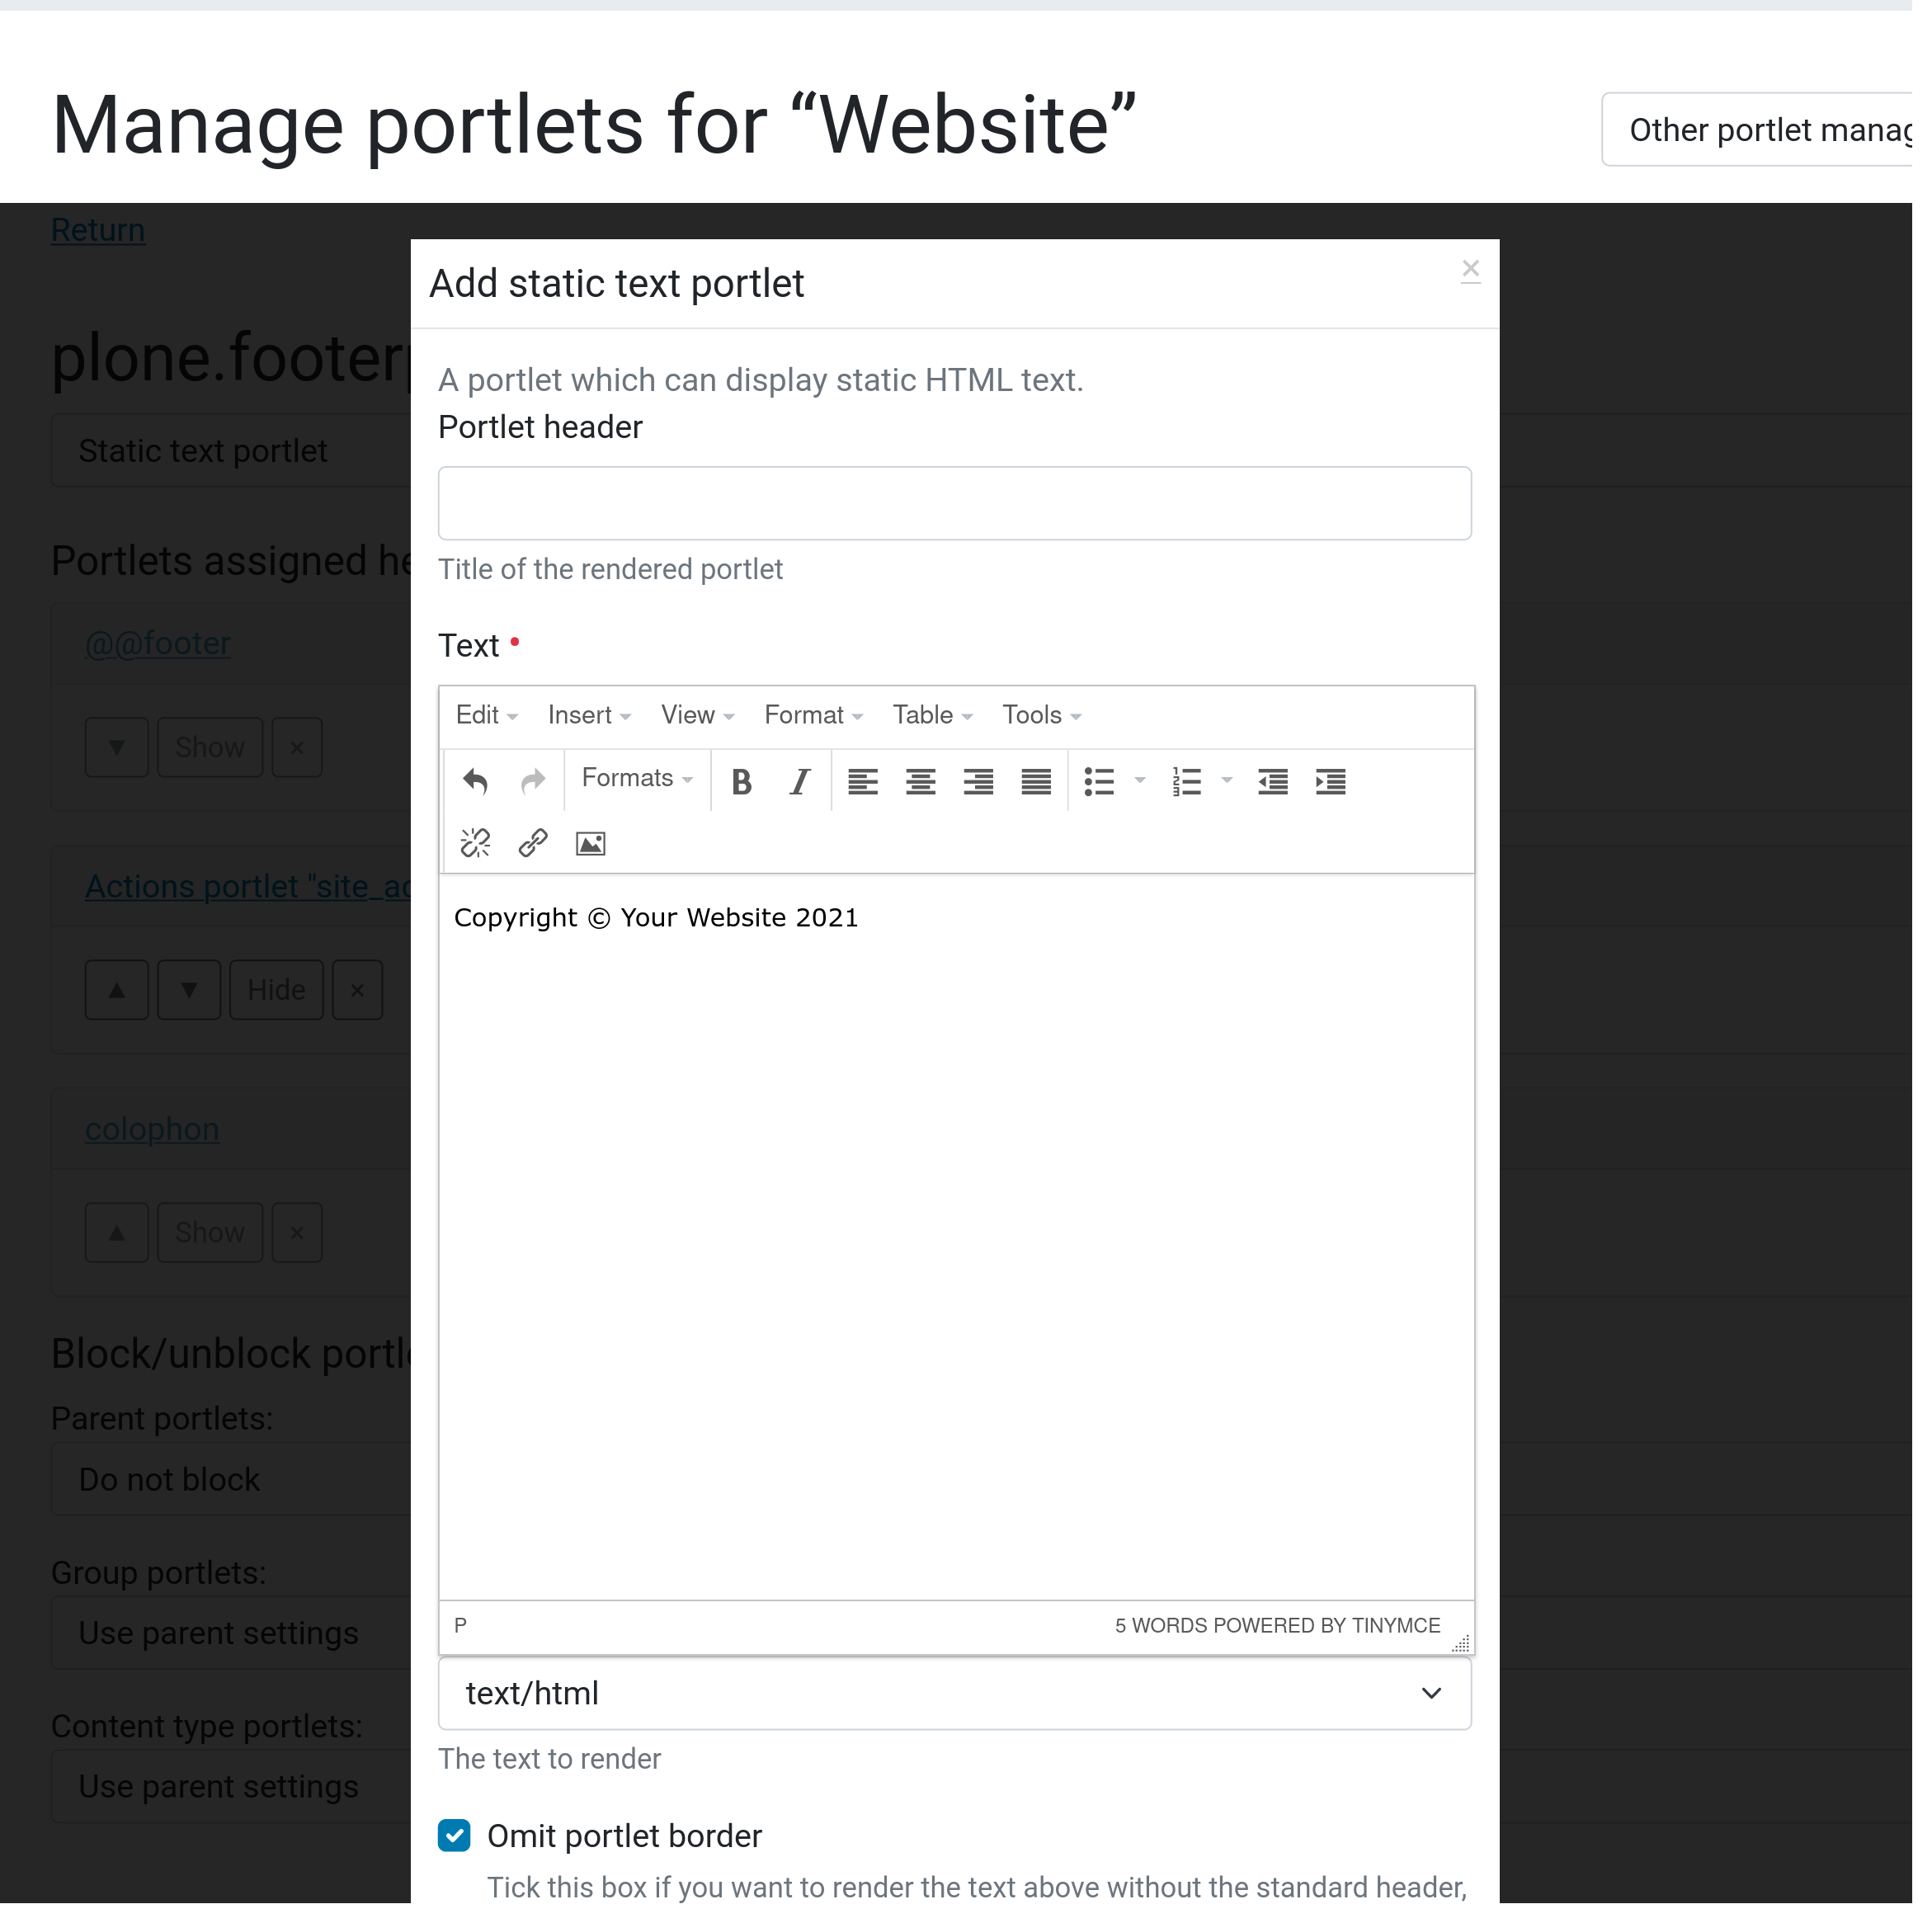
Now let's add a static portlet with our footer content. we also will omit the portlet border here.
Now let's have a look hat we have archived:
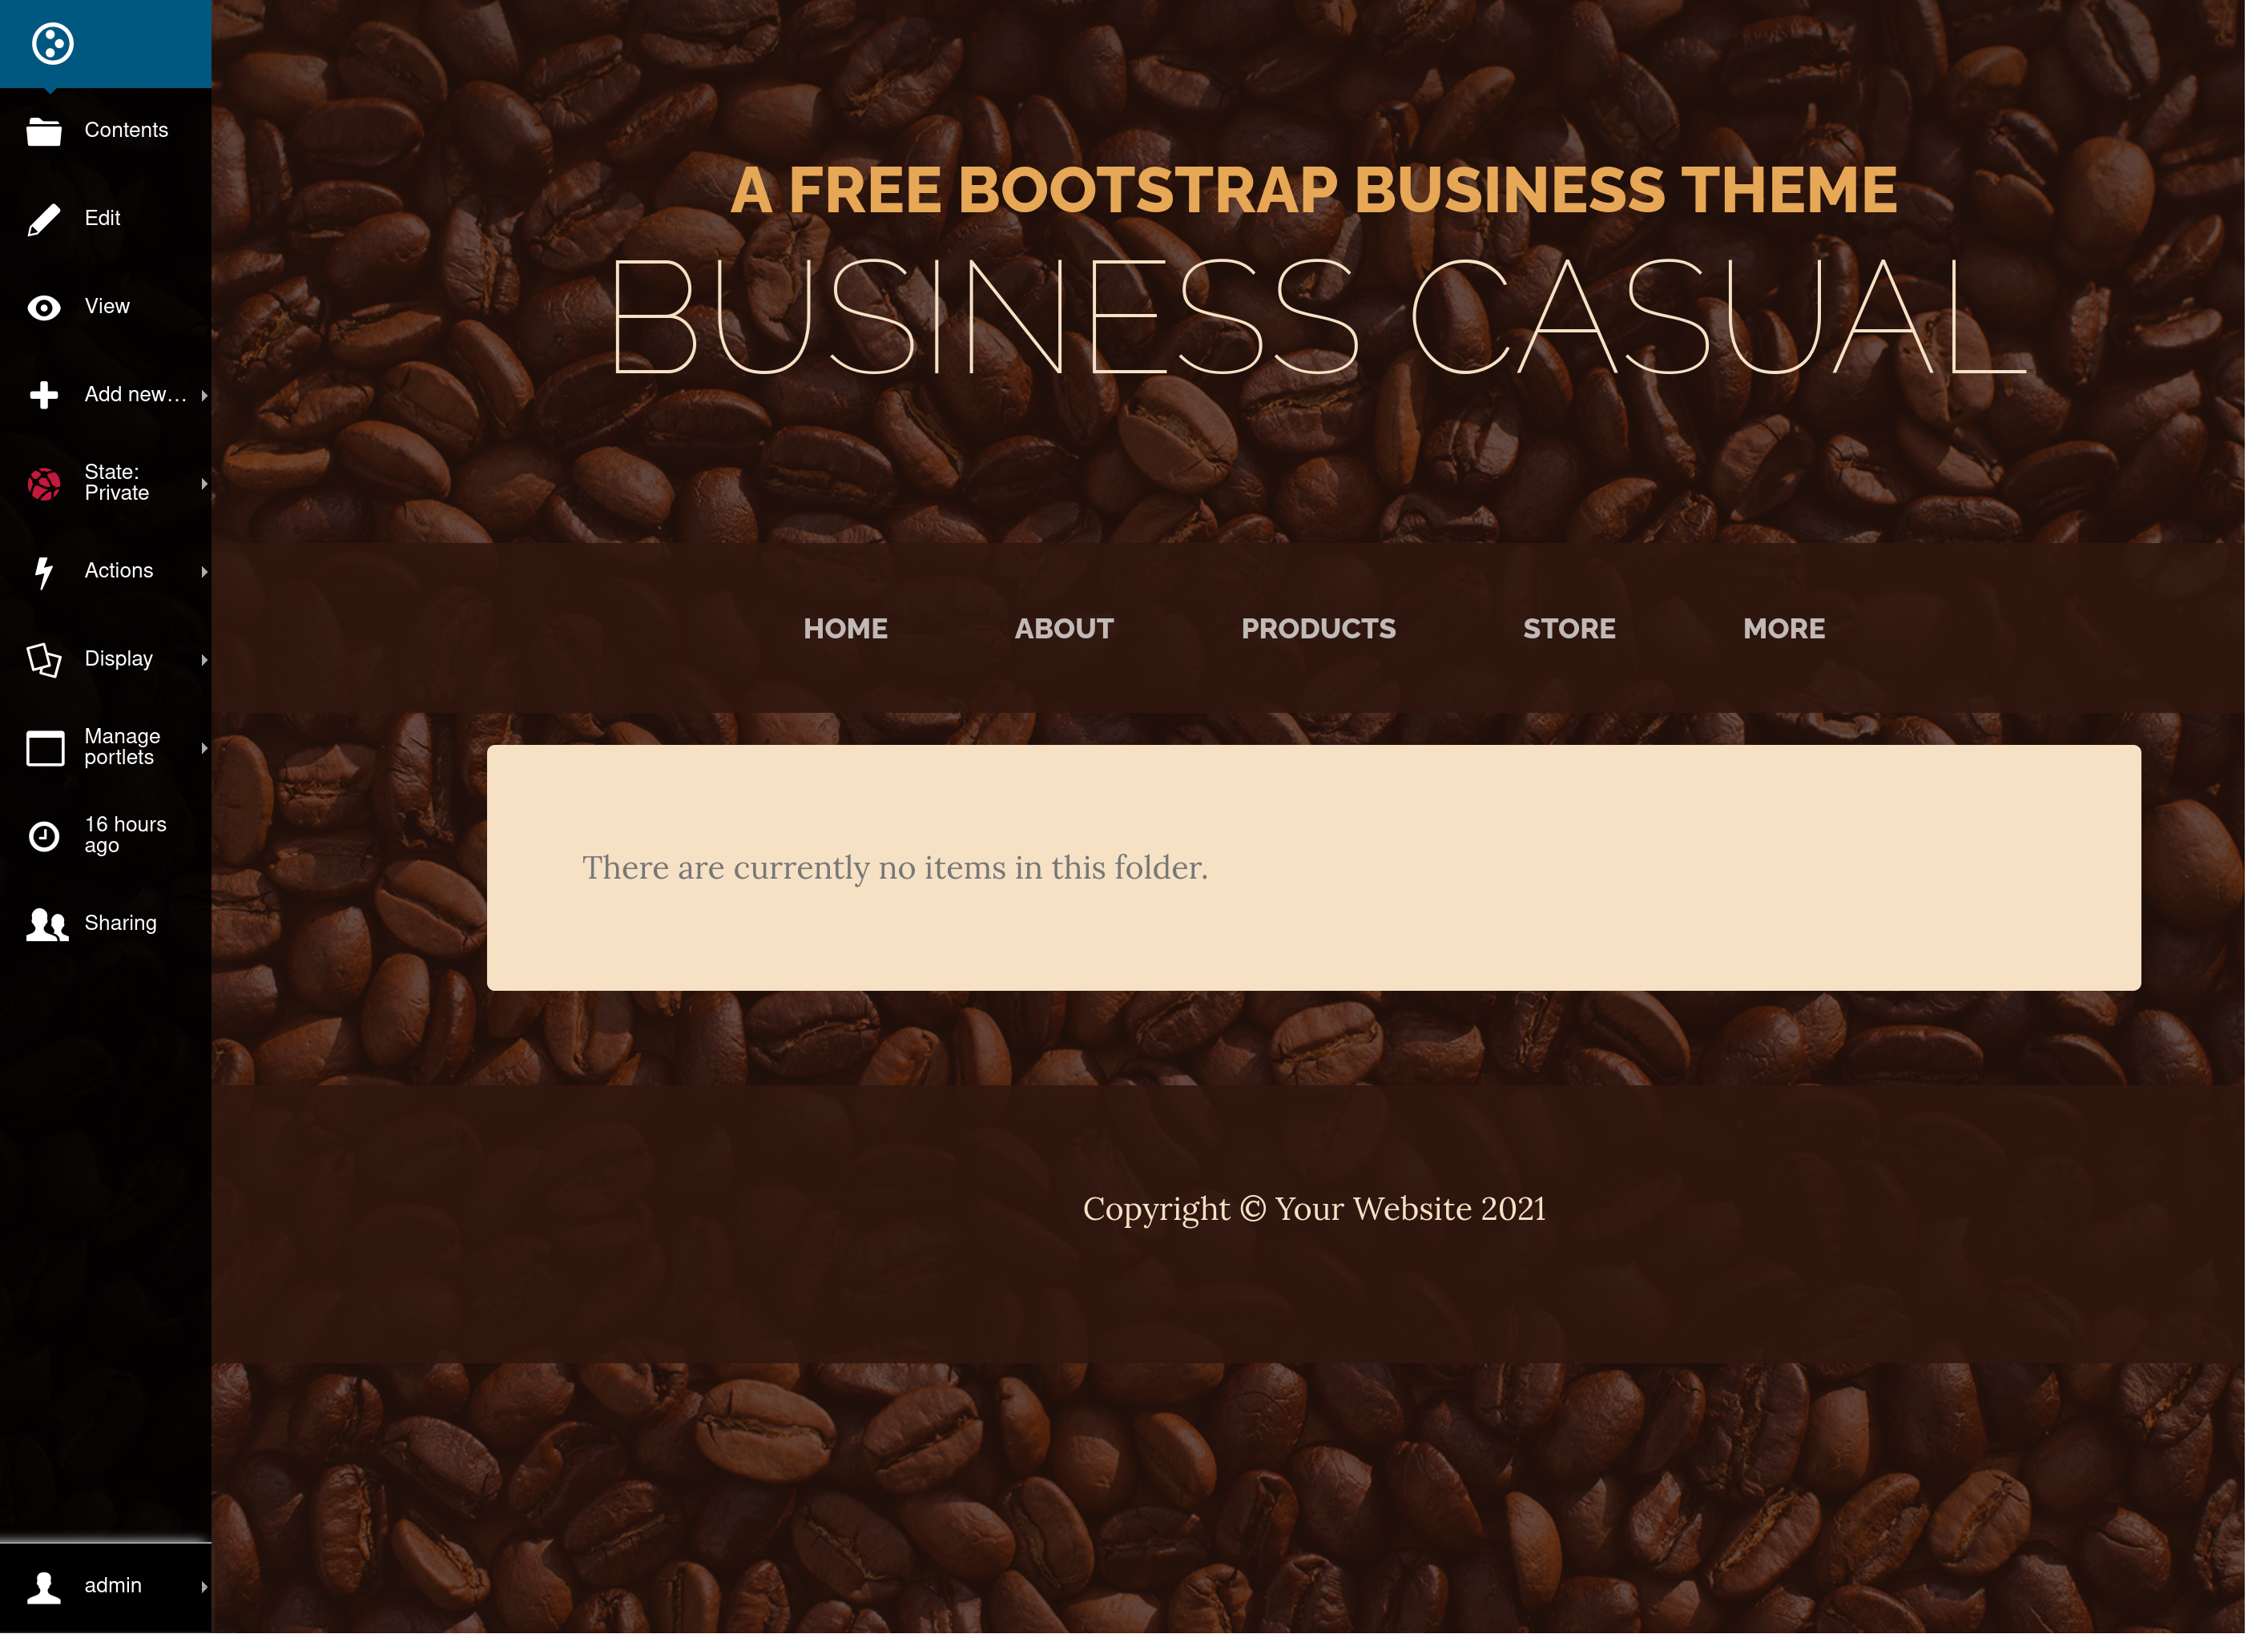
Not bad so far.
5.11. Adding complex HTML markup with TinyMCE templates#
To create the home page, we need two of our TinyMCE templates.
section-intro
section-promise
let's add them with TinyMCE templates:
Select Section: Intro from the list of templates:
We now have a preview of the template and can insert it:
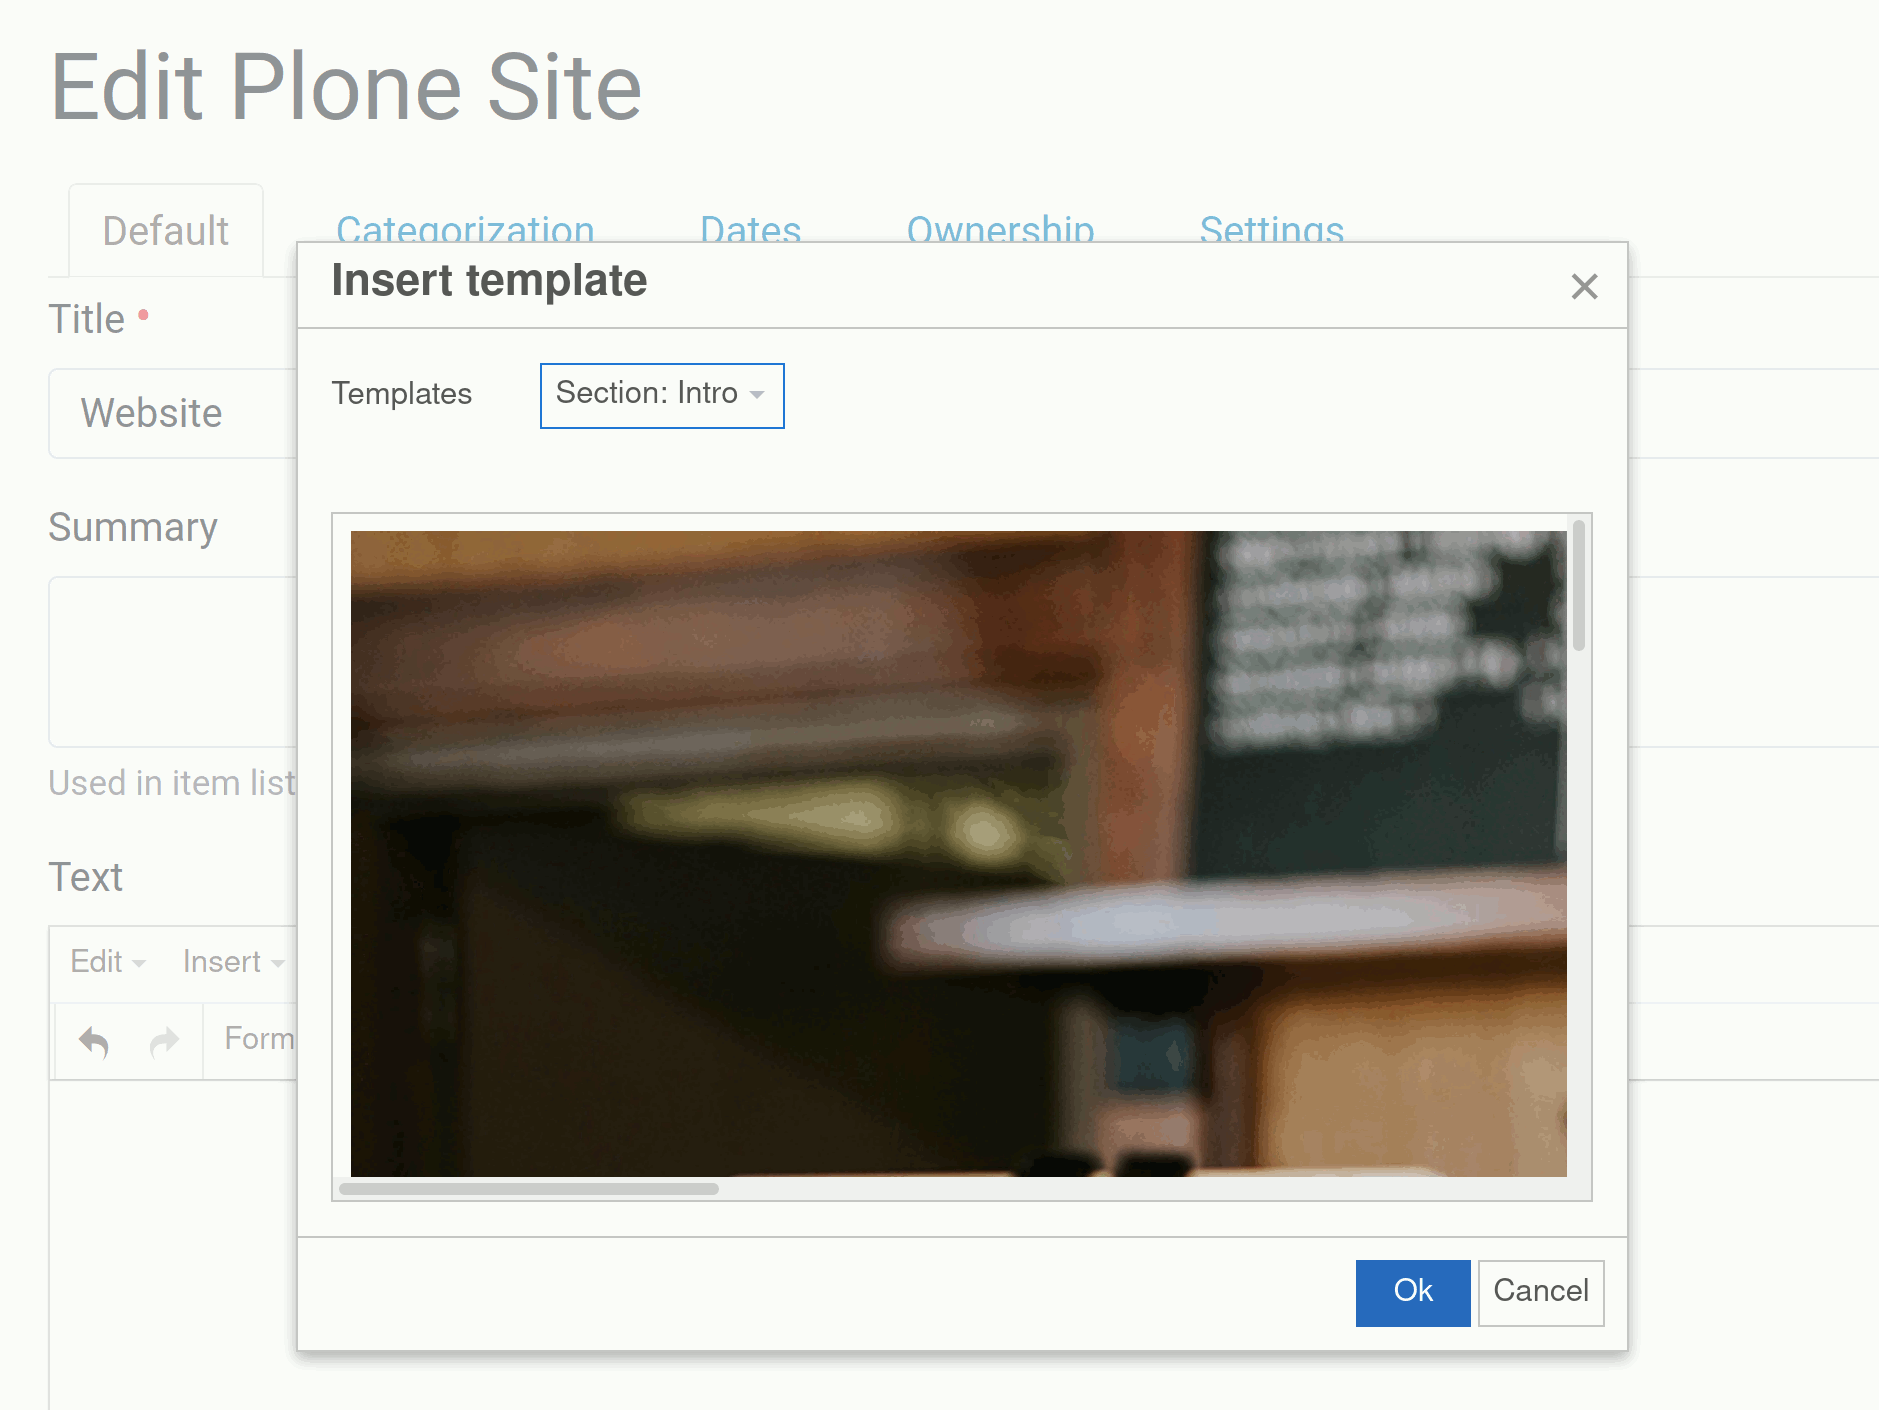
Now we can see it inside the TinyMCE. It looks a bit different than expected, but after saving we will have what we want. We also can edit the text and the images if we want.
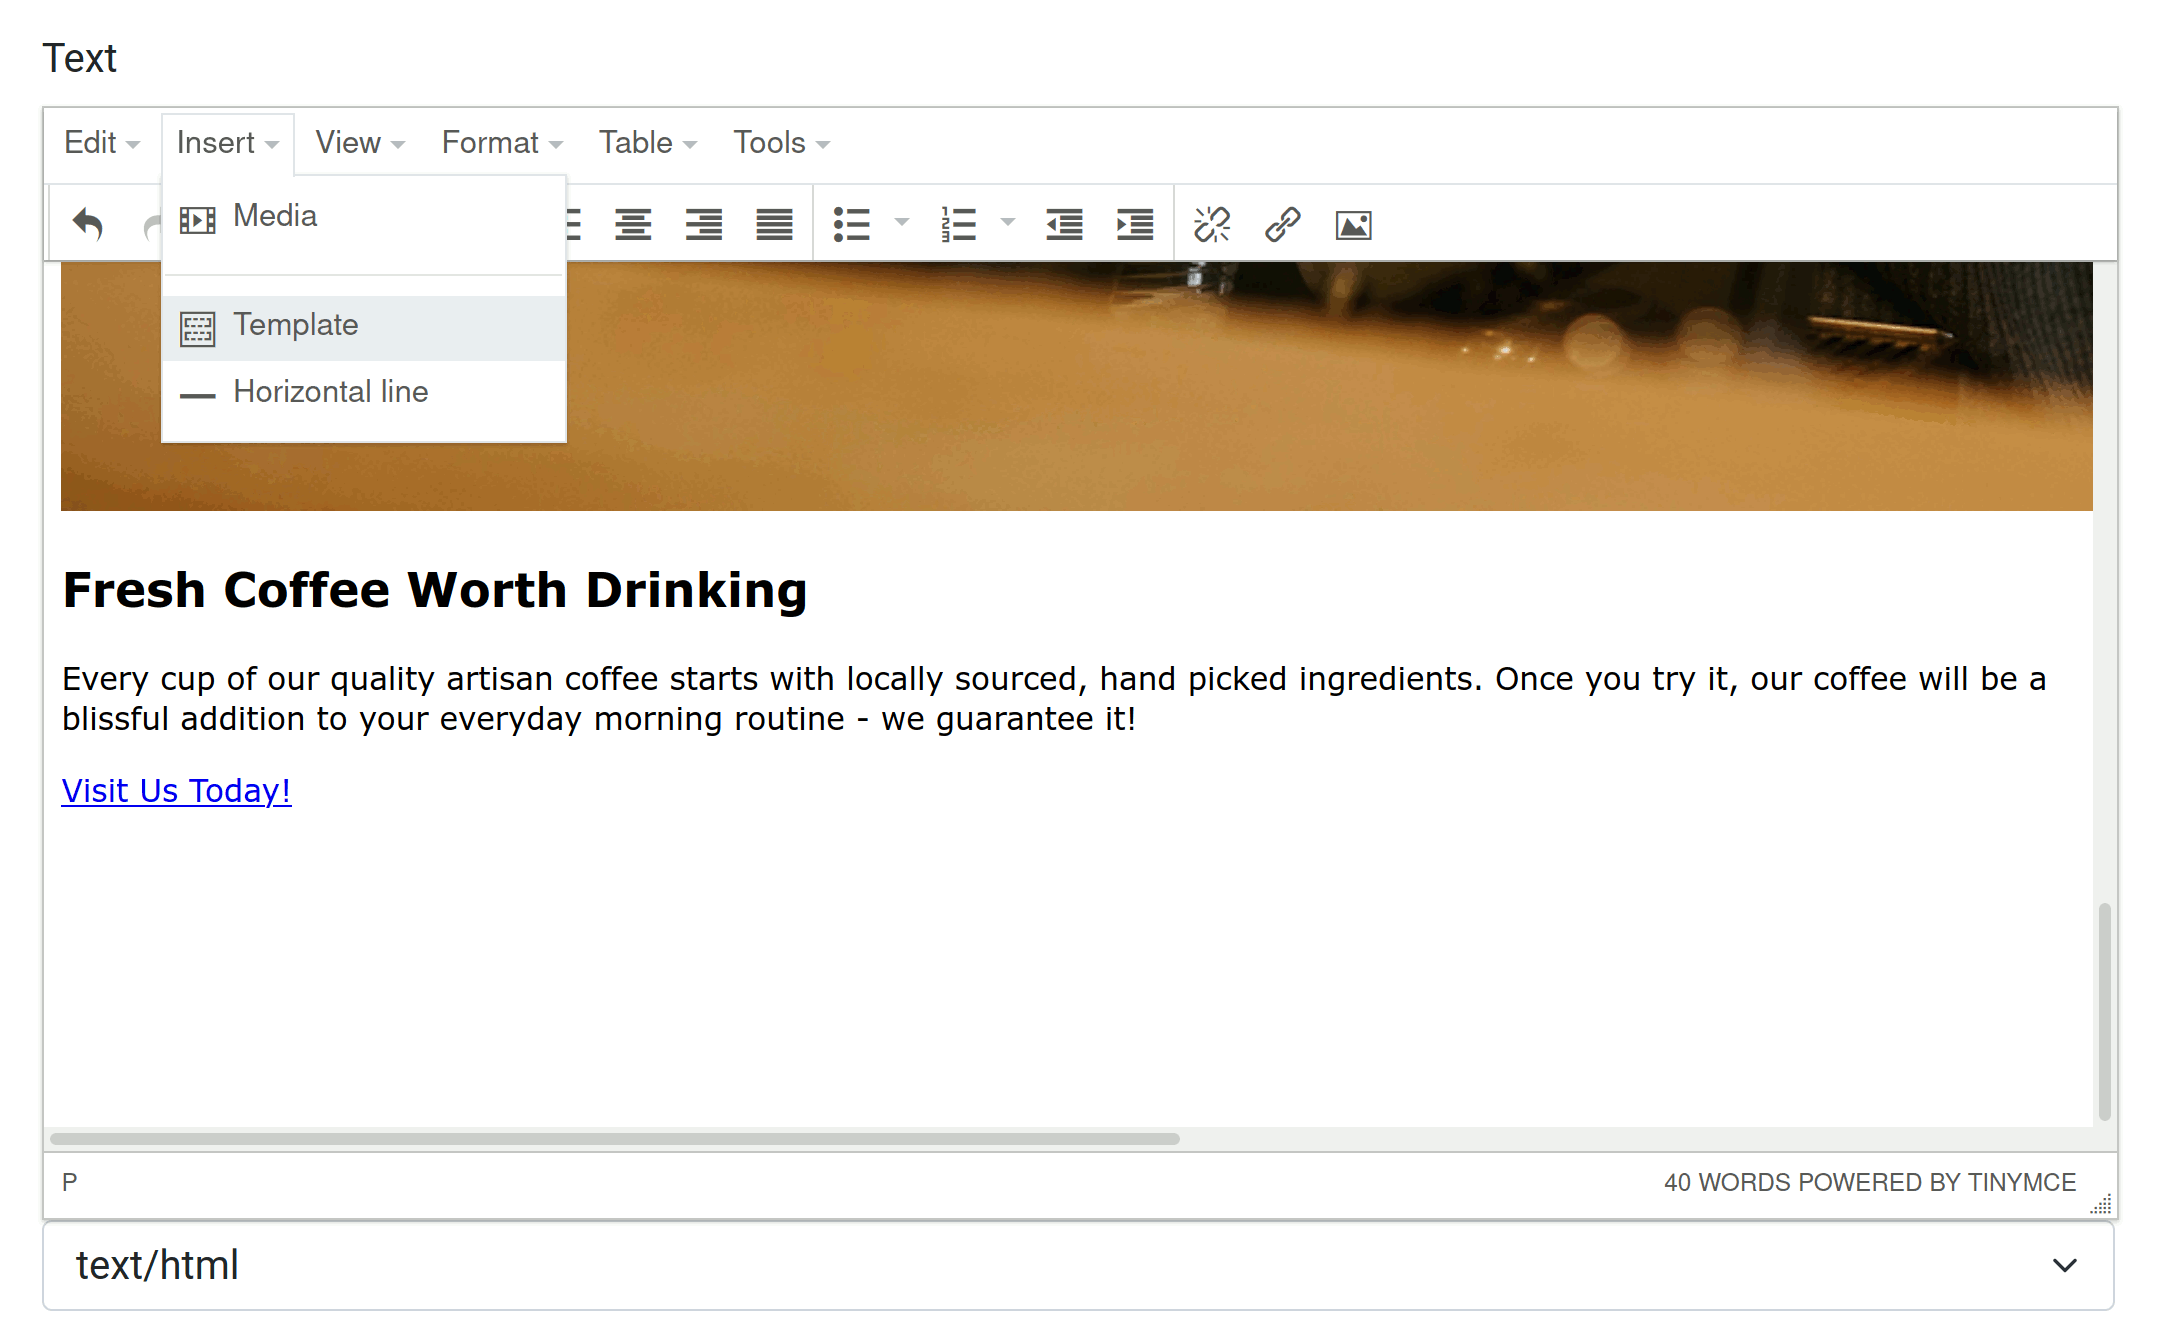
Let's add the section section Promise too:
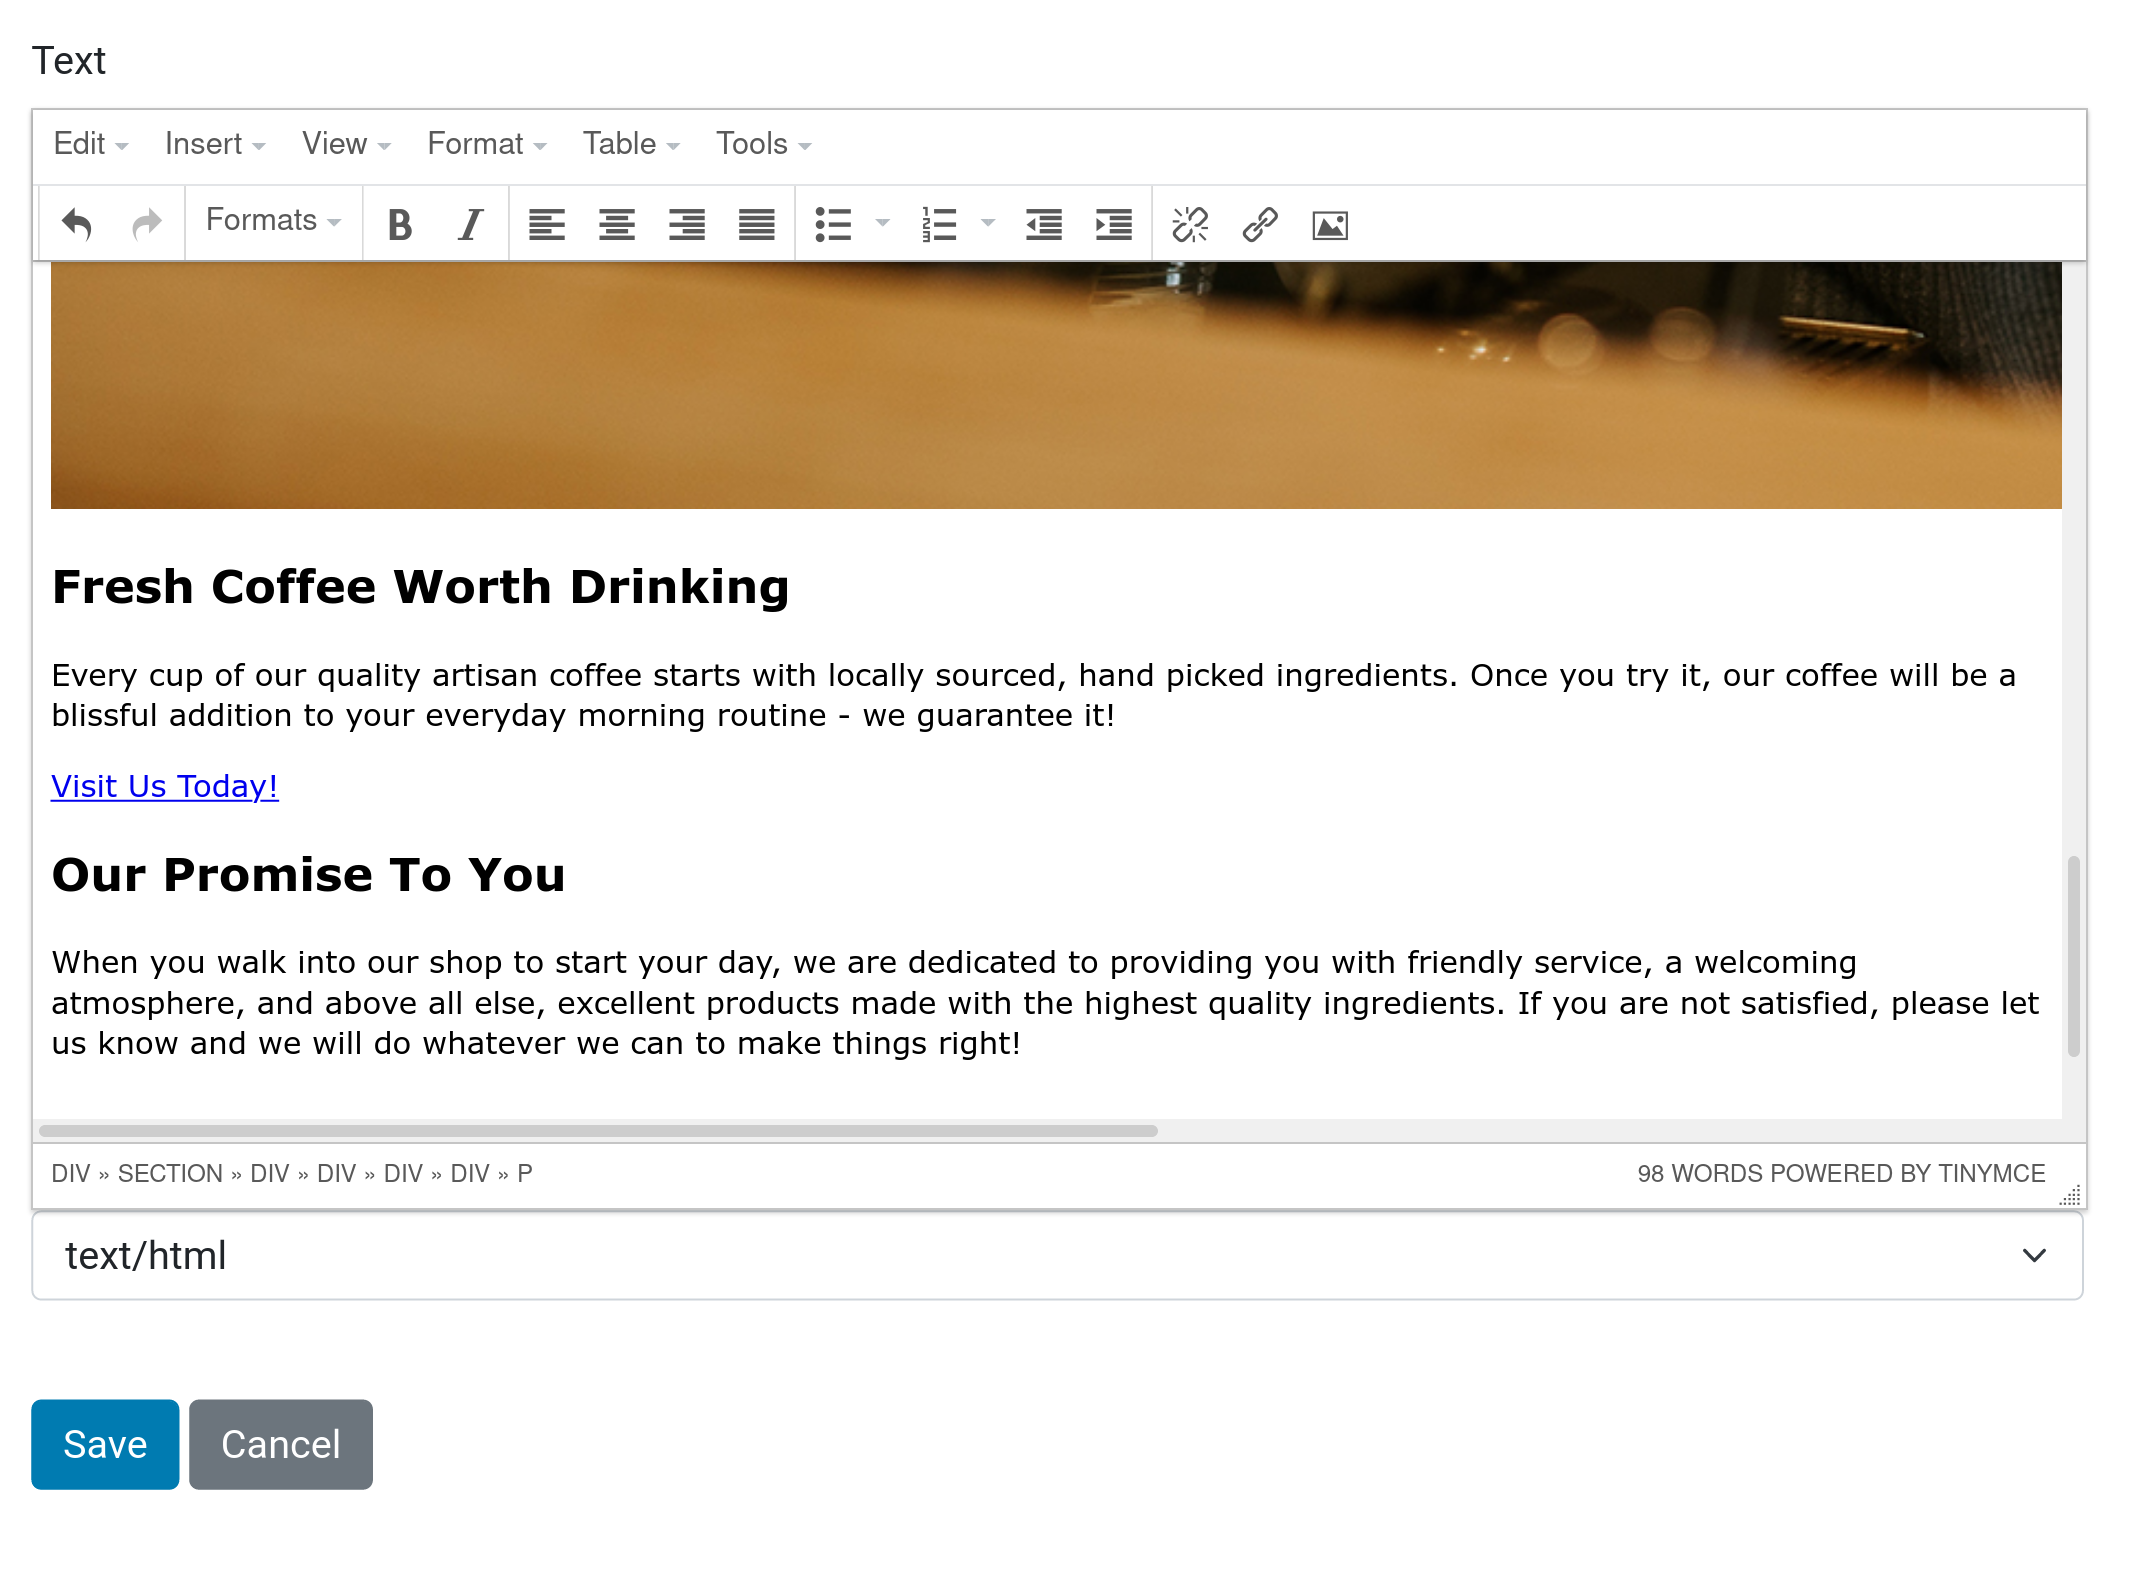
Now that we have both sections in, let's save and have a look at it:
Not bad!
We can do the same with the Store and About sections.
Only the Products section, we handle differently.
Before we continue, let's commit our changes so far.
git add .
git commit -a -m "integrate theme"
5.12. Creating a Product content type#
To manage our products data, we will add a content type Product.
$ plonecli add content_type

RUN: mrbob bobtemplates.plone:content_type

Welcome to mr.bob interactive mode. Before we generate directory structure, some questions need to be answered.

Answer with a question mark to display help.
Values in square brackets at the end of the questions show the default value if there is no answer.

RUN: git status --porcelain --ignore-submodules
Git state is clean.

--> Content type name (Allowed: _ a-z A-Z and whitespace) [Todo Task]: Product

--> Content type description:

--> Use XML Model [n]:

--> Dexterity base class (Container/Item) [Container]: Item

--> Should the content type globally addable? [y]:

--> Create a content type class [y]:

--> Activate default behaviors? [y]: n
We have now a content type Product in our addon. Let's open the file content/products.py which contains the Interface class with schema definition and the content type class.
# -*- coding: utf-8 -*-
# from plone.app.textfield import RichText
# from plone.autoform import directives
from plone.dexterity.content import Item

# from plone.namedfile import field as namedfile
from plone.supermodel import model

# from plone.supermodel.directives import fieldset
# from z3c.form.browser.radio import RadioFieldWidget
# from zope import schema
from zope.interface import implementer

# from plonetheme.businesscasual22 import _


class IProduct(model.Schema):
    """Marker interface and Dexterity Python Schema for Product"""

    # If you want, you can load a xml model created TTW here
    # and customize it in Python:

    # model.load('product.xml')

    # directives.widget(level=RadioFieldWidget)
    # level = schema.Choice(
    #     title=_(u'Sponsoring Level'),
    #     vocabulary=LevelVocabulary,
    #     required=True
    # )

    # text = RichText(
    #     title=_(u'Text'),
    #     required=False
    # )

    # url = schema.URI(
    #     title=_(u'Link'),
    #     required=False
    # )

    # fieldset('Images', fields=['logo', 'advertisement'])
    # logo = namedfile.NamedBlobImage(
    #     title=_(u'Logo'),
    #     required=False,
    # )

    # advertisement = namedfile.NamedBlobImage(
    #     title=_(u'Advertisement (Gold-sponsors and above)'),
    #     required=False,
    # )

    # directives.read_permission(notes='cmf.ManagePortal')
    # directives.write_permission(notes='cmf.ManagePortal')
    # notes = RichText(
    #     title=_(u'Secret Notes (only for site-admins)'),
    #     required=False
    # )


@implementer(IProduct)
class Product(Item):
    """Content-type class for IProduct"""
In the Interface, we are going to define our fields. If you are using Visual Studio Code, you can install the Plone Snippets plugin for VS Code.
    # Make sure you import: plone.namedfile.field as namedfile
    photo = namedfile.NamedBlobImage(
        title=_(
            u'Photo',
        ),
        description=_(
            u'',
        ),
        required=False,
    )
As the comment above states, we need to make sure that plone.namedfile.field is imported as namedfield. Also make sure that the message factory is imported:
from plone.namedfile import field as namedfile
from plonetheme.businesscasual22 import _
Next we add a rich text field called text:
    # Make sure to import: from plone.app.textfield import RichText
    text = RichText(
        title=_(
            u'Text',
        ),
        description=_(
            u'',
        ),
        default=u'',
        required=False,
    )
As the comment above states, we need to make sure that RichText is imported`.
from plone.app.textfield import RichText
After removing the inactive example schema definitions, our file should now look like this:
# -*- coding: utf-8 -*-
from plone.app.textfield import RichText
from plone.dexterity.content import Item
from plone.namedfile import field as namedfile
from plone.supermodel import model
from zope.interface import implementer

from plonetheme.businesscasual22 import _

# from plone.autoform import directives
# from plone.supermodel.directives import fieldset
# from z3c.form.browser.radio import RadioFieldWidget
# from zope import schema


class IProduct(model.Schema):
    """Marker interface and Dexterity Python Schema for Product"""

    # Make sure you import: plone.namedfile.field as namedfile
    photo = namedfile.NamedBlobImage(
        title=_(
            u"Photo",
        ),
        description=_(
            u"",
        ),
        required=False,
    )

    # Make sure to import: from plone.app.textfield import RichText
    text = RichText(
        title=_(
            u"Text",
        ),
        description=_(
            u"",
        ),
        default=u"",
        required=False,
    )


@implementer(IProduct)
class Product(Item):
    """Content-type class for IProduct"""
Now that we have all field in place, we need to activate two of the default behaviors, to get some functionality for free.
In profiles/default/types/Product.xml we will activate the basic and namefromtitle behaviors:
  <!-- Enabled behaviors -->
  <property name="behaviors" purge="false">
    <!-- Details about all standard behaviors following can be read at
         https://5.docs.plone.org/external/plone.app.dexterity/docs/reference/standard-behaviours.html
    -->
    <element value="plone.basic"/>
    <element value="plone.namefromtitle"/>
    <!-- <element value="plone.allowdiscussion"/> -->
    <!-- <element value="plone.excludefromnavigation"/> -->
    <!-- <element value="plone.shortname"/> -->
    <!-- <element value="plone.ownership"/> -->
    <!-- <element value="plone.publication"/> -->
    <!-- <element value="plone.categorization"/> -->
    <!-- <element value="plone.locking" /> -->
    <!--<element value="plone.leadimage"/>-->
    <!--<element value="plone.relateditems"/>-->
    <!--<element value="plone.richtext"/>-->
    <!--<element value="plone.tableofcontents"/>-->
    <!--<element value="plone.versioning" />-->
    <!--<element value="plone.translatable" />-->
  </property>
When we now restart Plone and uninstall/install our addon, we will have a new content type Products, which we can add in our Products folder.
Let's add the 3 Products for our Products section.

Now that we have our products added, let's add a Collection called products, if you haven't already. This Collection we set as default page in toolbar --> display --> select a content item as default view.
Done with that, let's commit our changes so far.
$ git add .
$ git commit -a -m "define products schema, activate behaviors"
5.13. Creating a view for the Products Collection#
So far so good, the last thing we need is to have the products rendered in our desired markup. To archive this, we will add a products view.
$ plonecli add view

RUN: mrbob bobtemplates.plone:view

Welcome to mr.bob interactive mode. Before we generate directory structure, some questions need to be answered.

Answer with a question mark to display help.
Values in square brackets at the end of the questions show the default value if there is no answer.


RUN: git status --porcelain --ignore-submodules
Git state is clean.

--> Should the view have a Python class? [y]:

--> Python class name [MyView]: ProductsView

--> Which base class should the view use (BrowserView/DefaultView/CollectionView)? [CollectionsView]:

--> View name (part of the URL) [products-view]:

--> Should the View have a template file? [y]:

--> Template name (without extension) [products_view]:
this will generate the products-view in views/.
views/
├── configure.zcml
├── __init__.py
├── products_view.pt
└── products_view.py
To have the products-view in the list of available views on a Collection, we need to configure it in the FTI settings.
Let's create the file profiles/default/types/Collection.xml, with the following content:
<?xml version="1.0"?>
<object
    i18n:domain="plone"
    meta_type="Dexterity FTI"
    name="Collection"
    xmlns:i18n="http://xml.zope.org/namespaces/i18n">

  <property name="view_methods" purge="False">
    <element value="products-view"/>
  </property>

</object>
This will add the products-view to the list of available view on a Collection.
Now we have to make sure that we have the correct markup in the template of our view. For that we open the products_view.pt and add the following content:
<html xmlns="http://www.w3.org/1999/xhtml"
  xmlns:metal="http://xml.zope.org/namespaces/metal"
  xmlns:tal="http://xml.zope.org/namespaces/tal"
  xmlns:i18n="http://xml.zope.org/namespaces/i18n"
  i18n:domain="plonetheme.businesscasual22"
  metal:use-macro="context/main_template/macros/master">
  <body>
    <metal:content-core fill-slot="content-core">
      <metal:block define-macro="content-core">

        <tal:loop repeat="item view/results">
          <tal:products tal:condition="python: item.portal_type == 'Product'">

            <section class="page-section"
              tal:condition="repeat/item/odd">
              <div class="container">
                <div class="product-item">
                  <div class="product-item-title d-flex">
                    <div class="bg-faded p-5 d-flex ms-auto rounded">
                      <h2 class="section-heading mb-0">
                        <span class="section-heading-upper">${item/description}</span>
                        <span class="section-heading-lower">${item/title}</span>
                      </h2>
                    </div>
                  </div>
                  <img class="product-item-img mx-auto d-flex rounded img-fluid mb-3 mb-lg-0"
                    src="${item/getPath}/@@images/photo/large"
                    alt="...">
                    <div class="product-item-description d-flex me-auto">
                      <div class="bg-faded p-5 rounded"
                        tal:content="structure python:item.text.output"></div>
                    </div>
                  </div>
                </div>
              </section>

              <section class="page-section"
                tal:condition="repeat/item/even">
                <div class="container">
                  <div class="product-item">
                    <div class="product-item-title d-flex">
                      <div class="bg-faded p-5 d-flex me-auto rounded">
                        <h2 class="section-heading mb-0">
                          <span class="section-heading-upper">${item/description}</span>
                          <span class="section-heading-lower">${item/title}</span>
                        </h2>
                      </div>
                    </div>
                    <img class="product-item-img mx-auto d-flex rounded img-fluid mb-3 mb-lg-0"
                      src="${item/getPath}/@@images/photo/large"
                      alt="...">
                      <div class="product-item-description d-flex ms-auto">
                        <div class="bg-faded p-5 rounded"
                          tal:content="structure python:item.text.output"></div>
                      </div>
                    </div>
                  </div>
                </section>
              </tal:products>
            </tal:loop>

          </metal:block>
        </metal:content-core>
      </body>
    </html>
In the template we are iterating over view/results with the repeat command. Inside the loop we have two sections, one for odd and one for even sections. We then placed the title, description, photo and text at the correct places in the markup.
The final step is, to update the Python class of the view. Open the views/products_view.py, import the CollectionView and replace the BrowserView base class with it:
# -*- coding: utf-8 -*-

from plone.app.contenttypes.browser.collection import CollectionView
# from Products.Five.browser.pagetemplatefile import ViewPageTemplateFile
# from plonetheme.businesscasual22 import _


class ProductsView(CollectionView):
    # If you want to define a template here, please remove the template from
    # the configure.zcml registration of this view.
    # template = ViewPageTemplateFile('products_view.pt')

    def __call__(self):
        # Implement your own actions:
        return self.index()
Let's restart Plone and uninstall/install our addon, to reapply the profiles and have a look at our products page.
Awesome!
we are done, time to enjoy the rest of the day.