2. Quick Start#
2.1. Set Up Volto Project#
To create our first volto project we will install the volto generator tool (https://www.npmjs.com/package/@plone/generator-volto) using npm install -g yo @plone/generator-volto. When installed you can use it to generate a brand new volto project:
yo @plone/volto
The dialogue in the console will first prompt you for a name for your project. When choosing an appropriate name, please note that due to a current bug, your name should not begin with a number. After you have given a name to your project, you will be asked whether you want to install any add-ons. You can skip ahead by pressing the enter button, as we don't want to use any third-party add-ons for the training.
Hint
In case you want to install any addons you can find a curated list of addons of all different sorts here: collective/awesome-volto
After the bootstrapping process is done cd into the newly created project folder and install all necessary dependencies by running yarn.
With the initial project and dependencies set up now, you could already start adding your first customzations, but it is recommended to set up your own policy addon to contain all your customizations and additions. To do that create a new addon in the project folder by running:
yo @plone/volto:addon
When prompted to add a name to your addon, just hit enter and your current projects name will be used as name for the addon as well. This will create a new folder with your projects name within the src/addons directory. Finally to get you project readily configured run make develop to get the configuration inside of jsconfig and mrs.developer.json updated to use our new policy addon.
2.2. Folder structure#
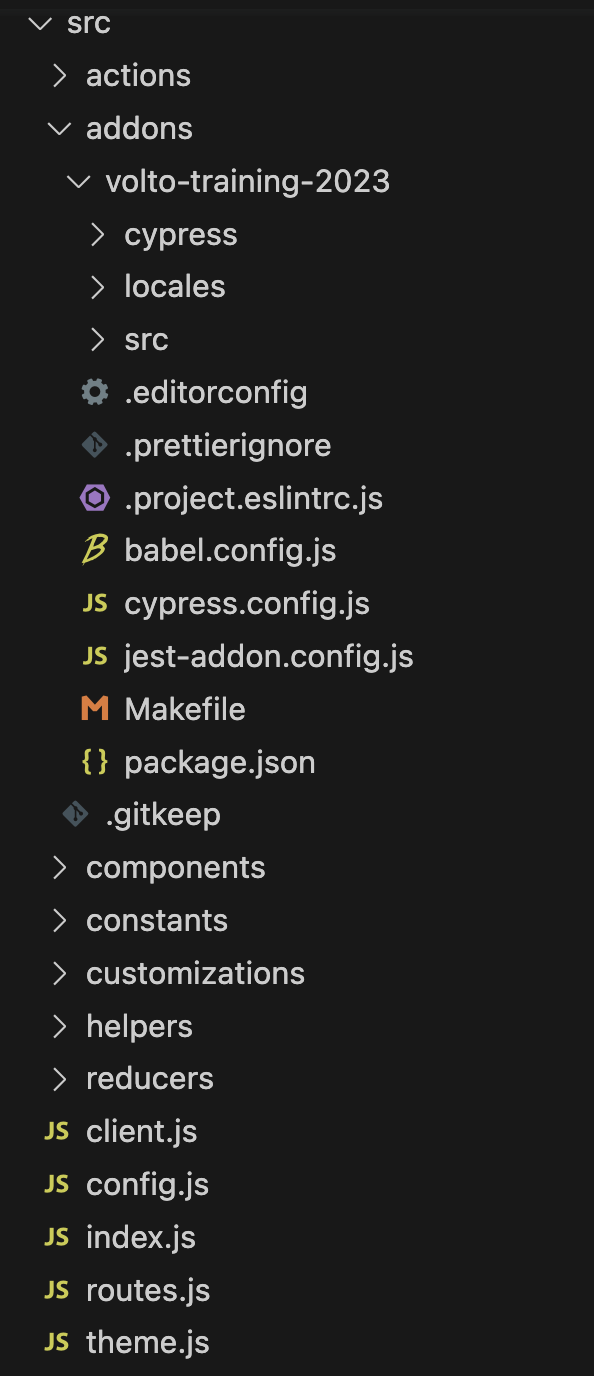
Within your src folder of your project you will find the following subfolders:
actions
components
constants
customizations
helpers
reducers
As we want to work within our policy addon instead of directly within our initial project we will have to recreate some of these inside of our addon during the course of this training. Your folder structure inside your projects src directory now should look something like this:
2.3. Build environments#
We need to build two environments.
Start two terminal sessions, one for each environment, Plone and Yarn, and a third session to issue git and other shell commands.
In each terminal session you should be in your project folder volto-training or whatever you named your project.
2.3.1. Plone environment#
To run our Volto site, we will use the latest Plone 6 backend Docker image. You can start it by running the following command:
docker run -p 8080:8080 -e SITE=Plone plone/plone-backend
Keep that process running during the whole training in one of your terminal windows because the container does not have a persistant storage. So once you stop that container your plone database will be lost.
Note
If you already have expierience setting up Plone instances you can also use a Plone Classic Plone instance with the addons "Plone 6 Frontend (plone.volto)" and "plone.restapi" installed.
See also
An alternate way to set up a complete Plone 6 Project including both frontend and backend setup is using Plone cookiecutter
2.3.2. Yarn environment#
You can now start up your Volto instance by running the following command:
yarn start
2.4. Volto source code#
When developing Volto you will find yourself looking quite often at the Volto source code to see how things are done, the code syntax, and how to clone or override components.
For convenience, a symlink to a copy of the Volto code is set up inside node_modules when you run yarn in your Volto project folder.
You will find this copy of Volto in the omelette folder. In some cases this folder will not appear, if you filesystem does not support symlinks.
2.5. Recommended plugins#
No matter which integrated development environment (IDE) you use, you should also install these plugins for a better workflow:
Prettier
ESlint
prettier-stylelint (for VSCode)